Rome wasn’t built in a day: Lego Colosseum review
A detailed, bag-by-bag review of the Lego Colosseum, the largest* Lego set ever released. Is it worth the time and money?

As you might have guessed by this point, I love Lego. If you have the money and space for a hobby consisting of putting together plastic bricks, it is one of the most satisfying mindless activities you can do for your mental health without actually working through any of your problems.
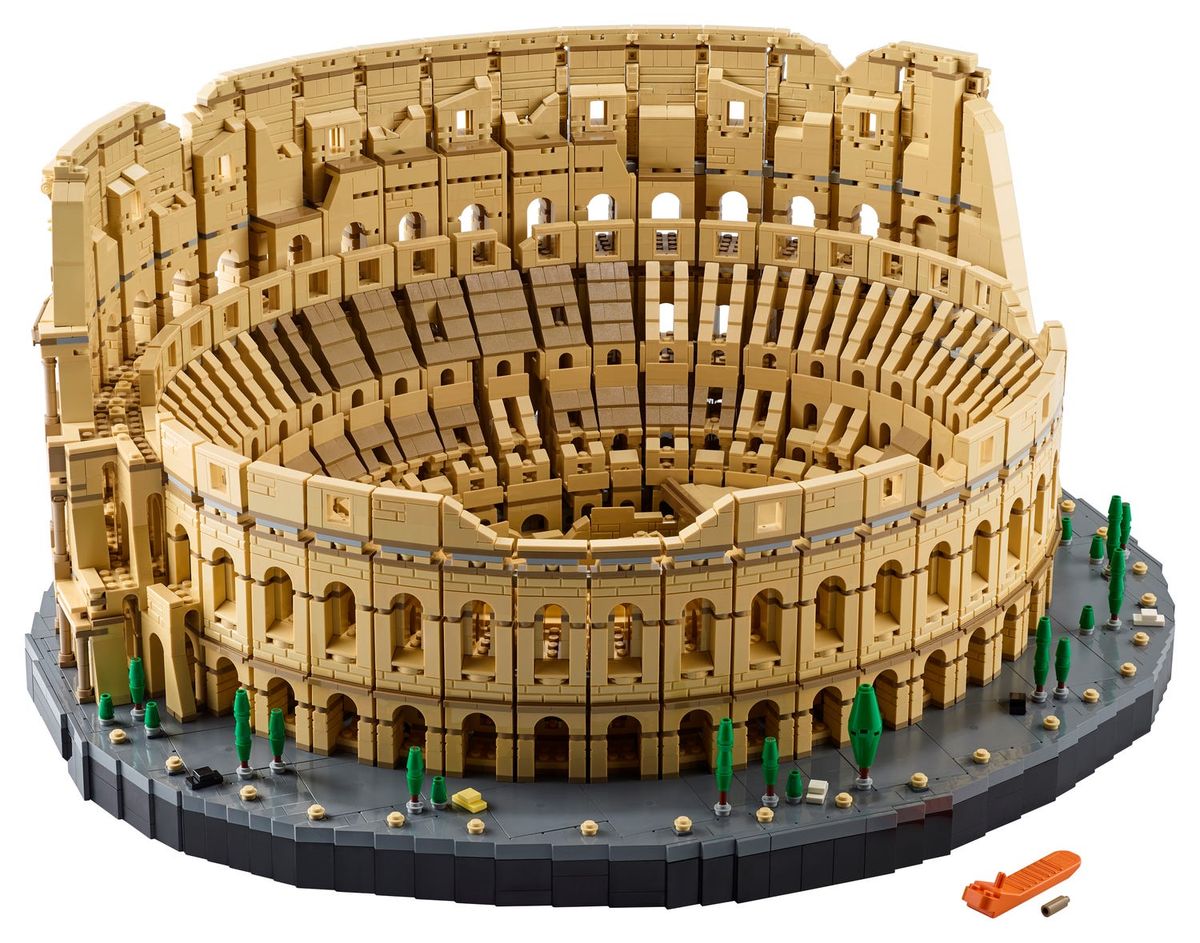
Many folks will start with a smaller set, maybe a BrickHead and work their way up from there. The new-ish Lego Colosseum and its 9,036 pieces ($749.99) is definitely the set you’re working up to.
When I started building it for this review, it was the largest set Lego had ever released. It’s now technically been superseded by the 11,695-piece World Map Art set ($449.99), but there’s some debate over whether it really counts, because it’s more dot-work than brick building. Then again, all Lego is equal and fun, I’m just bitter.
From opening the box to putting the finished set on my table took about two and a half months. I’m not kidding when I say this is a monster set (and also life got a little in the way in the middle part of the build). I hope you like tan bricks, because there is a theme.
Let’s jump into the bag-by-bag experience, so you can see why I loved it so much, but also why it’s definitely not for everyone.
The Box
Let’s begin at the beginning. The box for this set is massive and heavy. I would estimate it at around 7-10 kilos and the dimensions are 53.5 x 48 x 28cm. It is a box that means business.
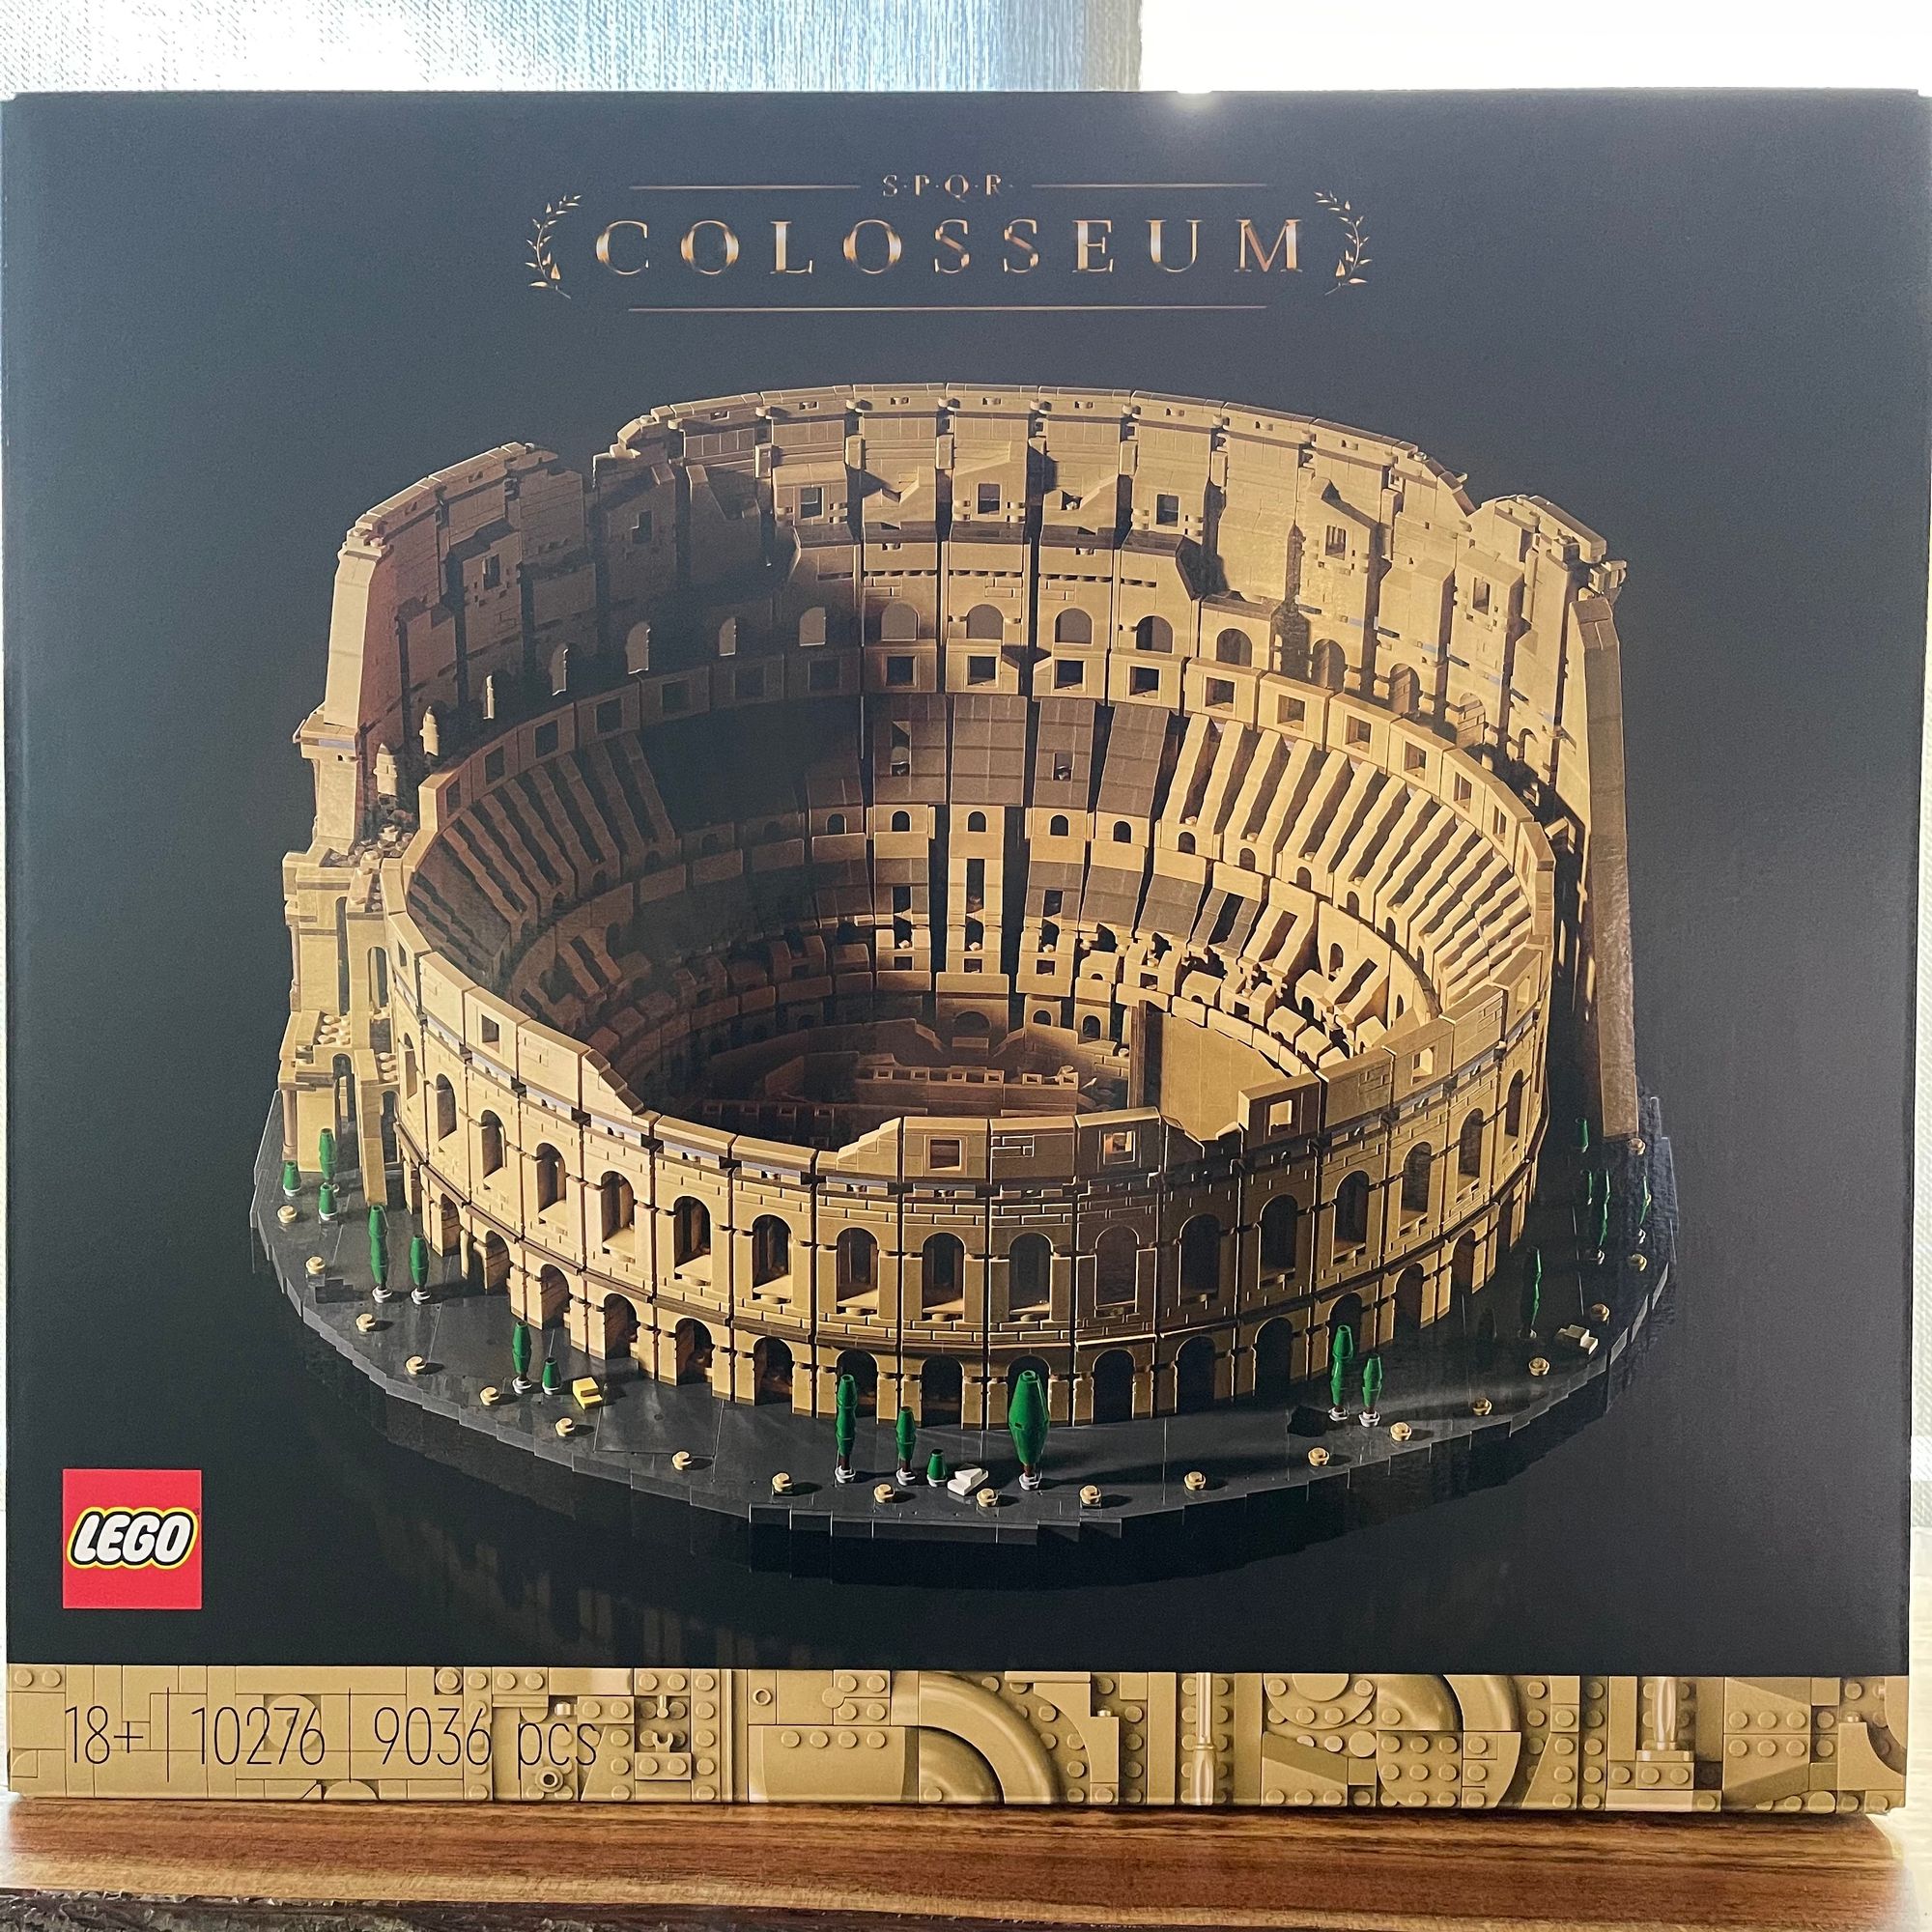
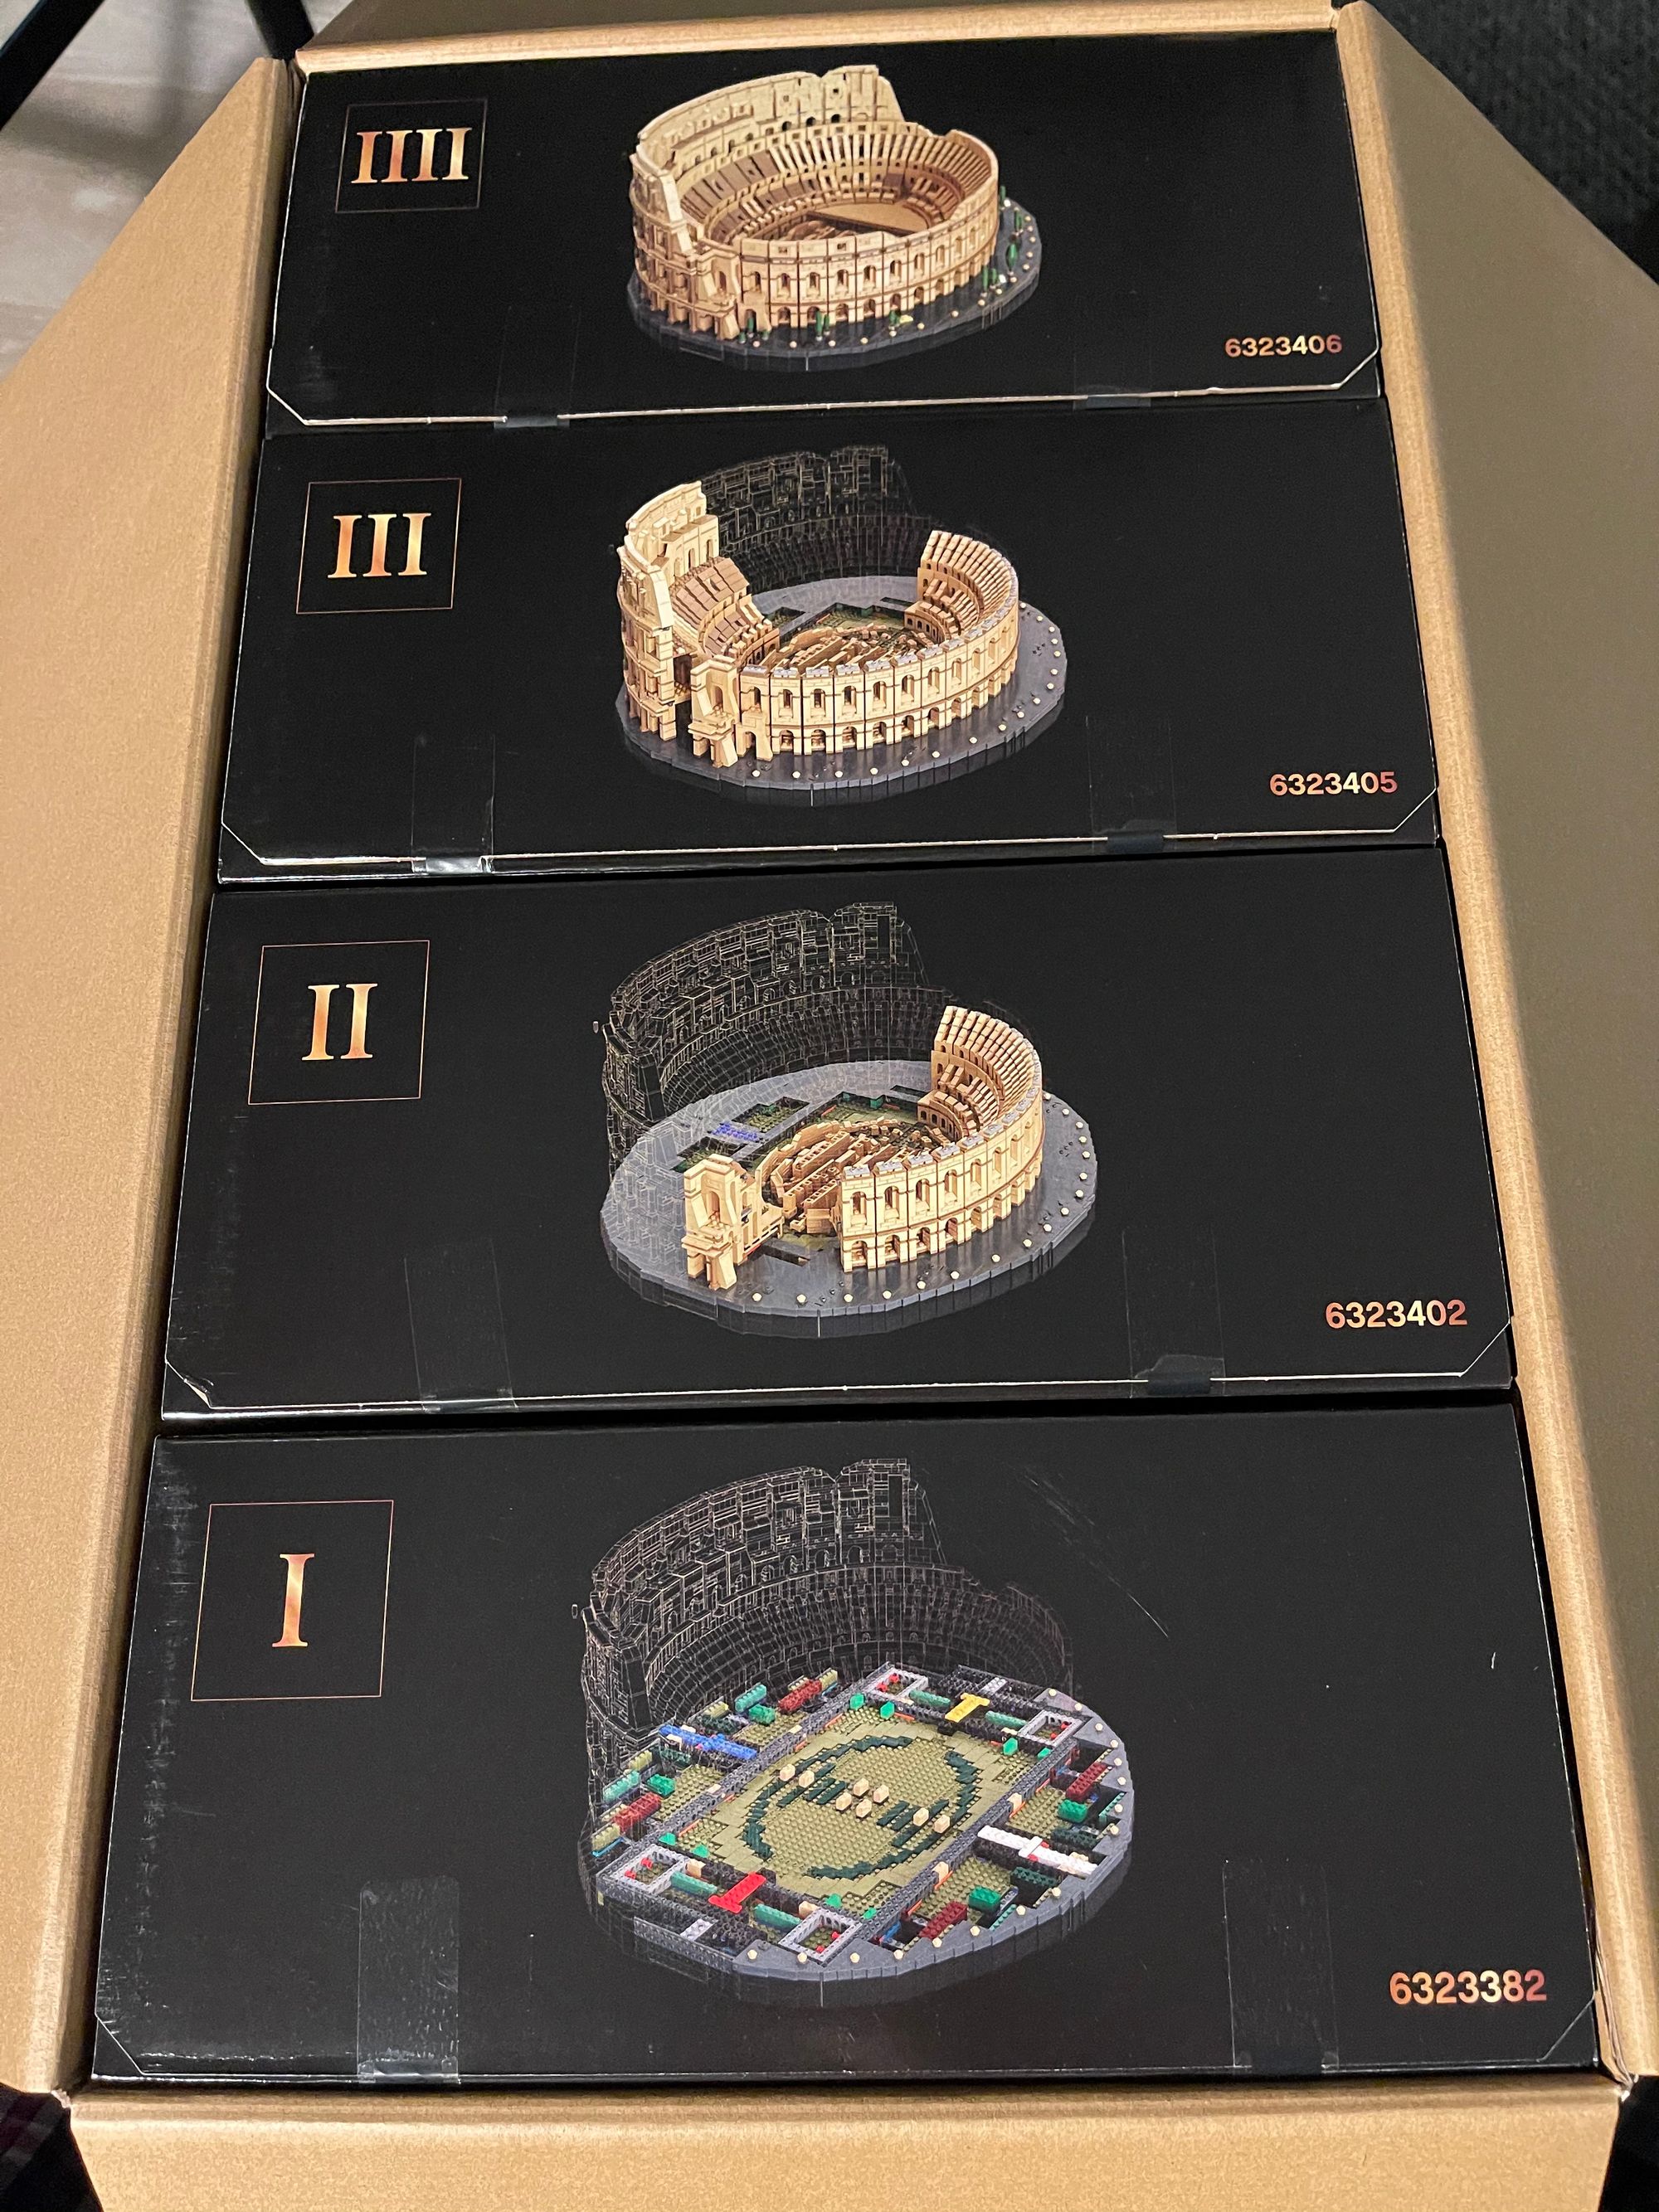
It’s got that nice black background that’s come to be the signature branding for the sets designed for adults. In the big box are four smaller boxes marked I-IIII (apparently those crazy Romans used both IV and IIII).
Spread between those boxes are four instruction books and 68 bags marked 1-40, and no stickers.
Box I
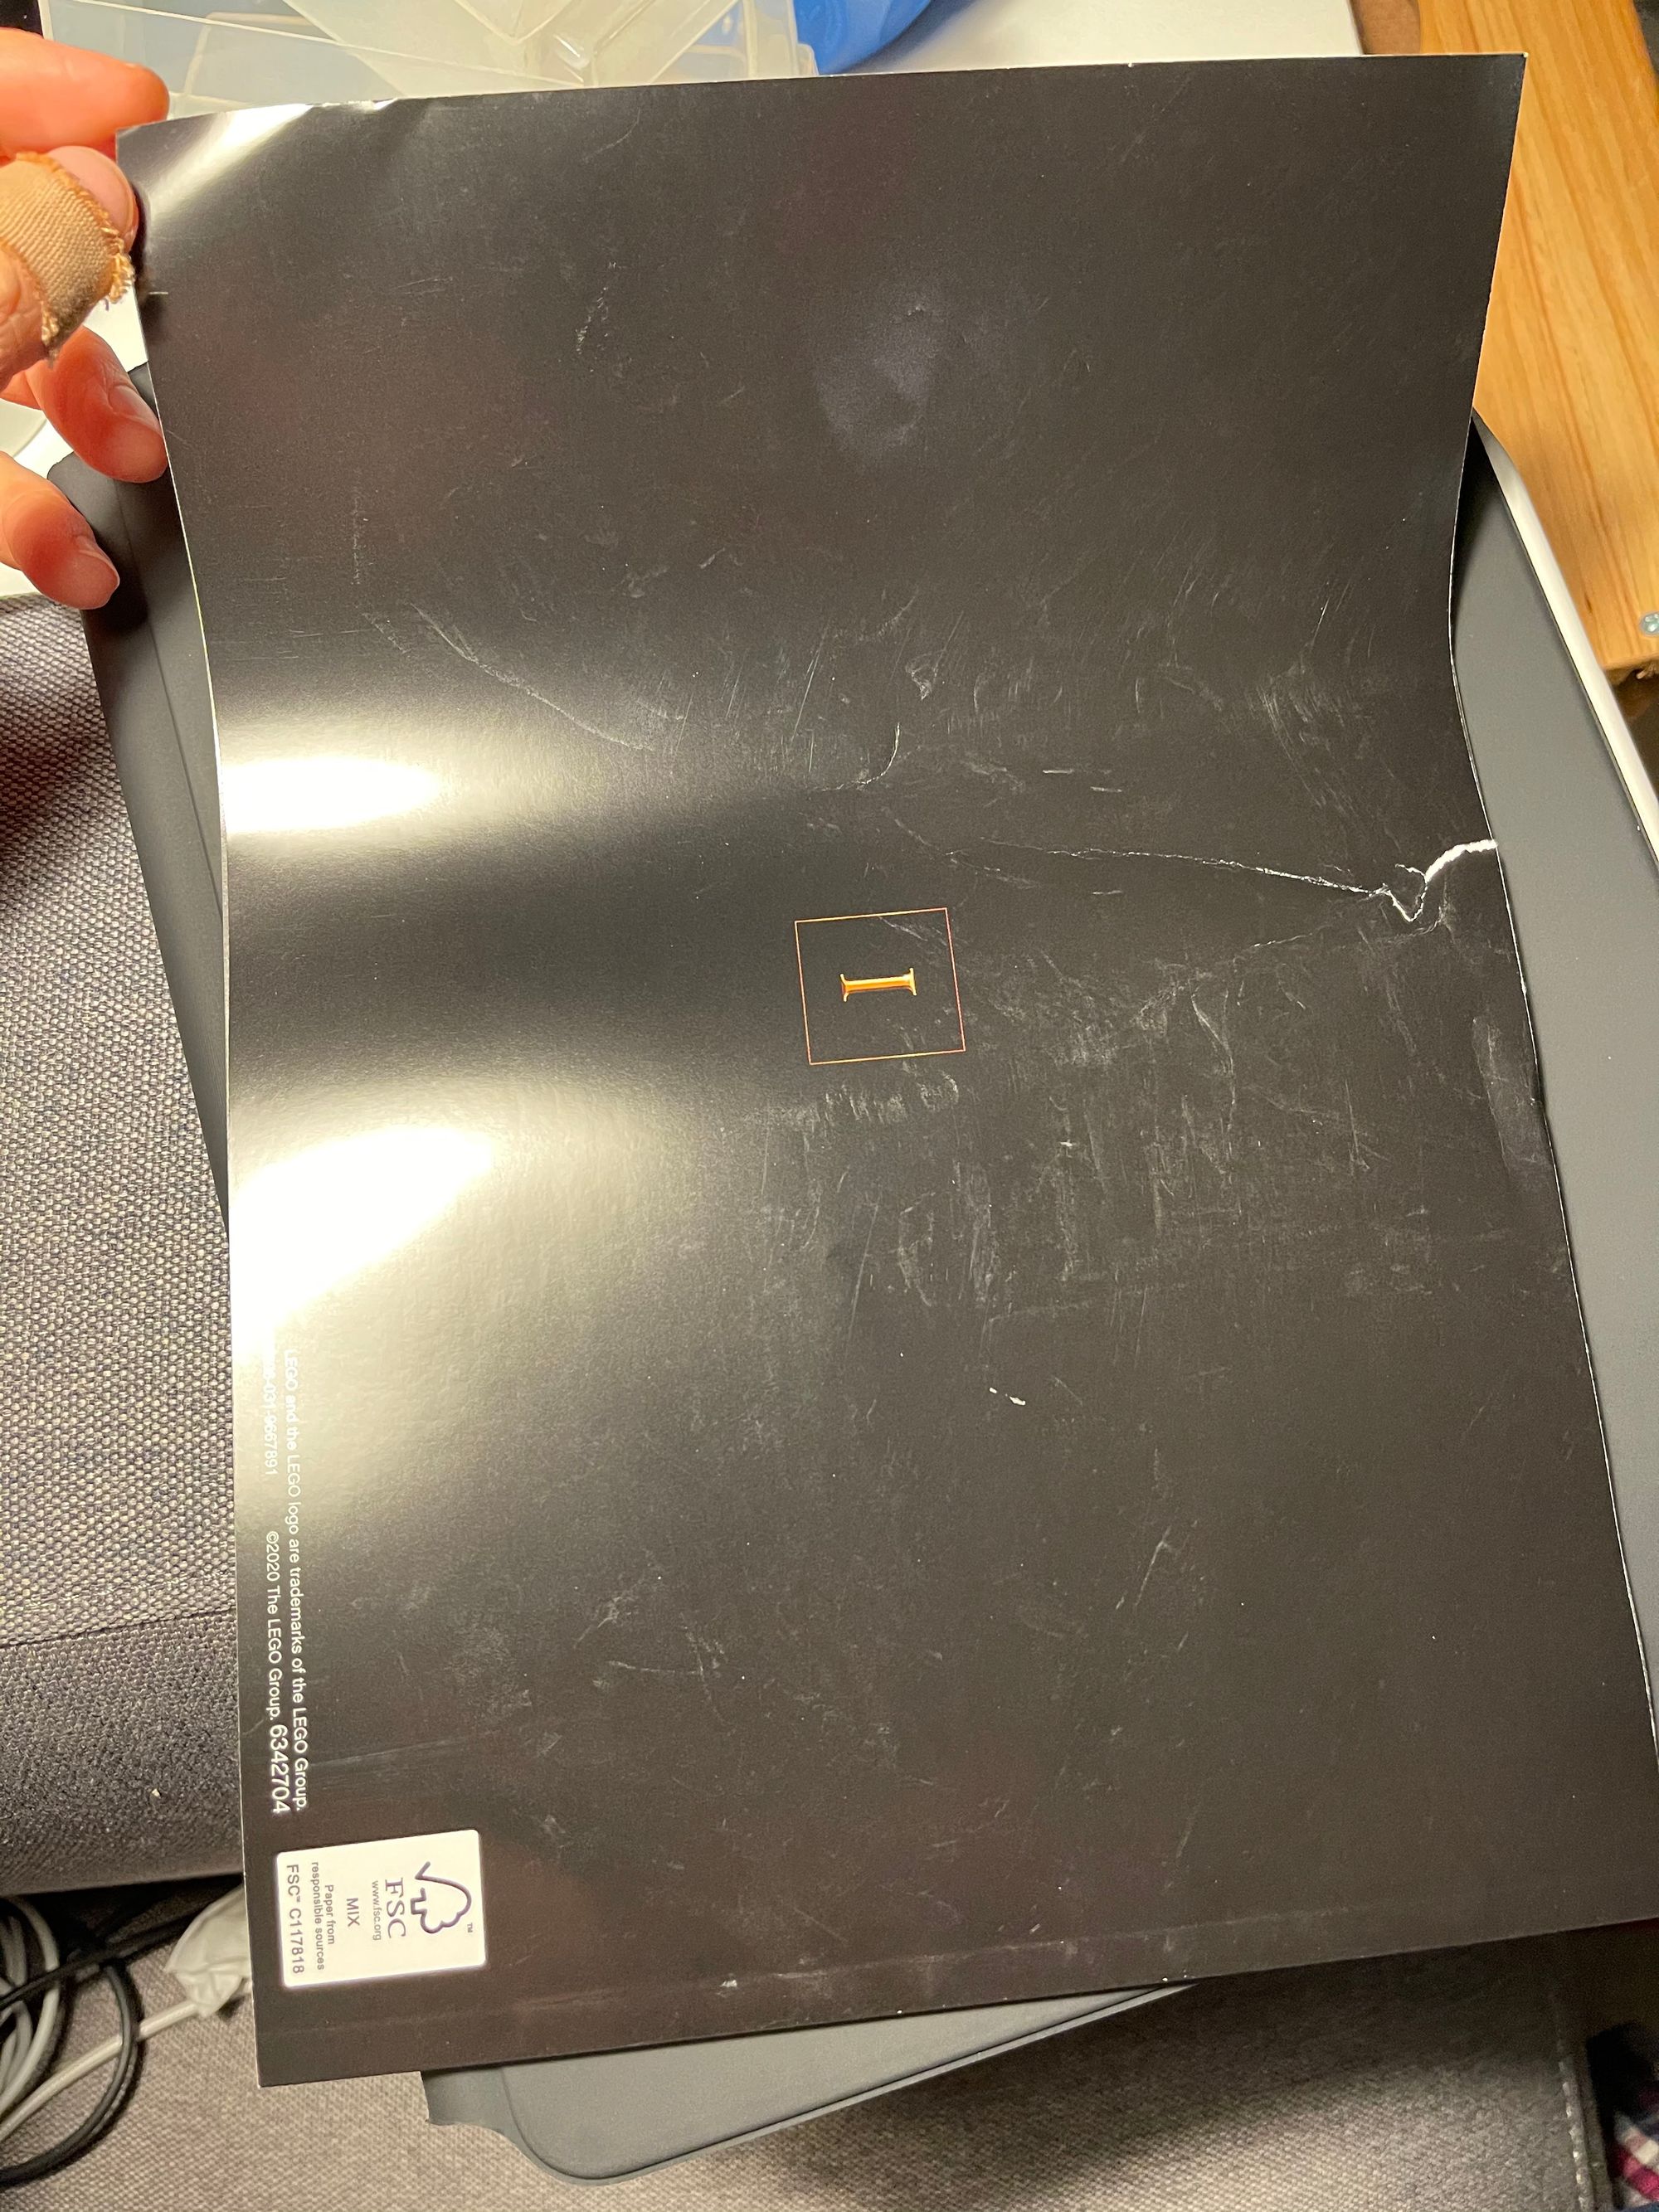
Unfortunately my first impression from box I was not a good one. This set is expensive, and yet the instruction book was just shoved in, so it was bent and a bit mangled with the back cover ripped. I would have expected better from a set that seems so premium in all other regards.
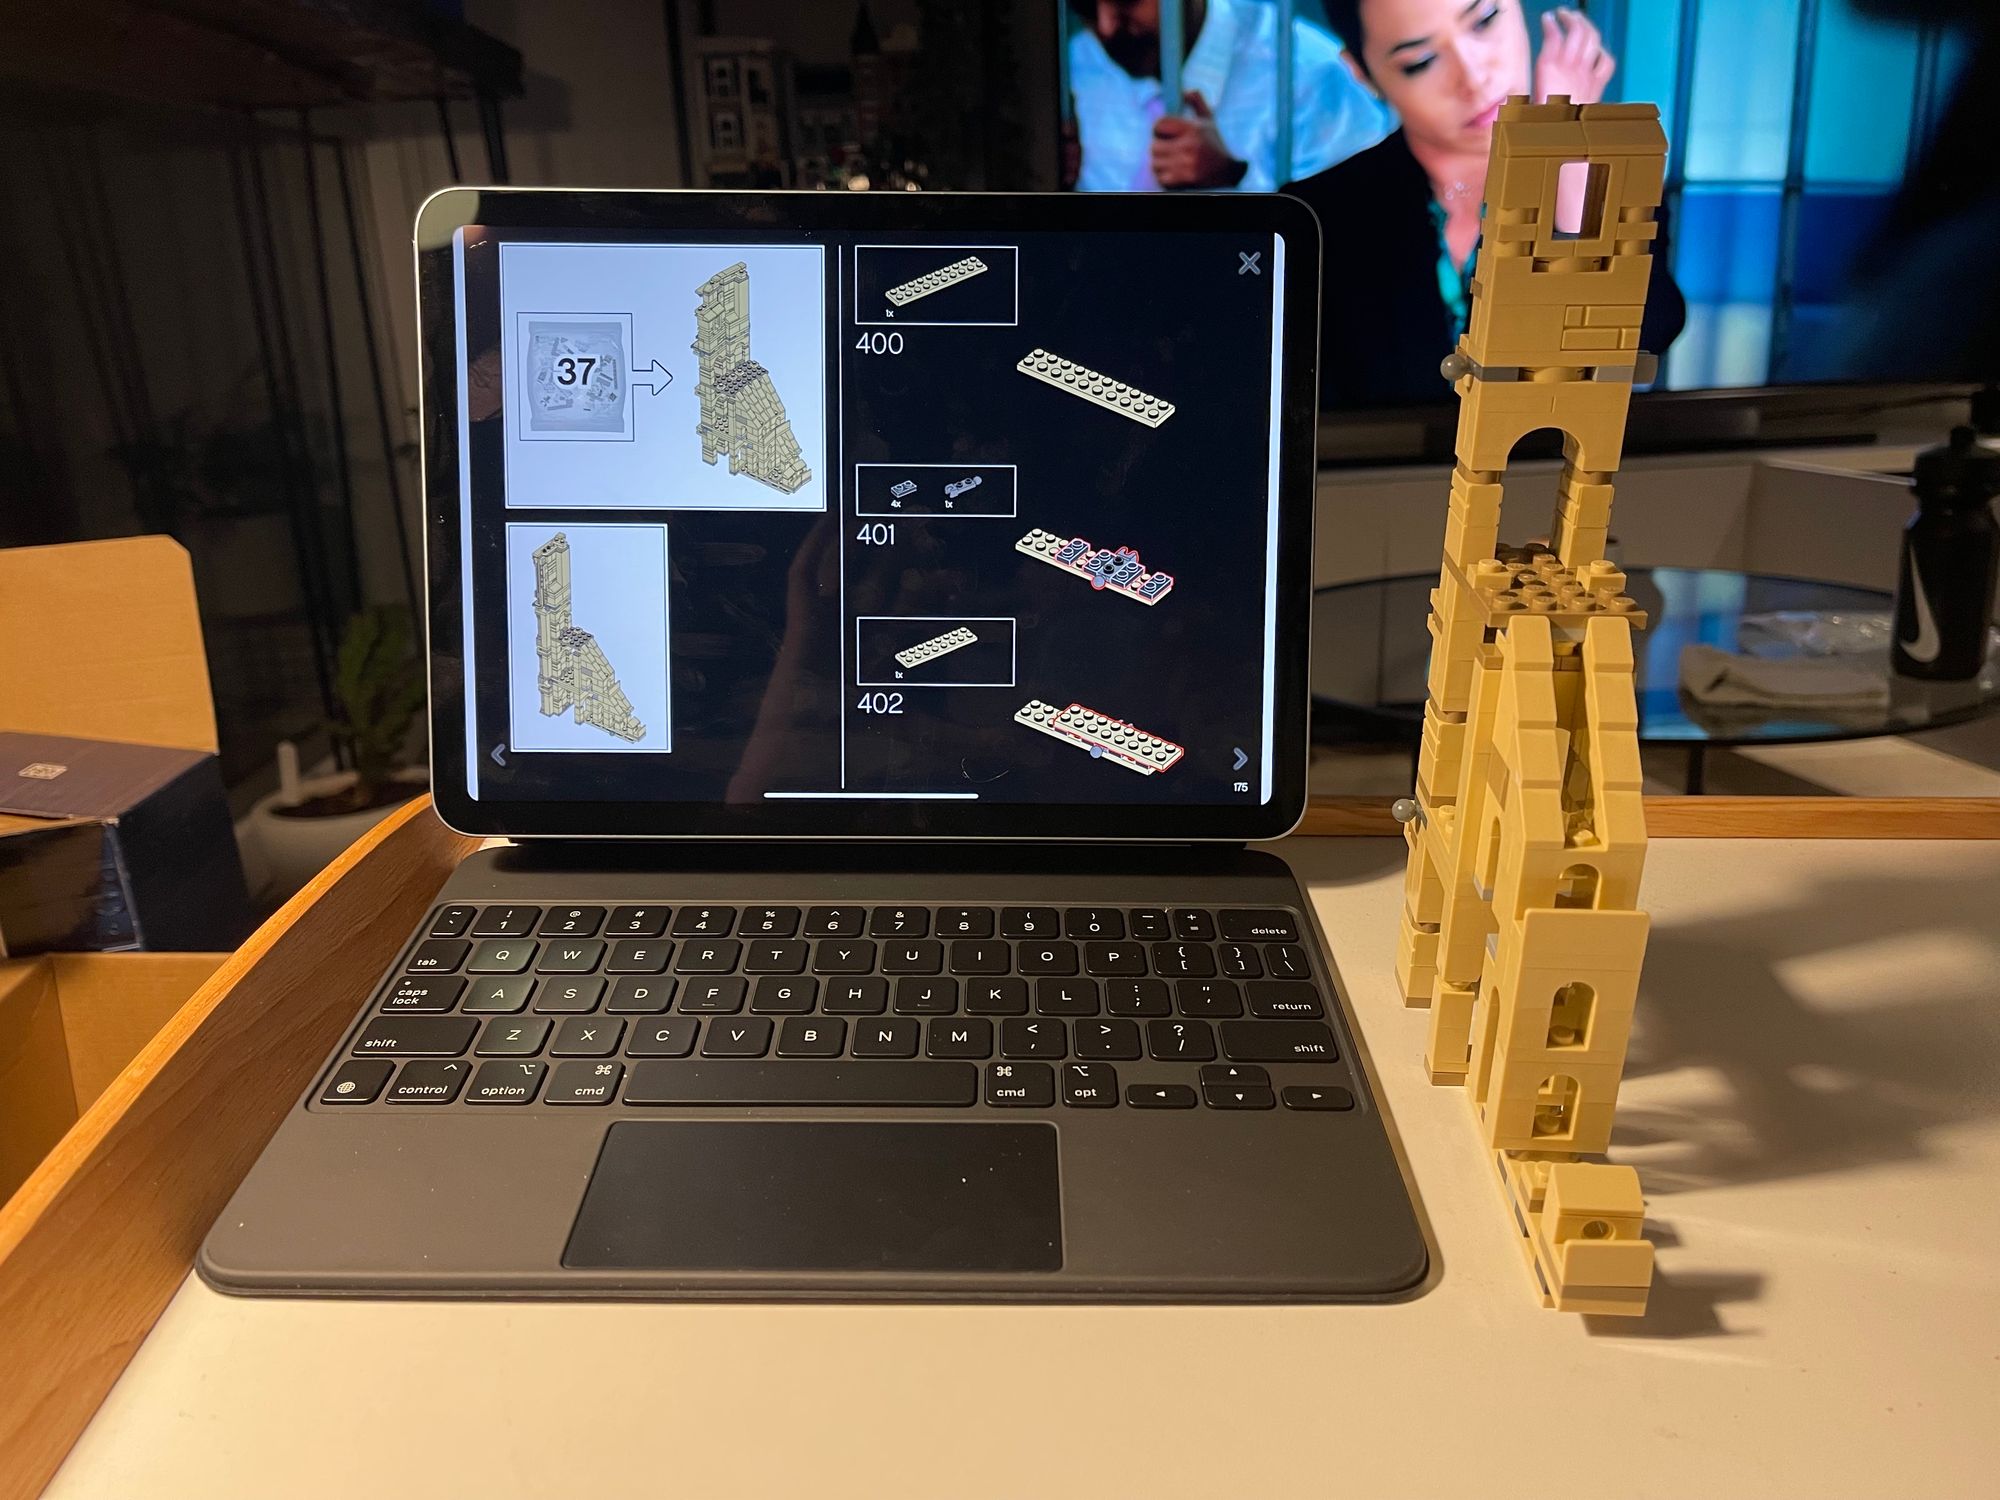
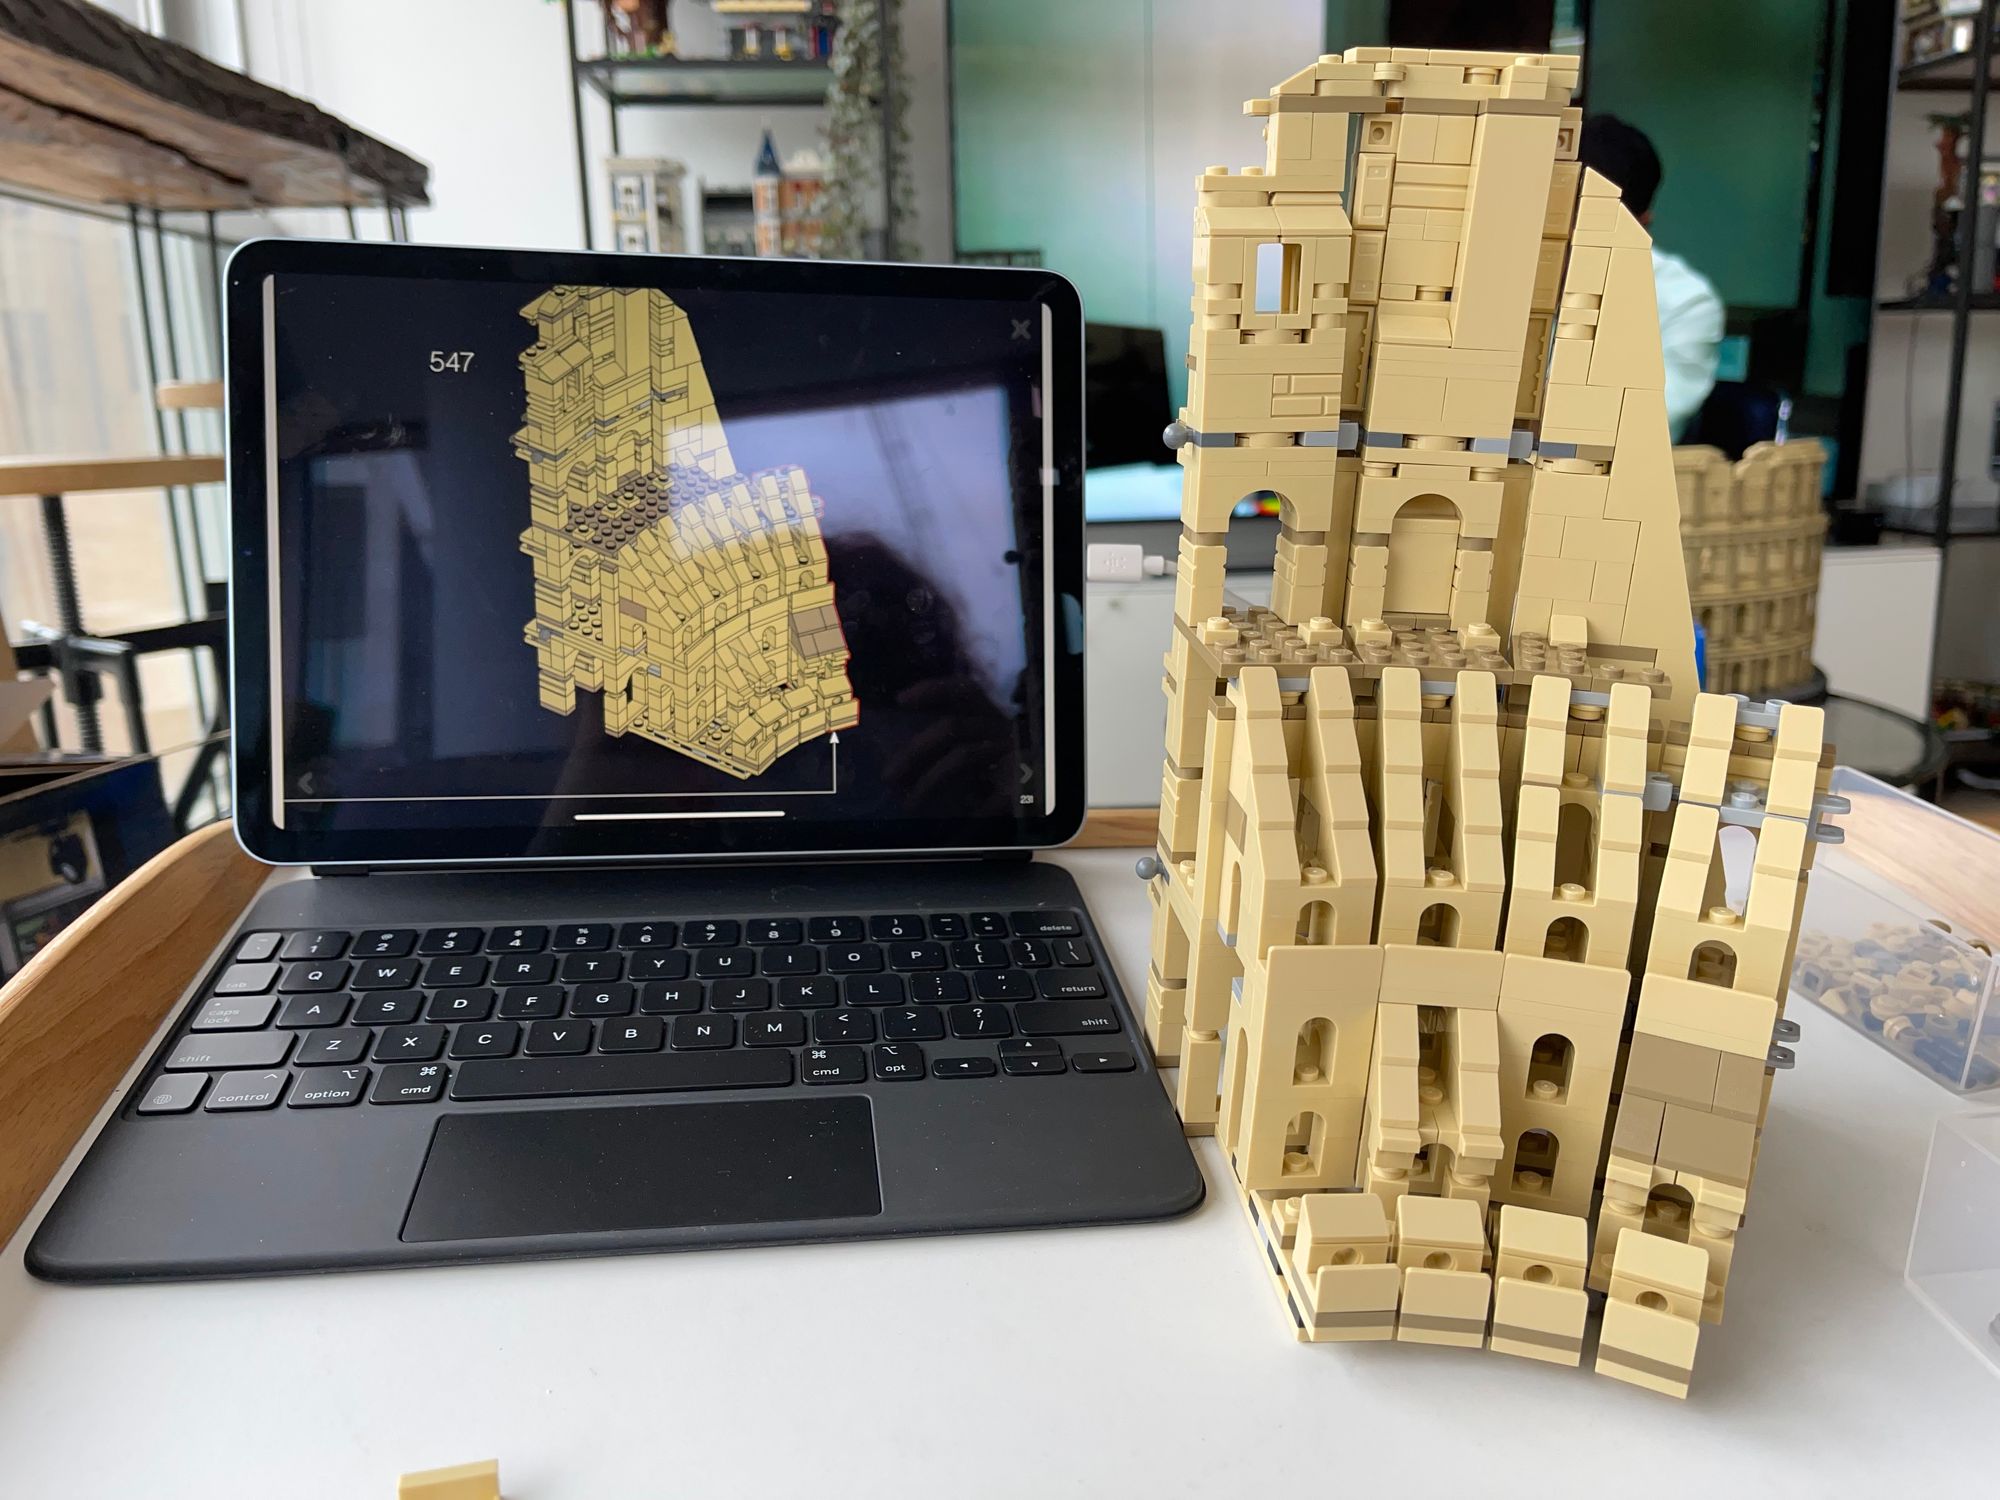
I use the instructions on my iPad, and that again wasn’t a premium experience – all through the build I had to search in the app for the Colosseum, with it never remembered in my recent set list, and it always opened to the previous book. It also wasn’t compatible with the new 3D building experience that was launched with Lego Super Mario.
Alongside the 10 bags (marked 1-5, with two bags per step) there were a few bags of plates and long Technic bricks.
Bag 1
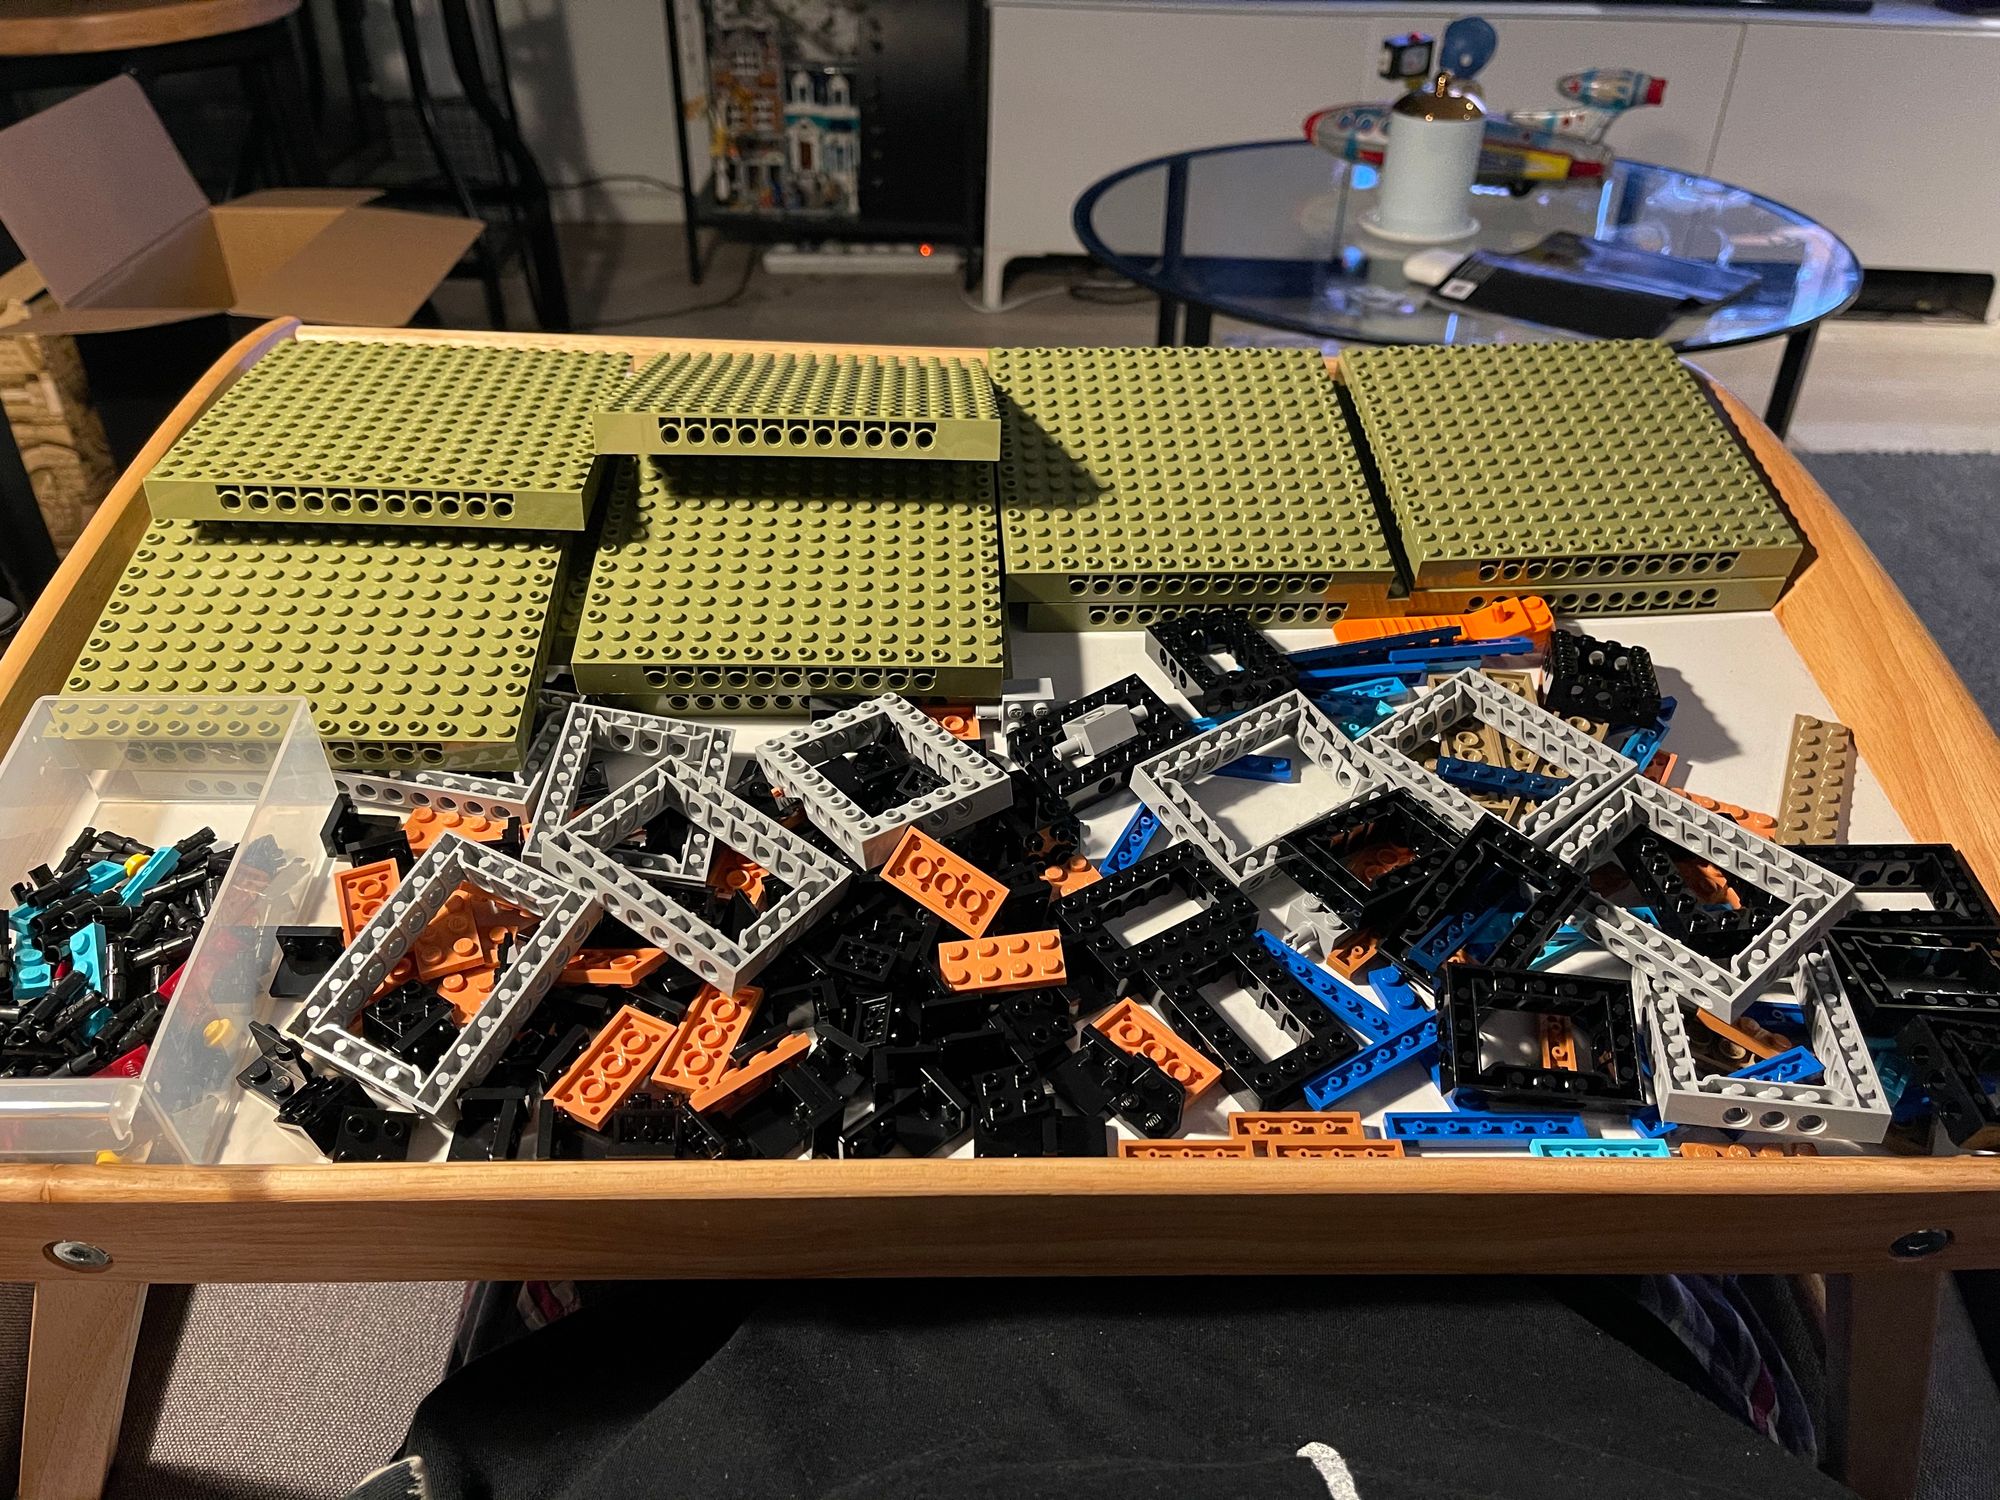
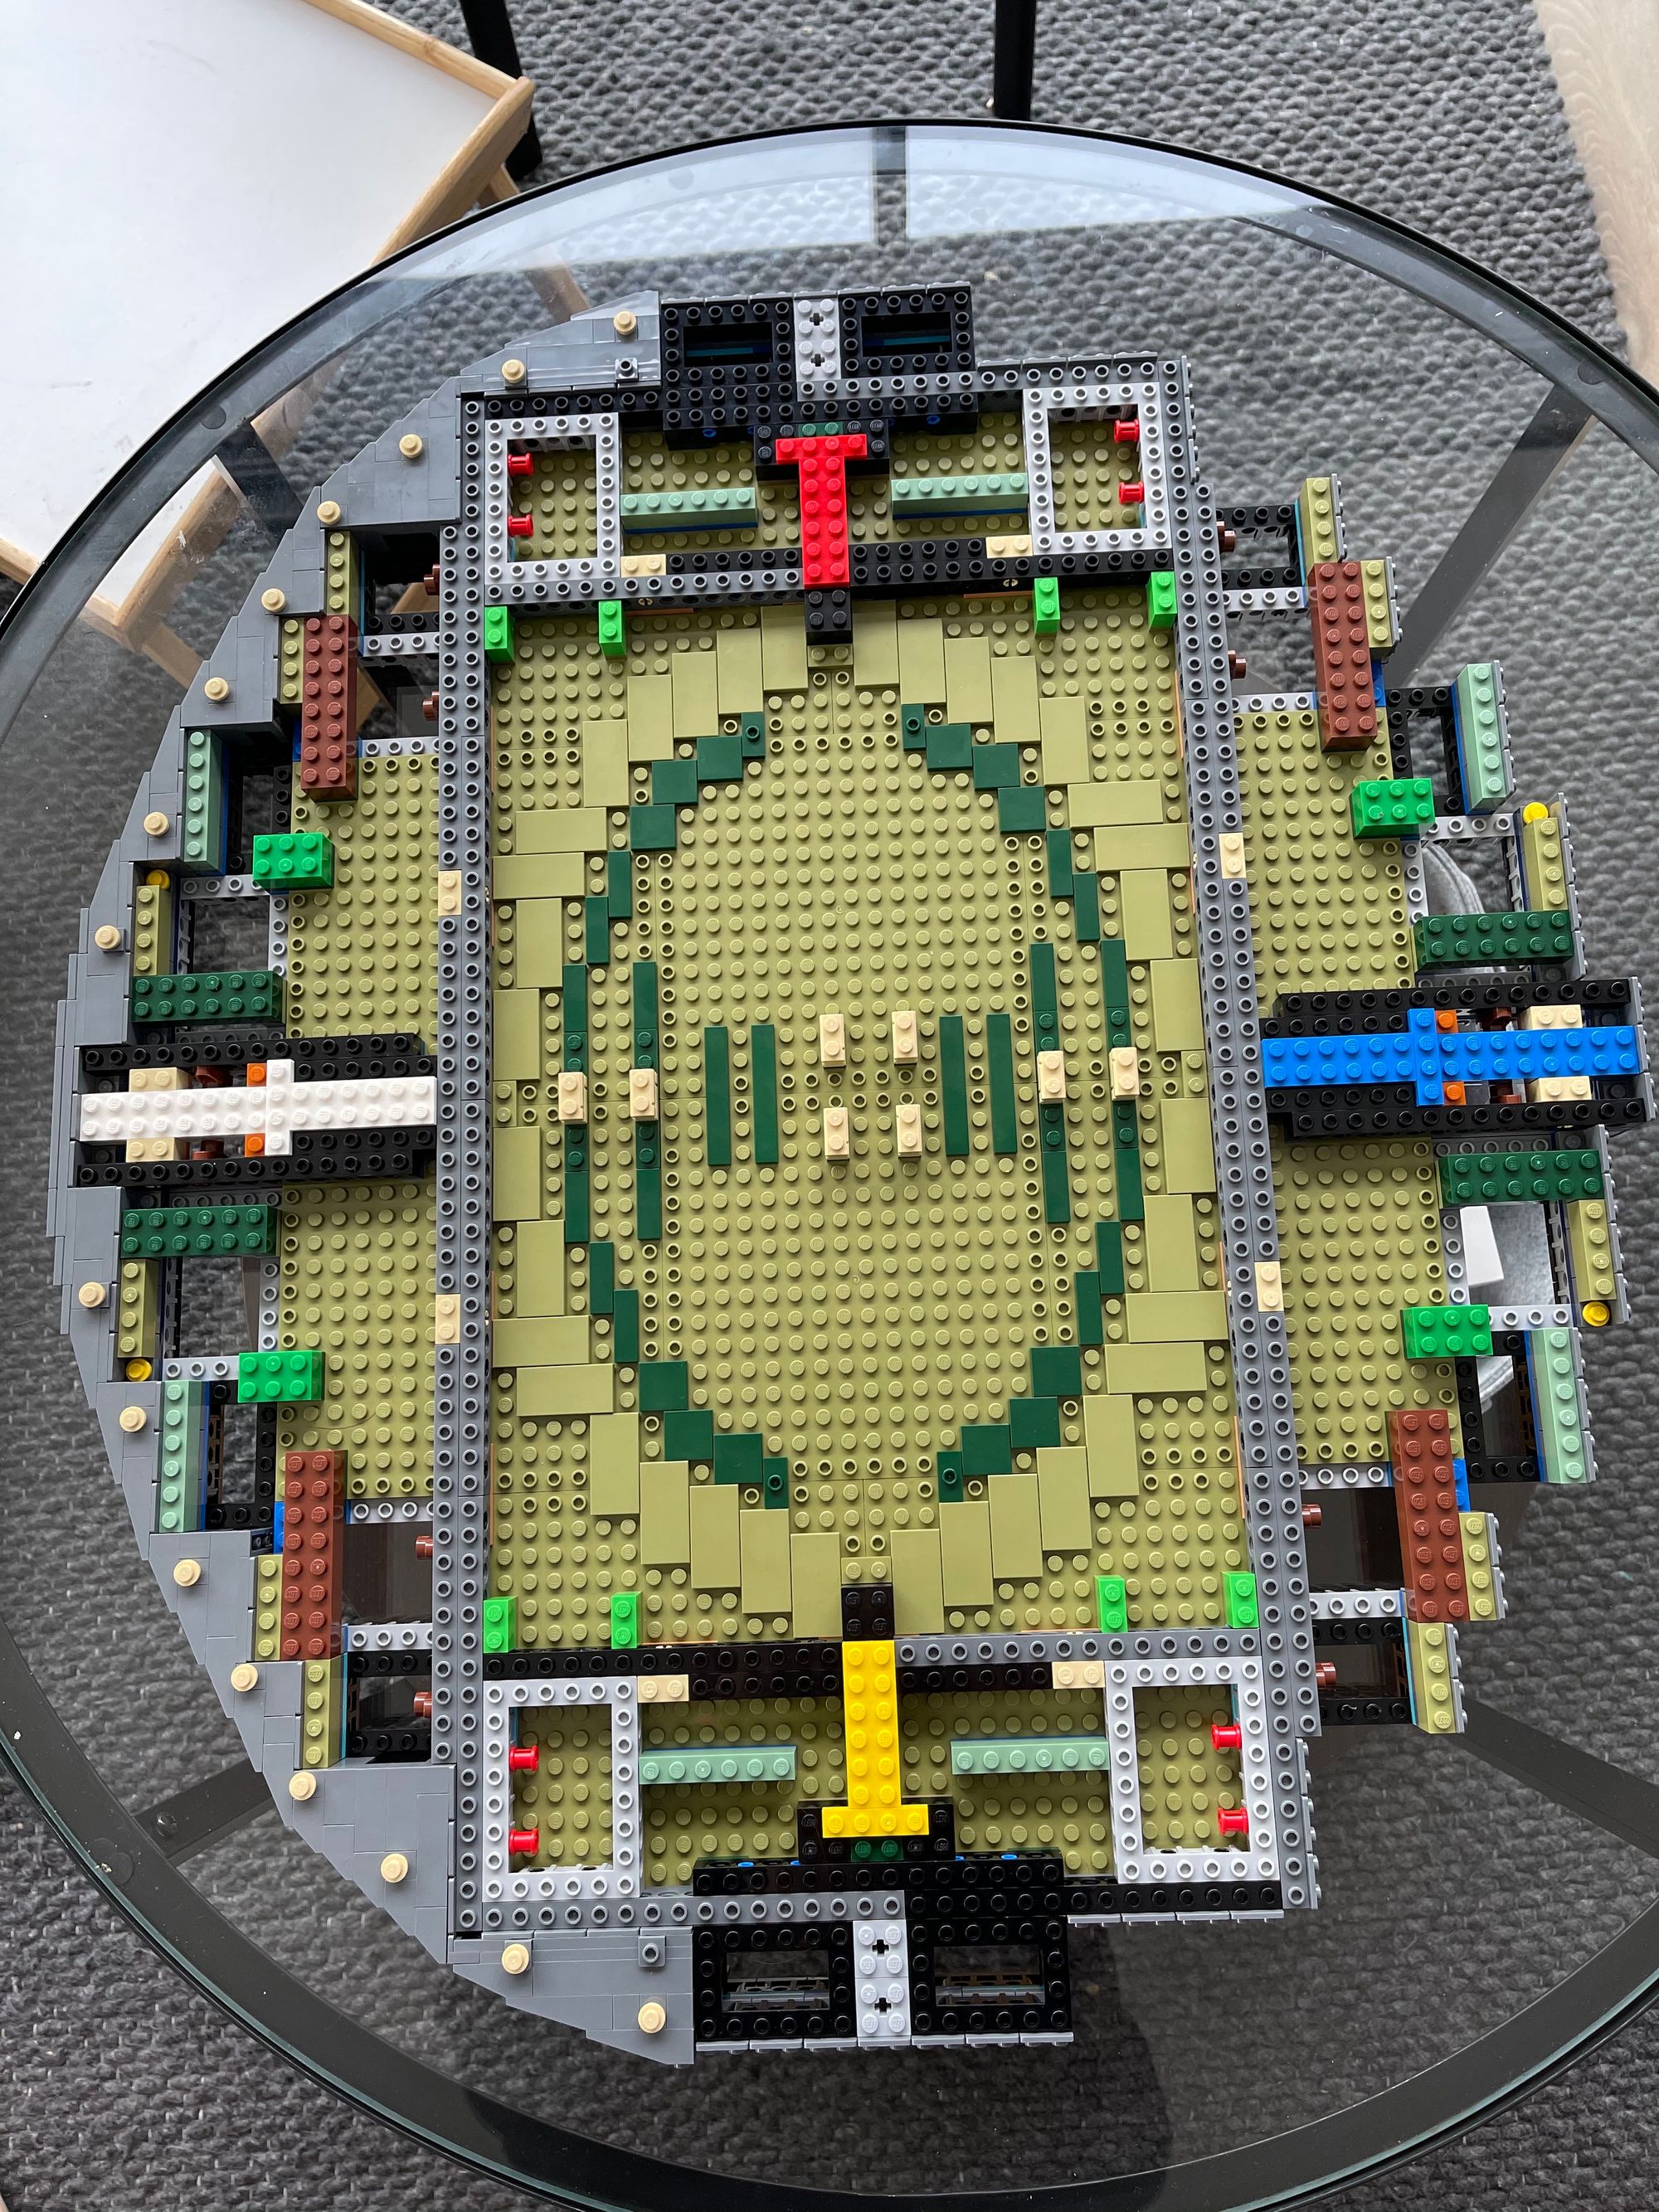
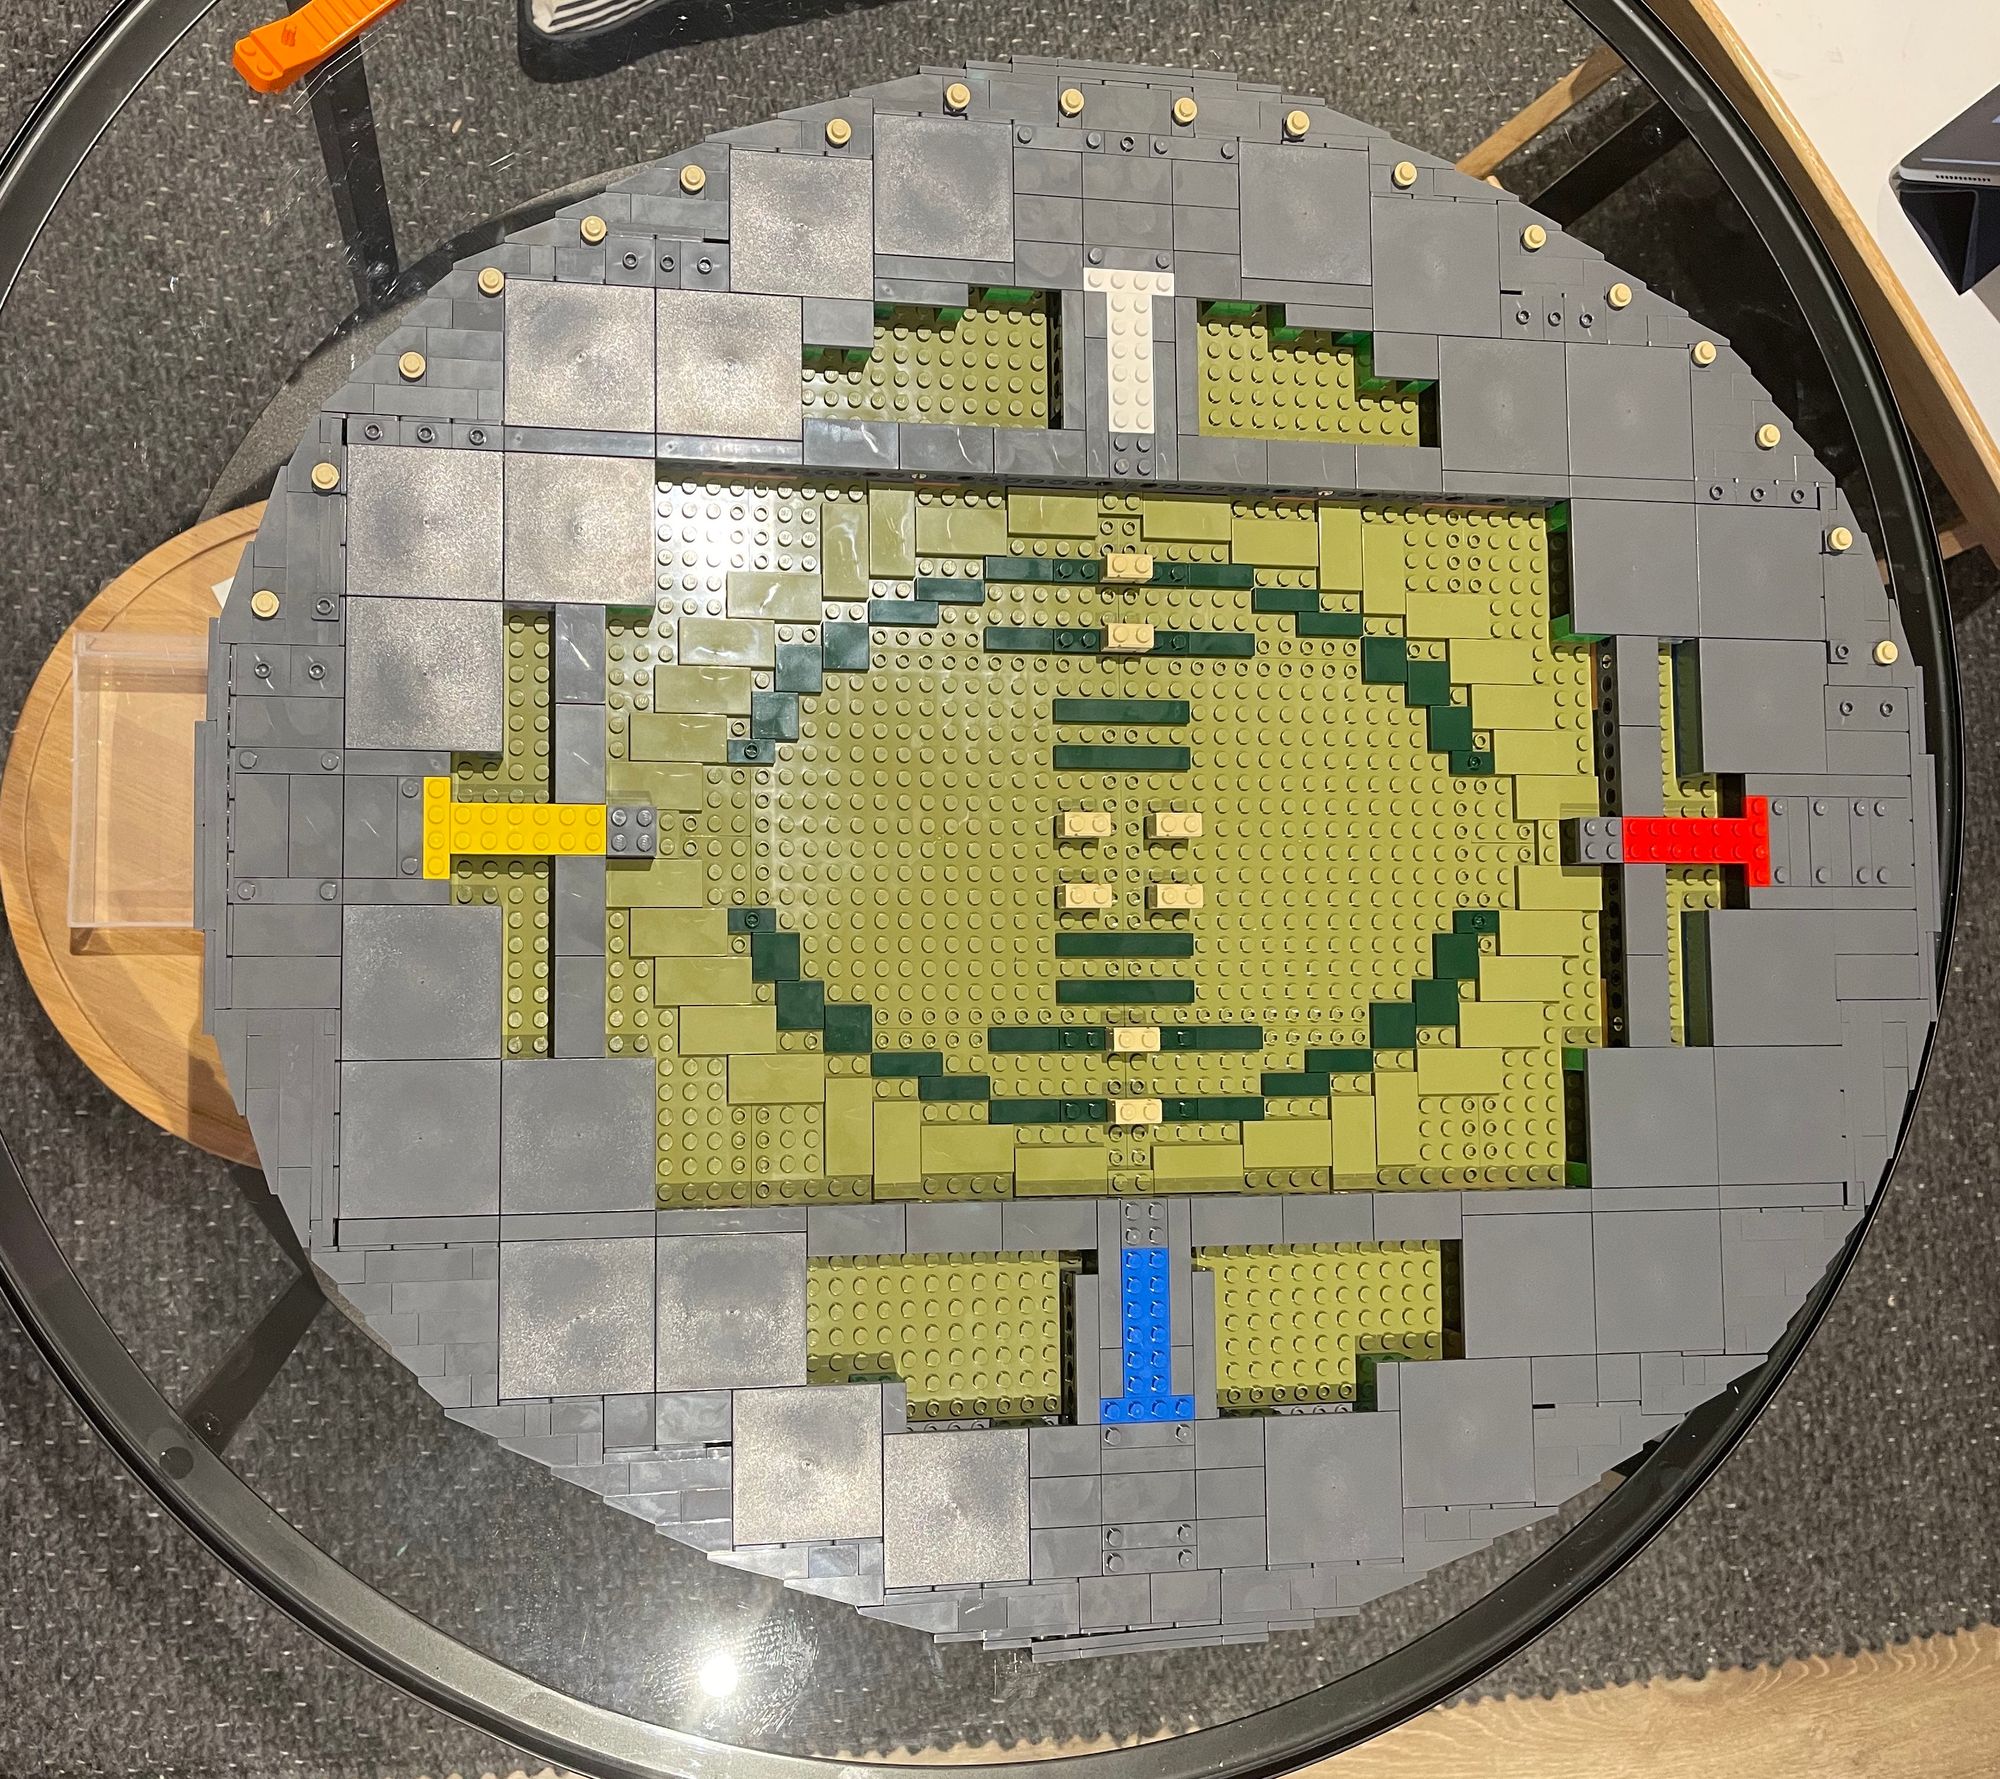
You start by building the base. It’s a massive base. I generally build all my Lego these days on an Ikea lap tray sitting on the couch. From the moment I opened the bags I knew I couldn’t build this base on my tray. I eventually rigged up a handy system on the tray using a Lazy Susan which worked until it all got too big to spin in the later bags.
Annoyingly, the digital instructions don’t make it clear that you need to do everything in bag 1 twice, though it is marked in the printed instructions. I had to go back and do it all over which is a little annoying, but not a deal breaker. Just maybe keep it in mind when it comes your time to build, because it’s better to double up at the beginning. It’s frustrating that the app instructions wasn’t updated to reflect this.
I found it really satisfying to make the base. I love that the plates are all different colours by length, so it’s much easier to find what you’re looking for. This is a good foundation before everything becomes tan, and it’s all going to be hidden anyway.
Bag 2

Good build, lots of little bits to do adding to the foundation. But, once again, it doesn’t say to do it X2 at all in the instructions. I checked. And again, I have to go back at the end and start again on the other side. Given that bag 3 has the two halves coming together, I don’t think it’ll be a problem much longer. Instructions in Book I are poorly written, though.
Bag 3
I was wrong, you did have to do everything x2 again, it just once again didn’t specify that. On the upside, it wasn’t too many pieces, and they were all colour coded again.
Once you put the two halves together, it kinda looks like a footy oval. So that’s fun.
Bag 4
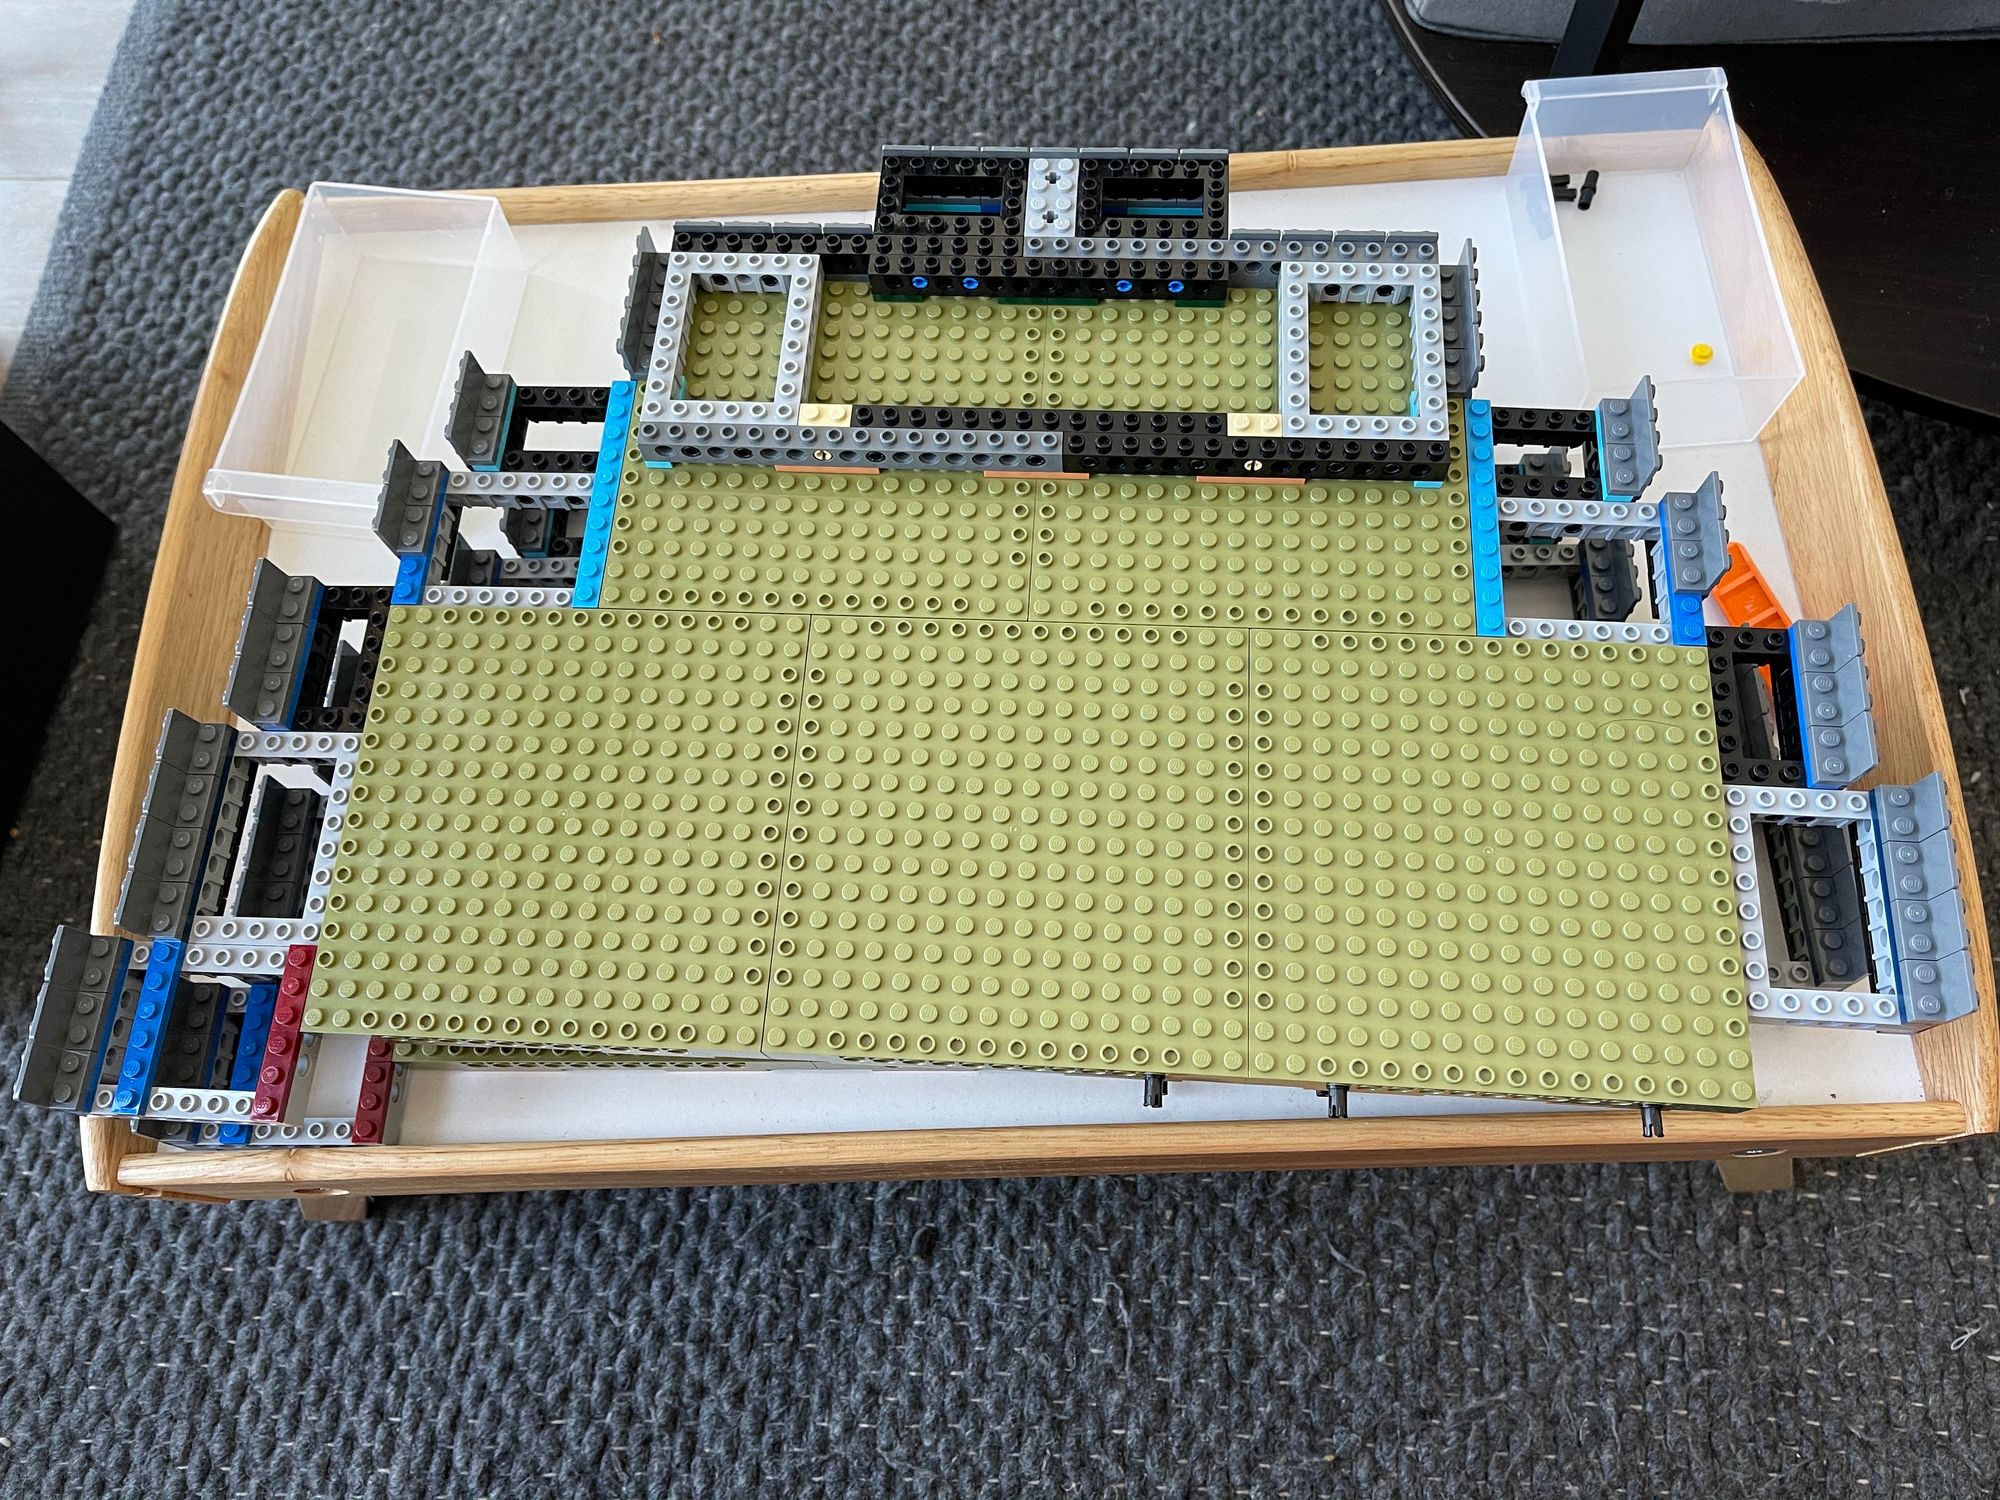
Here’s where those long Technic bricks come into play. Once again, the first part is X2 without saying so, but finally the foundation is done and it’s cool to see how it’s built. If someone wanted to know where to begin making heavy MOCs, checking out this foundation would be a great place to start so you don’t overuse bricks or risk it crashing in on itself.
Doing all the innards can be a bit fiddly, but it’s not super advanced, and it doesn’t require the precise dexterity of Technic. It’s definitely at the top end of traditional Lego complexity, but you don’t need to be an expert to complete it, just patient.
Bag 5
This is the part where you start putting the grey and black cladding on the outside of the base. I really liked doing this bit. It was repetitive, but nice, and because it was big it immediately made the whole thing look more impressive. You just do the one half here.
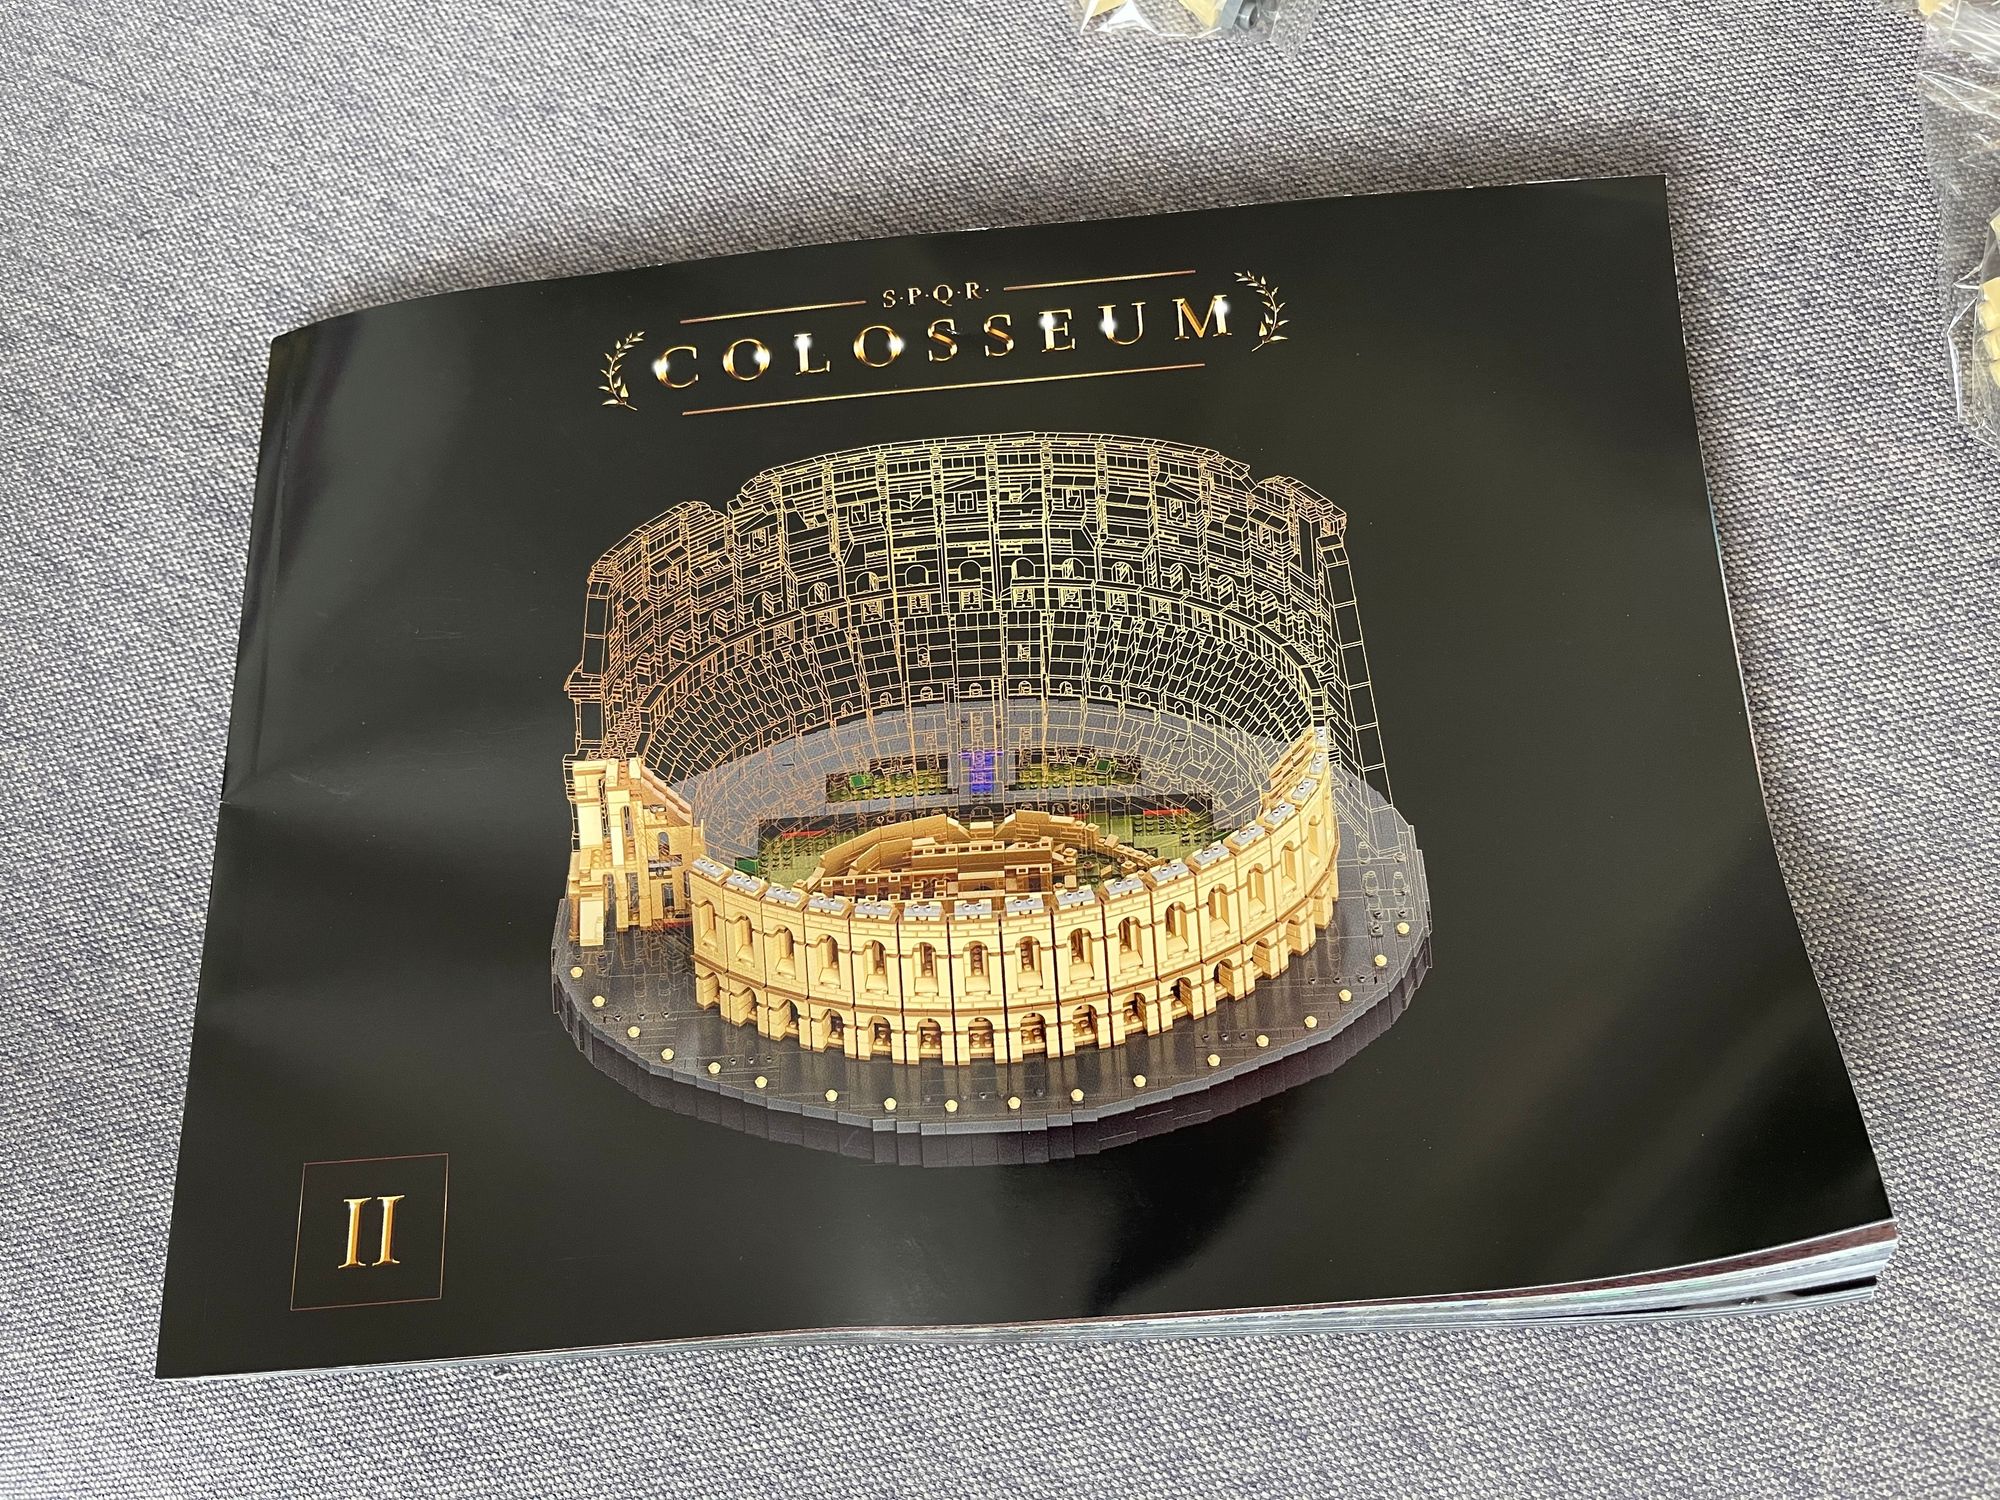
Box II
Good news! The instructions weren’t as ripped as last time, but were still somewhat crinkled, which isn’t great, especially for collectors who like to keep things in good condition.
It is important to note, though, that if you need replacements for a set you’ve bought, you can just contact Lego customer service and they’ll send you out some nice new ones. Box II contains steps 6-18.
Bag 6
Basically the same as bag 5, but on the other side.
Bag 7
This step puts a nice grey floor to cover the colourful inner workings and set the scene. Repetitive, but good. This is a very repetitive set, but in the best way for mindless building when you need to deal with other stuff in the background of your mind. I'm going to say repetitive a lot, my overuse of that word here will still not come close to the repetitiveness of some of these steps. Repetitive.
Bag 8
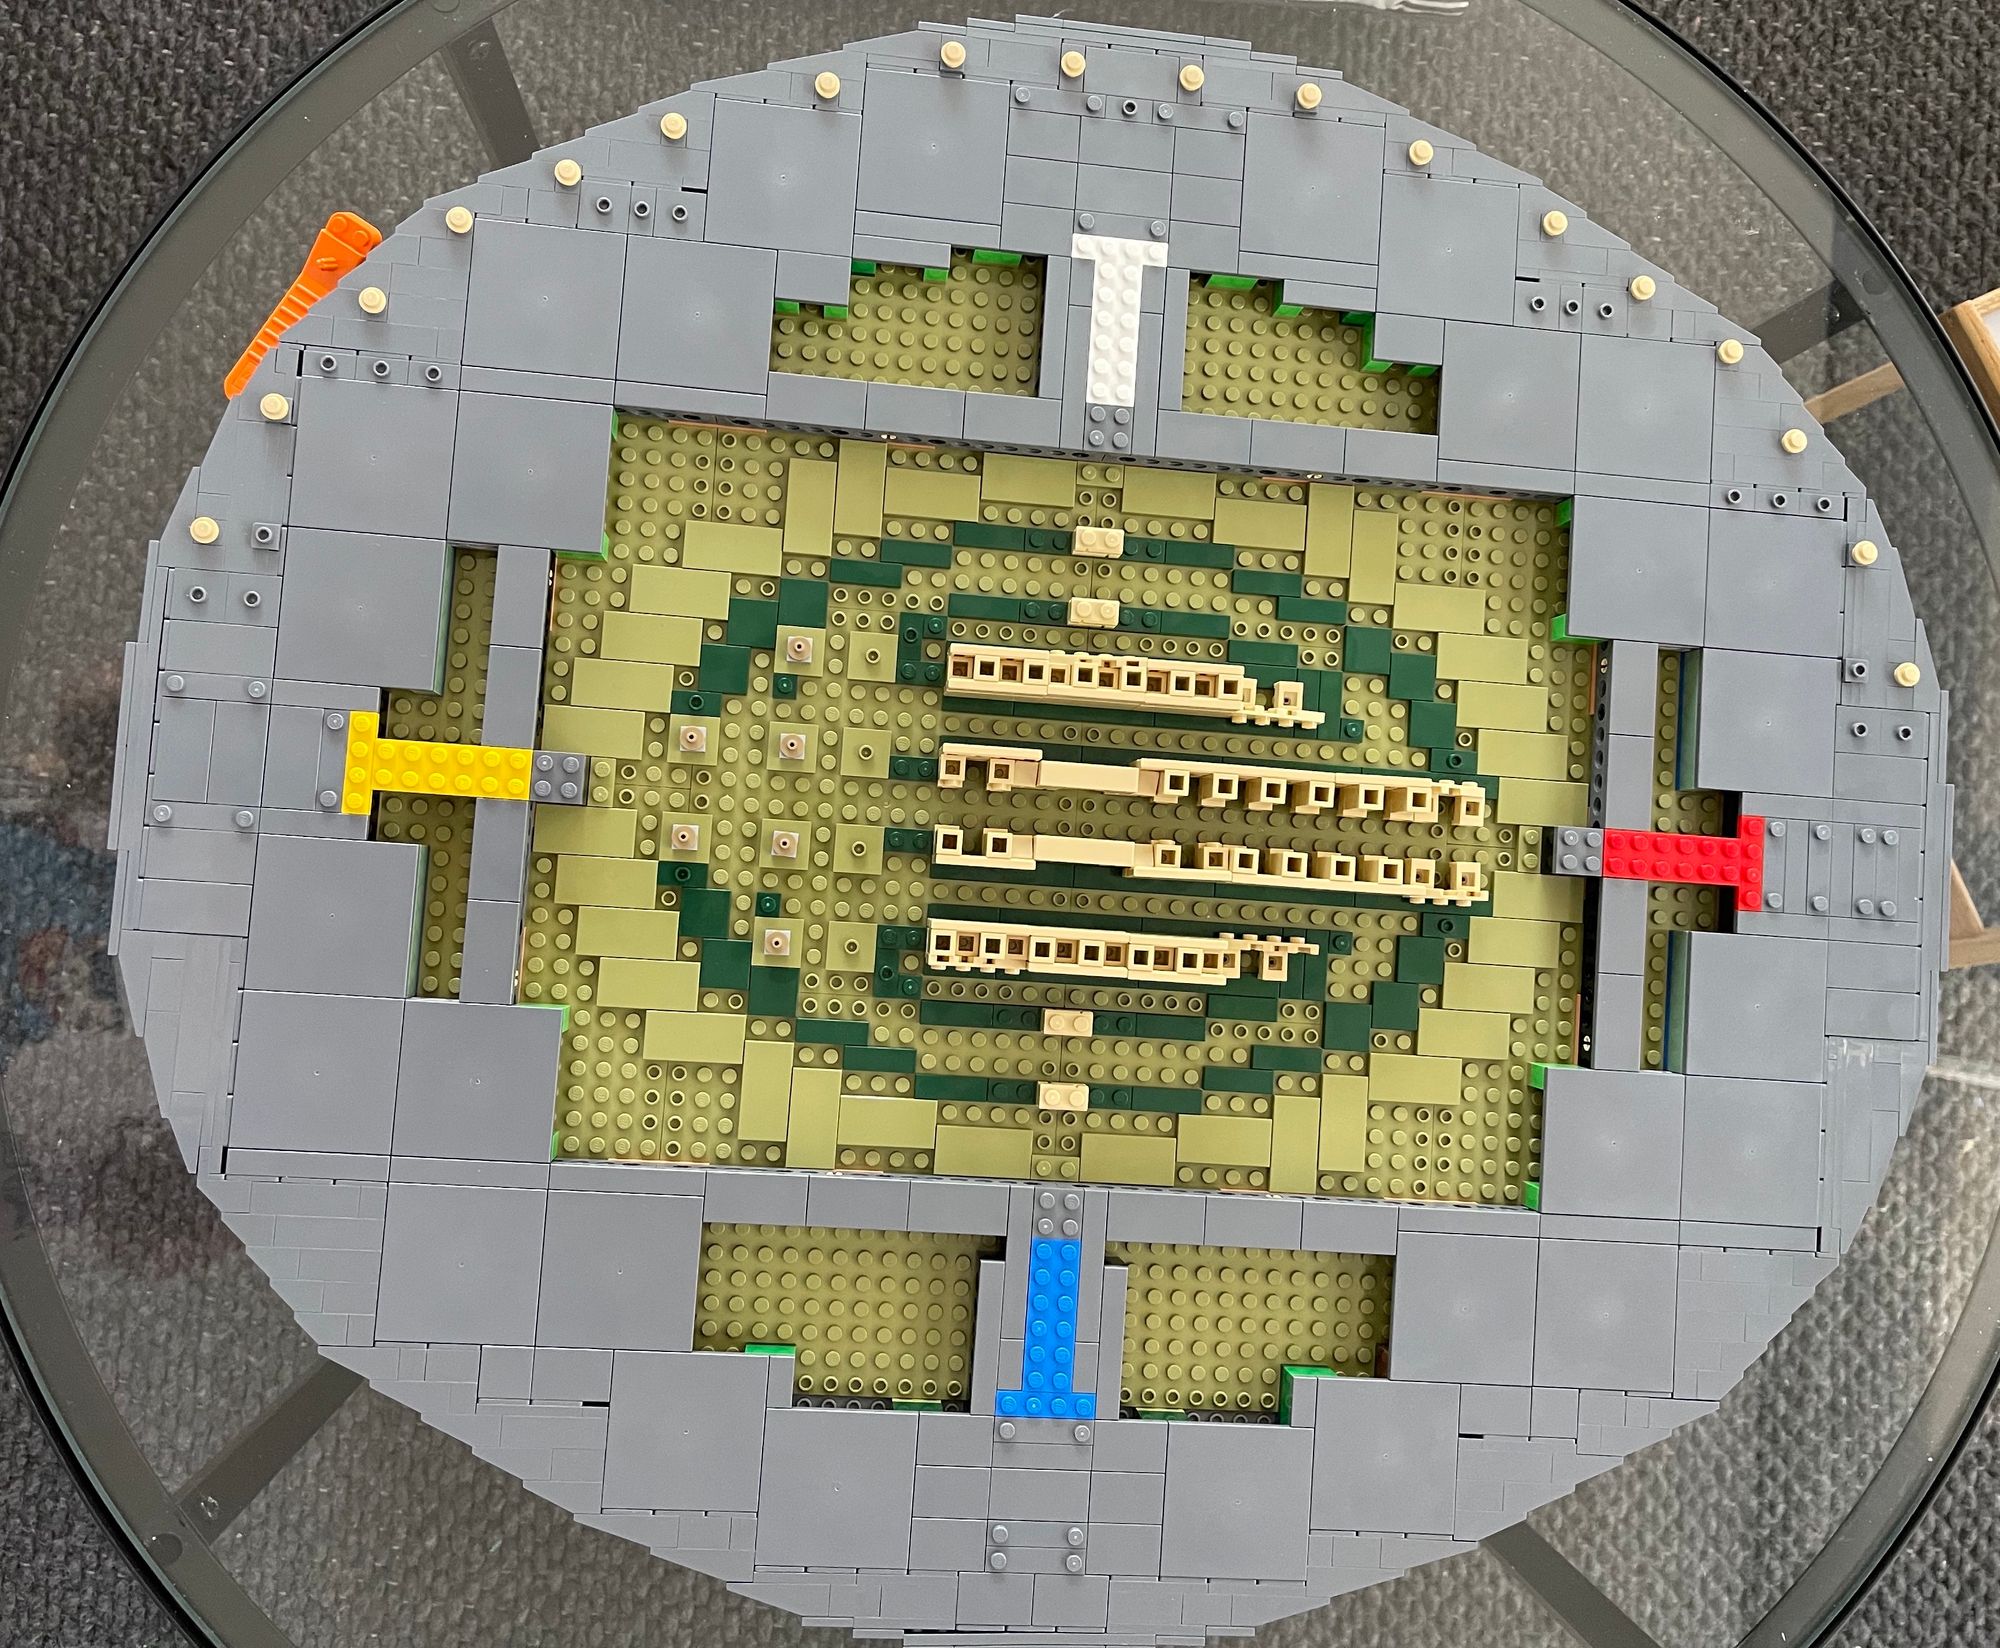
This is where things start getting detailed and delicate. You build the inside of the colosseum structures, like little walls and fences. Not to be repetitive, but this part is a little repetitive.
Bag 9

Walls! Many hinges! Here’s where I made a couple of minor mistakes, which is easy to do if you started to get lulled into repetition because each part is just slightly different. Not different enough to be obvious, but just different enough that if you stop concentrating for a second you can completely screw it up and need to go back a bit. Keeps you on your toes.
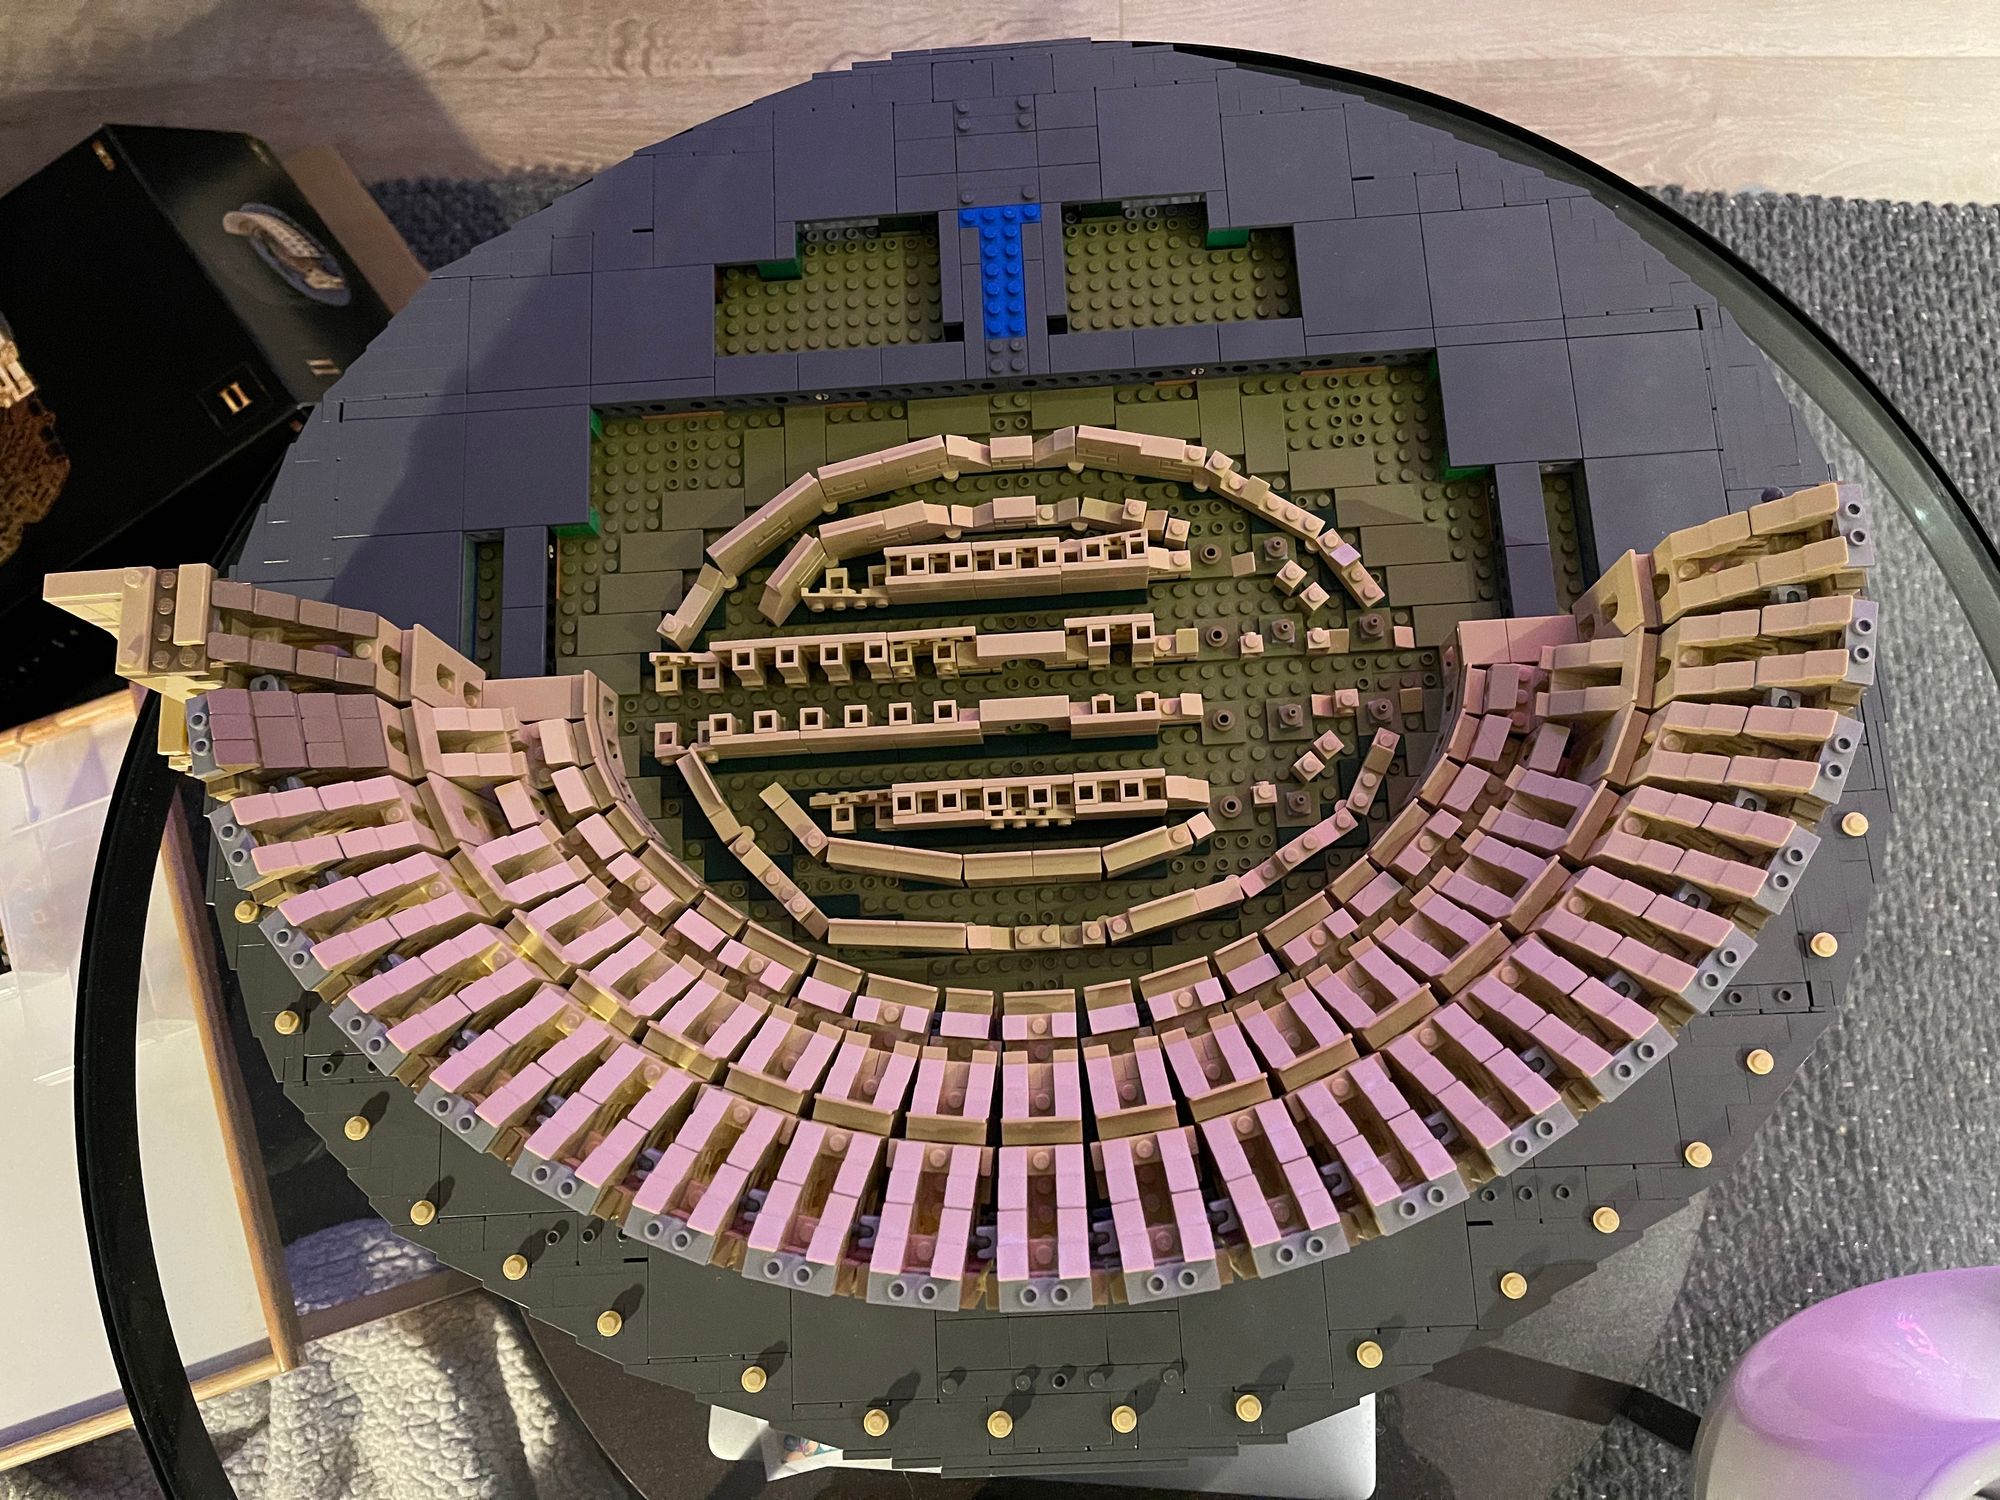
Bag 10

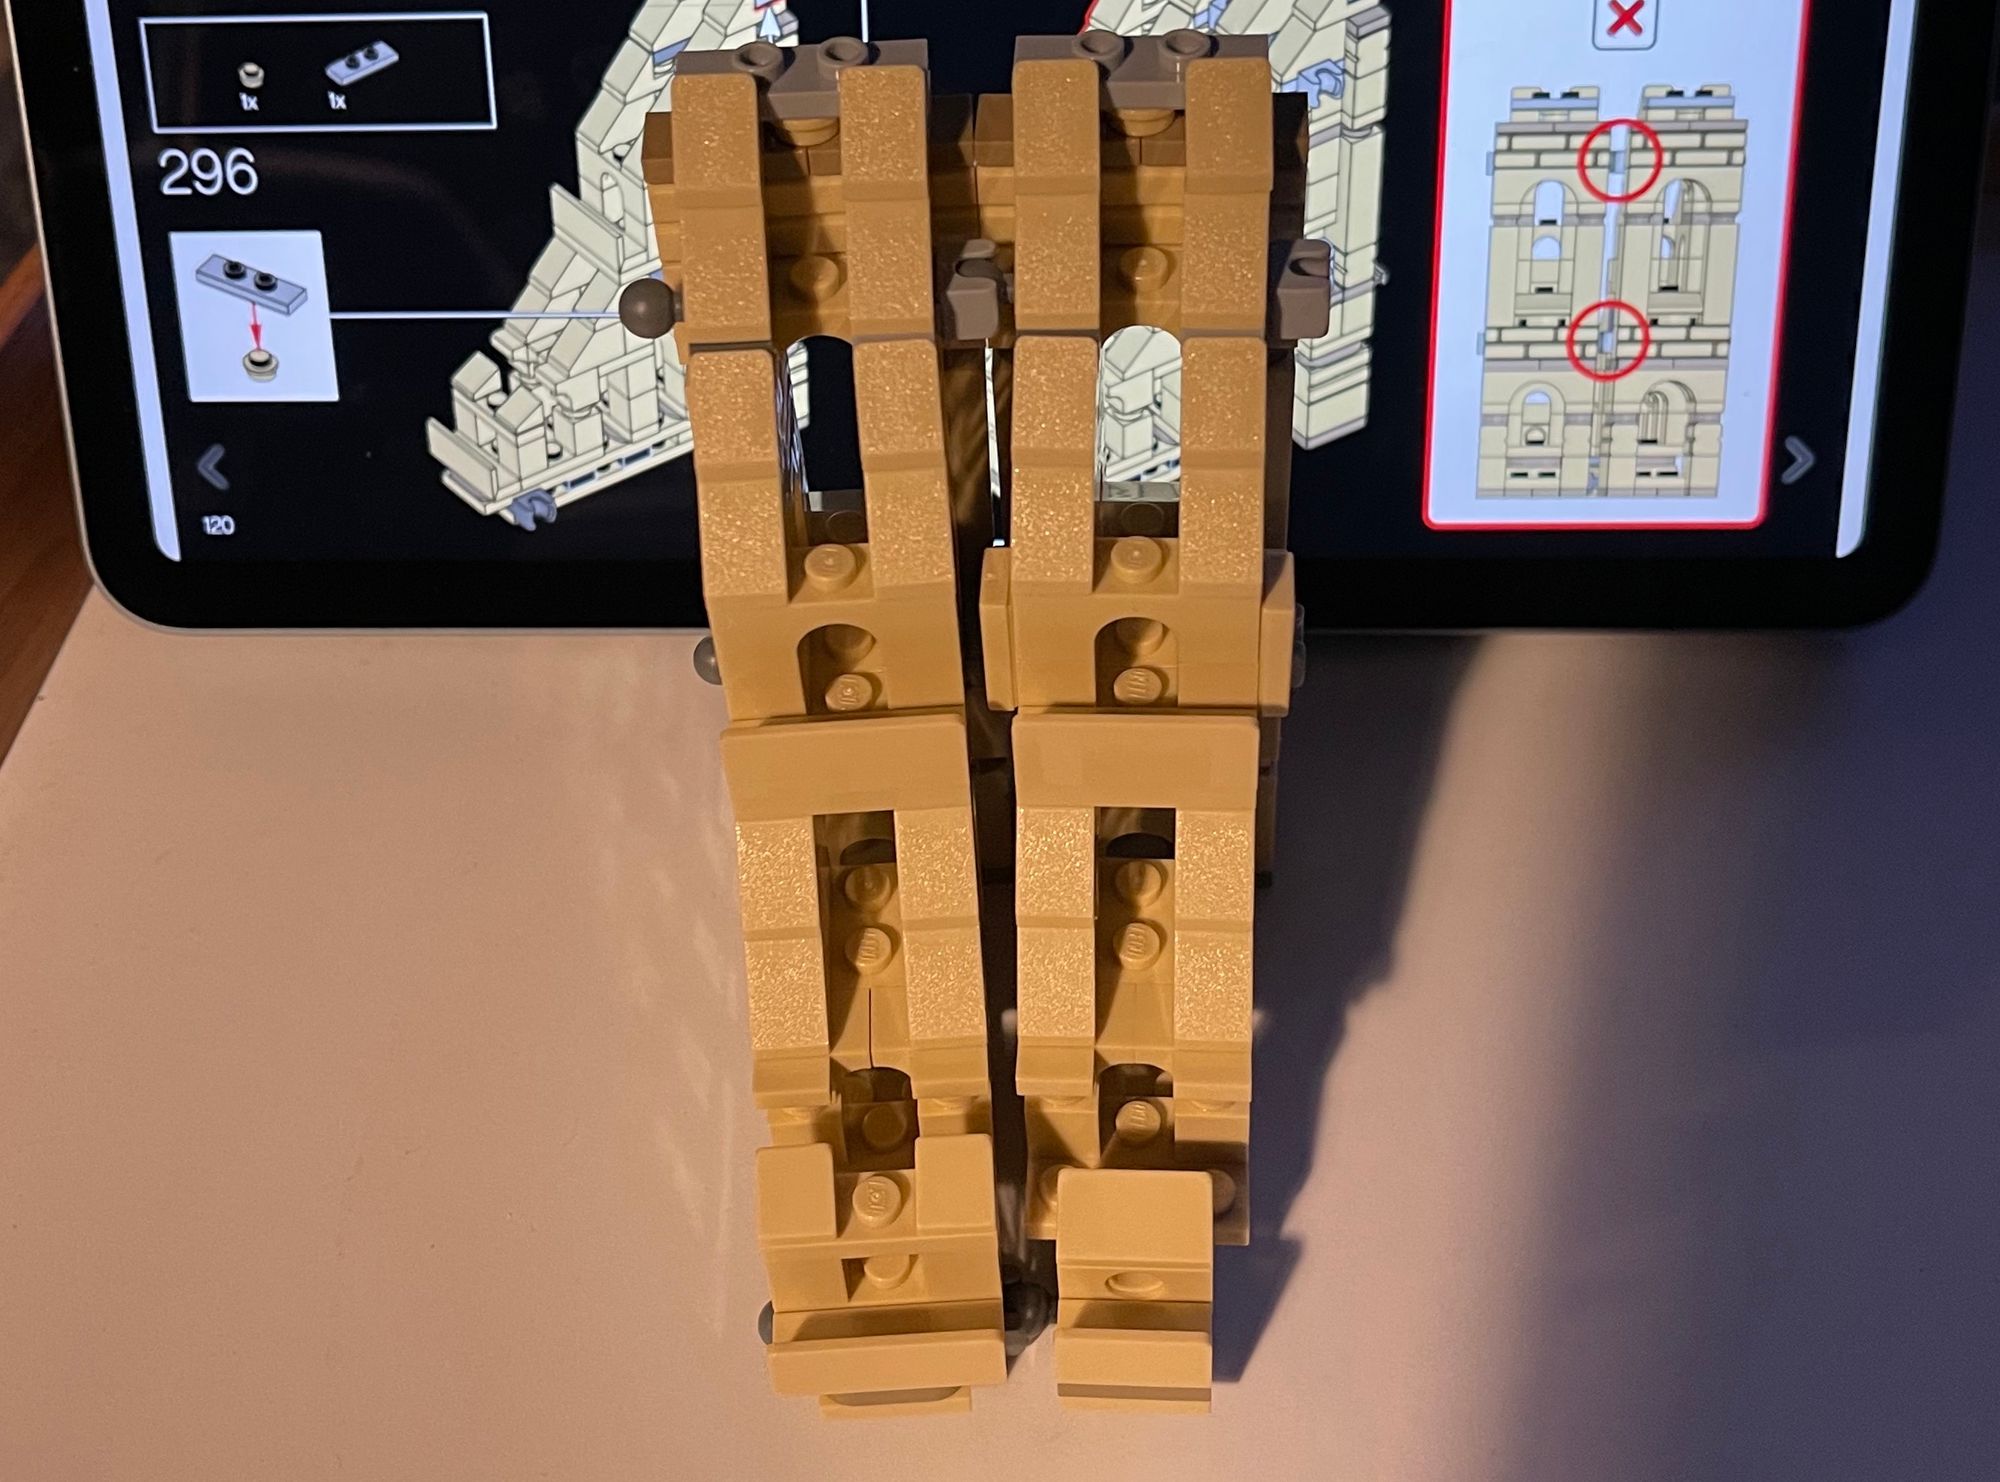
We’re making structures! Big ones. These would have been where the fancy people sat in the colosseum. These are the foundational parts of the stands, to which the other stands will attach. They’re structurally important, so make sure you pay close attention.
Soon, building these stands will become almost a reflex you’ll do it so much, but for the first two you’ll want to see exactly how they work.
My biggest tip is to not get the tan and light nougat little round bits mixed up when you get to the back of the structure. I did that and had to go back and take some parts apart to get a nice uniform look.
Bag 11
Time to begin the free-standing medium structures! This time we make two that hinge together and will start making up the shorter walls. In these there are lots of little archways and ramp bits that end up looking great when it’s done.
Bag 12
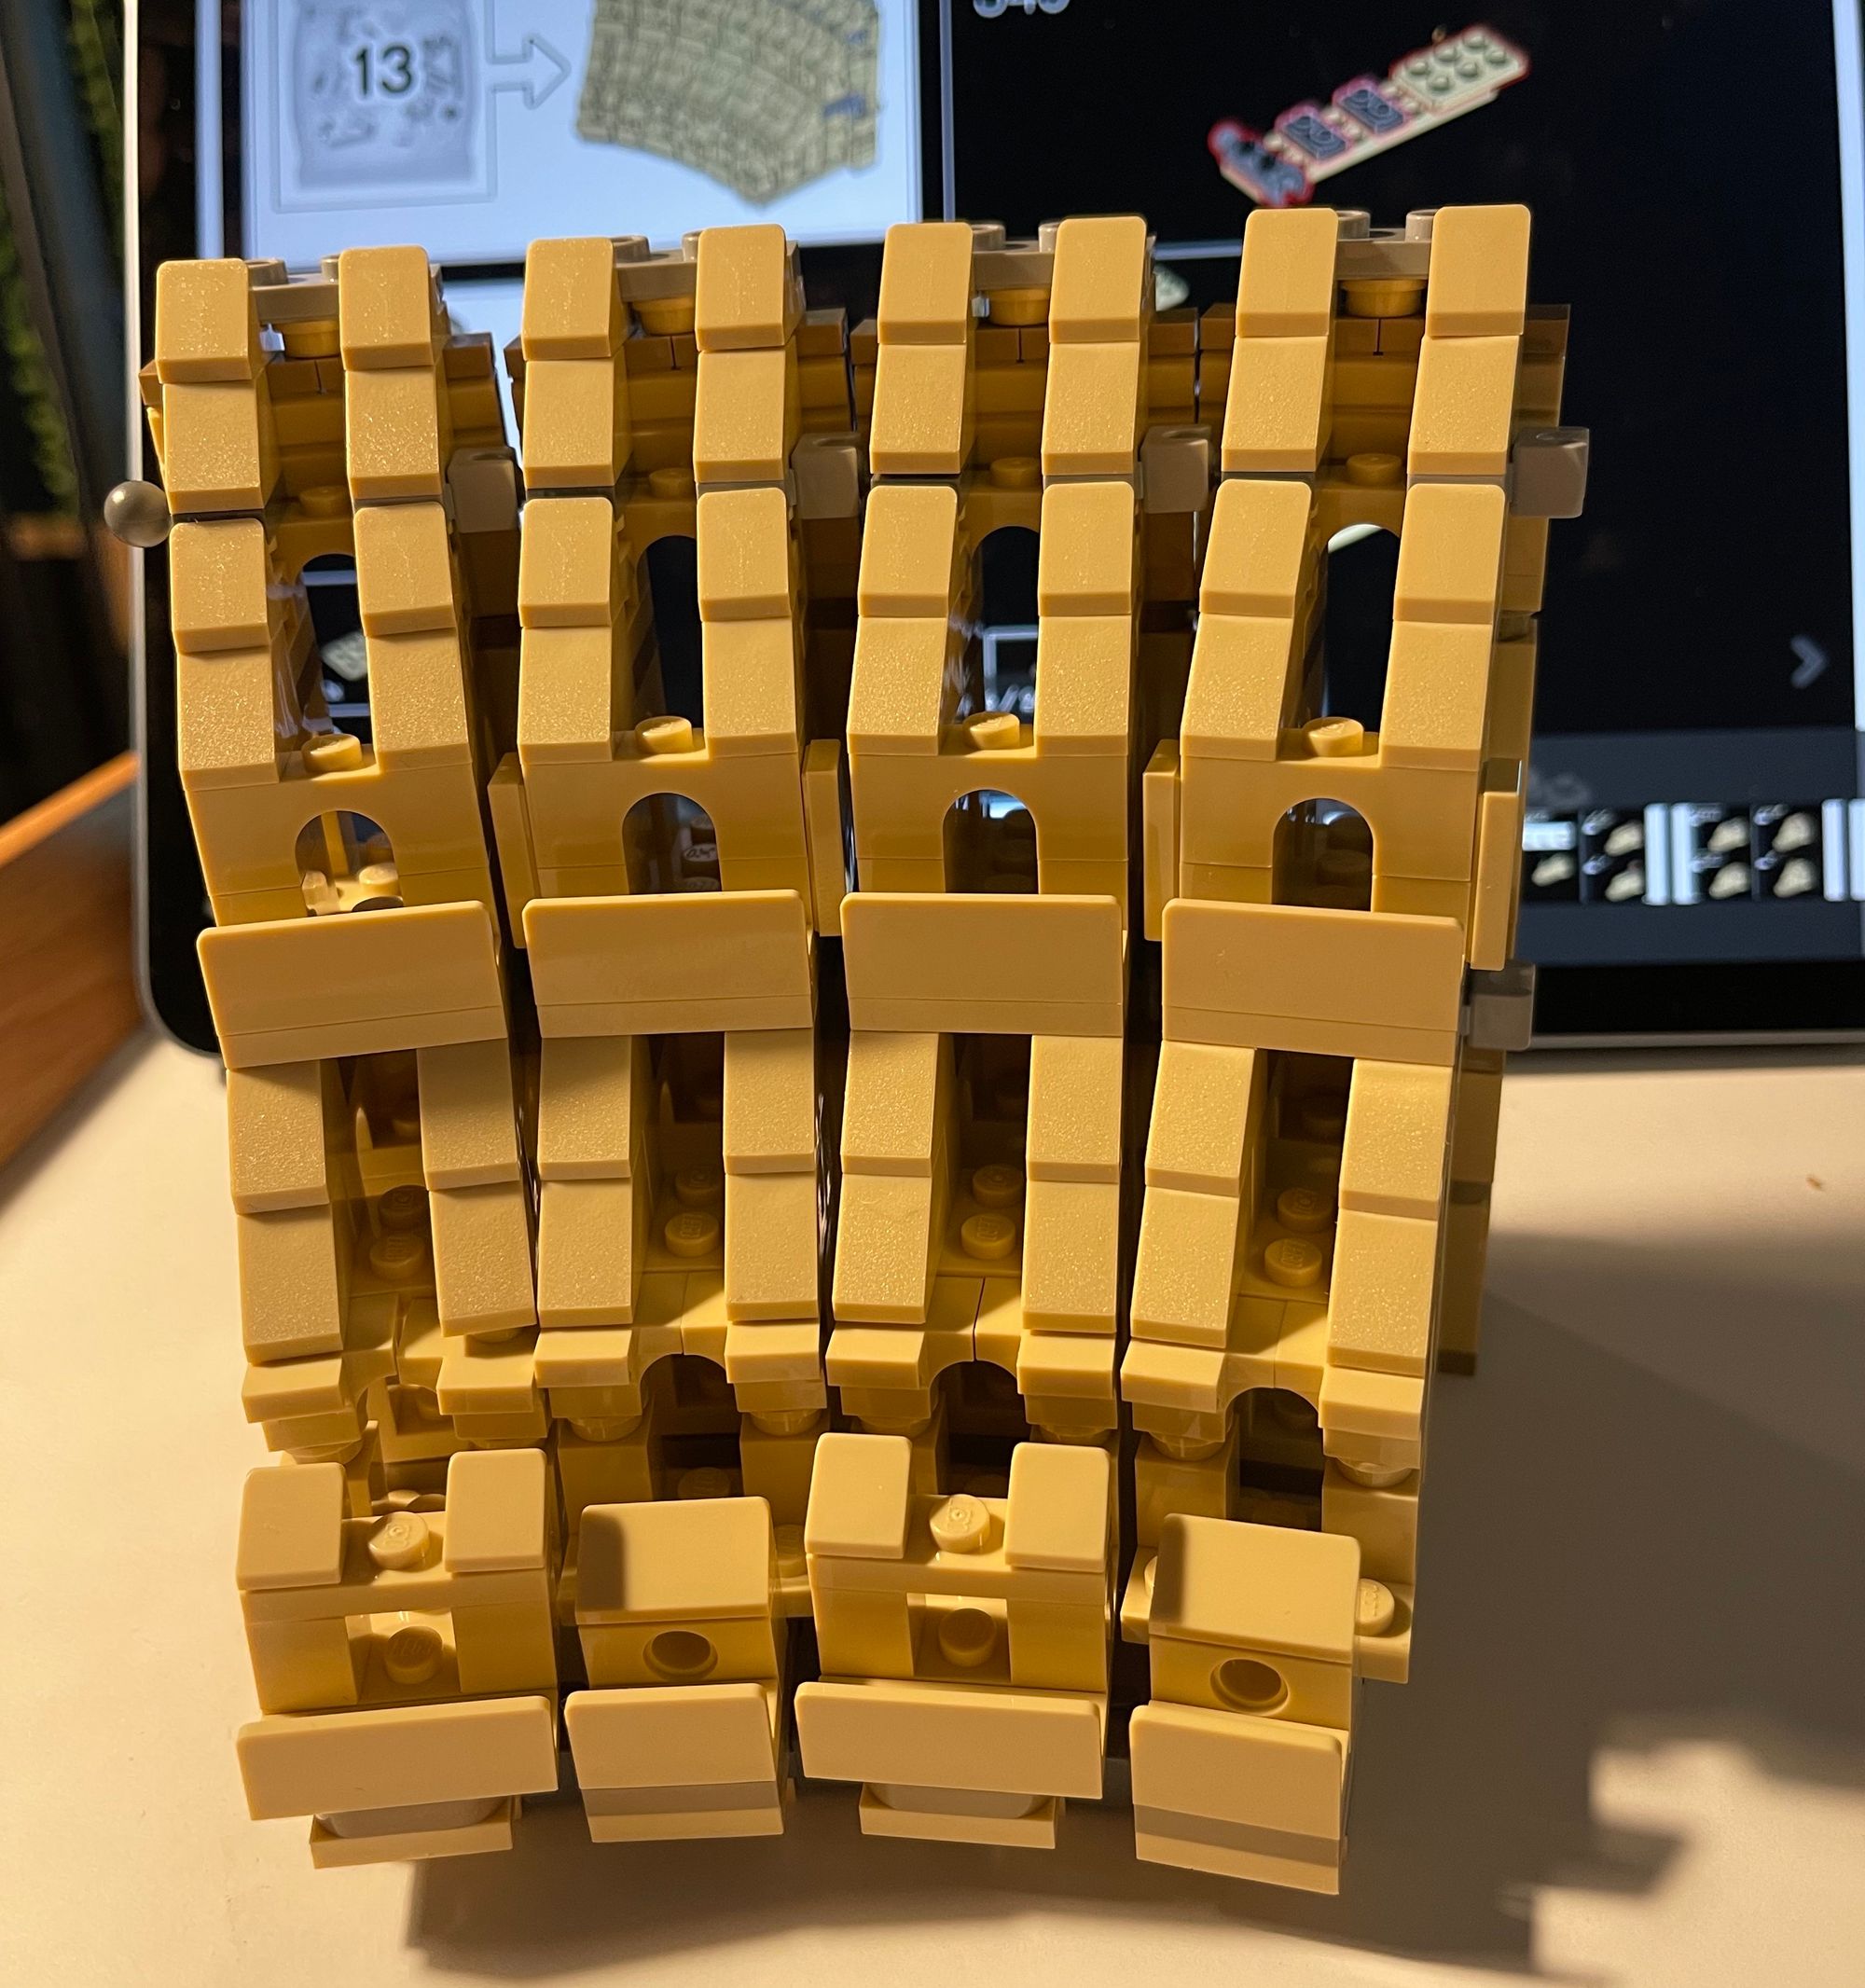
The same as bag 11. Bags 13-15 looks like they will also be the same. There was perhaps a more efficient way to do this, but it’s still fun.
Bags 13-15
They were, indeed, the same. Except the end of bag 15 when I got to put the uprights on the base and suddenly it looked like huge progress had been made!! It was kind of disheartening making the stands without putting them on the base, because you couldn’t see the progress, but that feeling of accomplishment once it started coming together was wonderful.
Bags 16-19
Exactly the same as 11-15, but slightly to the left.
Box III
The instructions weren’t quite as crumpled this time, which is nice. Still a bit crumpled, but not as bad as I. Here we have steps 19-28.
Bag 20

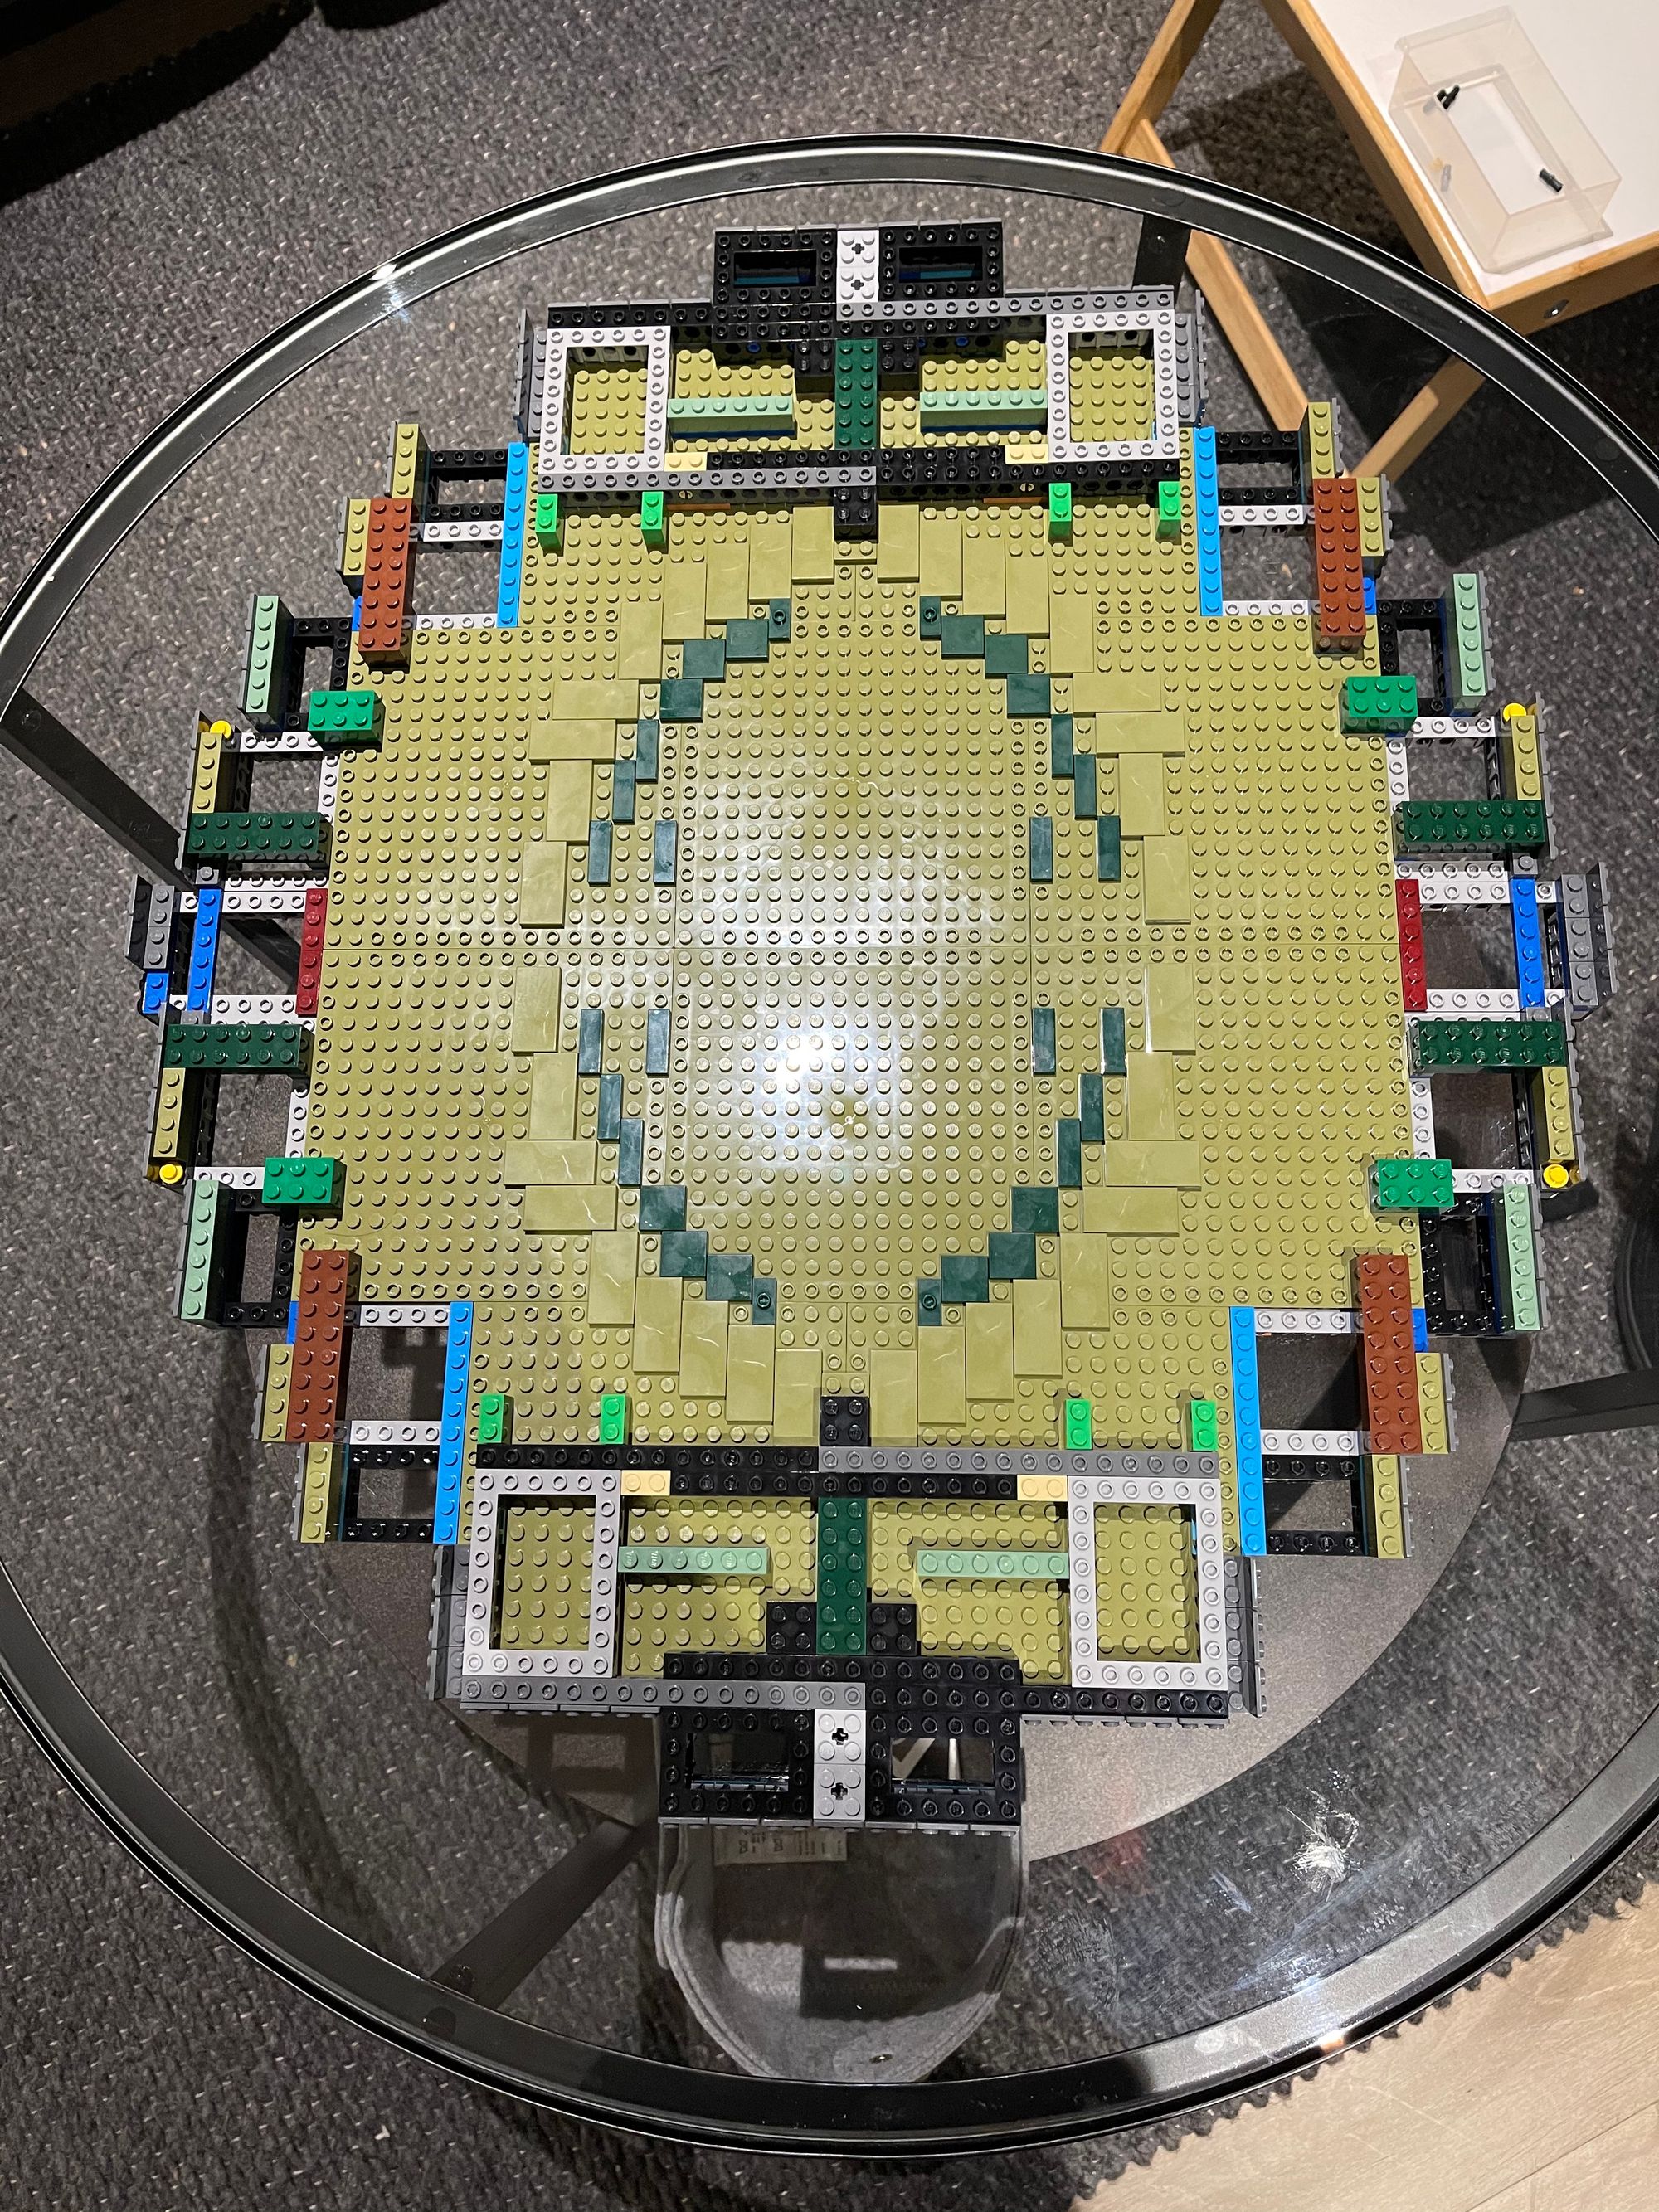
A slightly different upright! Similar to the others, but the variation was a welcome change. I think this one was supposed to be one of the ruins? At the end I added the little windows at the bottom to the full edge and then I got to add the whole chain of stands to the base, instantly making me feel as though I’d achieved something huge. It’s really starting to come together and look like *something*.
Bag 21
Made another one of those big, tall structures from bag 10, but taller (because this is the less ruined side of the colosseum) to make the final anchor for the rest of the stands.
Bag 22
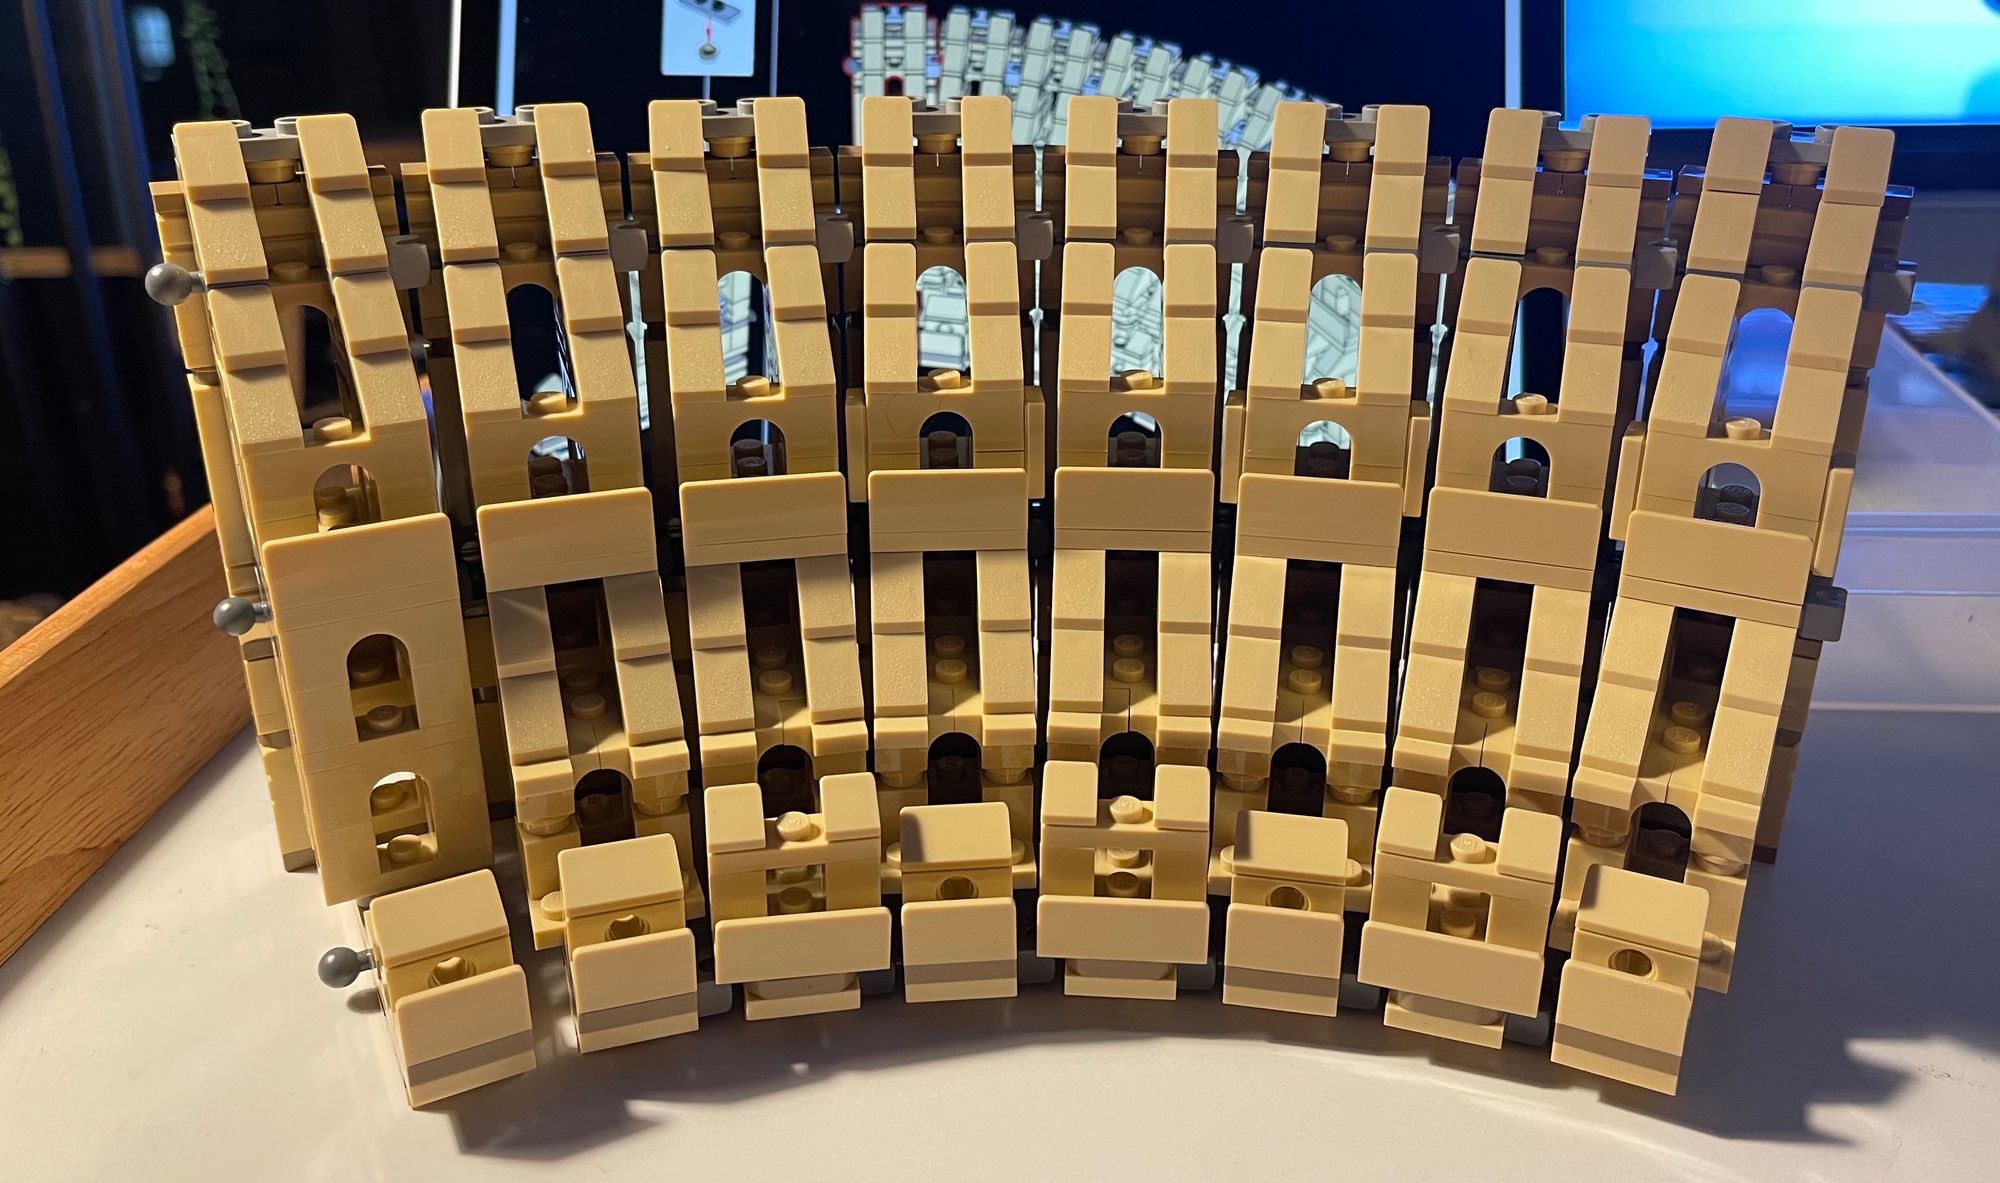
It’s time to start building the taller side. These stands are different to the others I’ve done so far, which is nice, but there’s about to be a lot of them.
These stands are so much more detailed with beautiful columns repurposing roller-skate elements as column details. Unlike the shorter side, these bags only contain one upright each, so progress will be a bit slower, and that’s perhaps also why it took longer to get this one done.
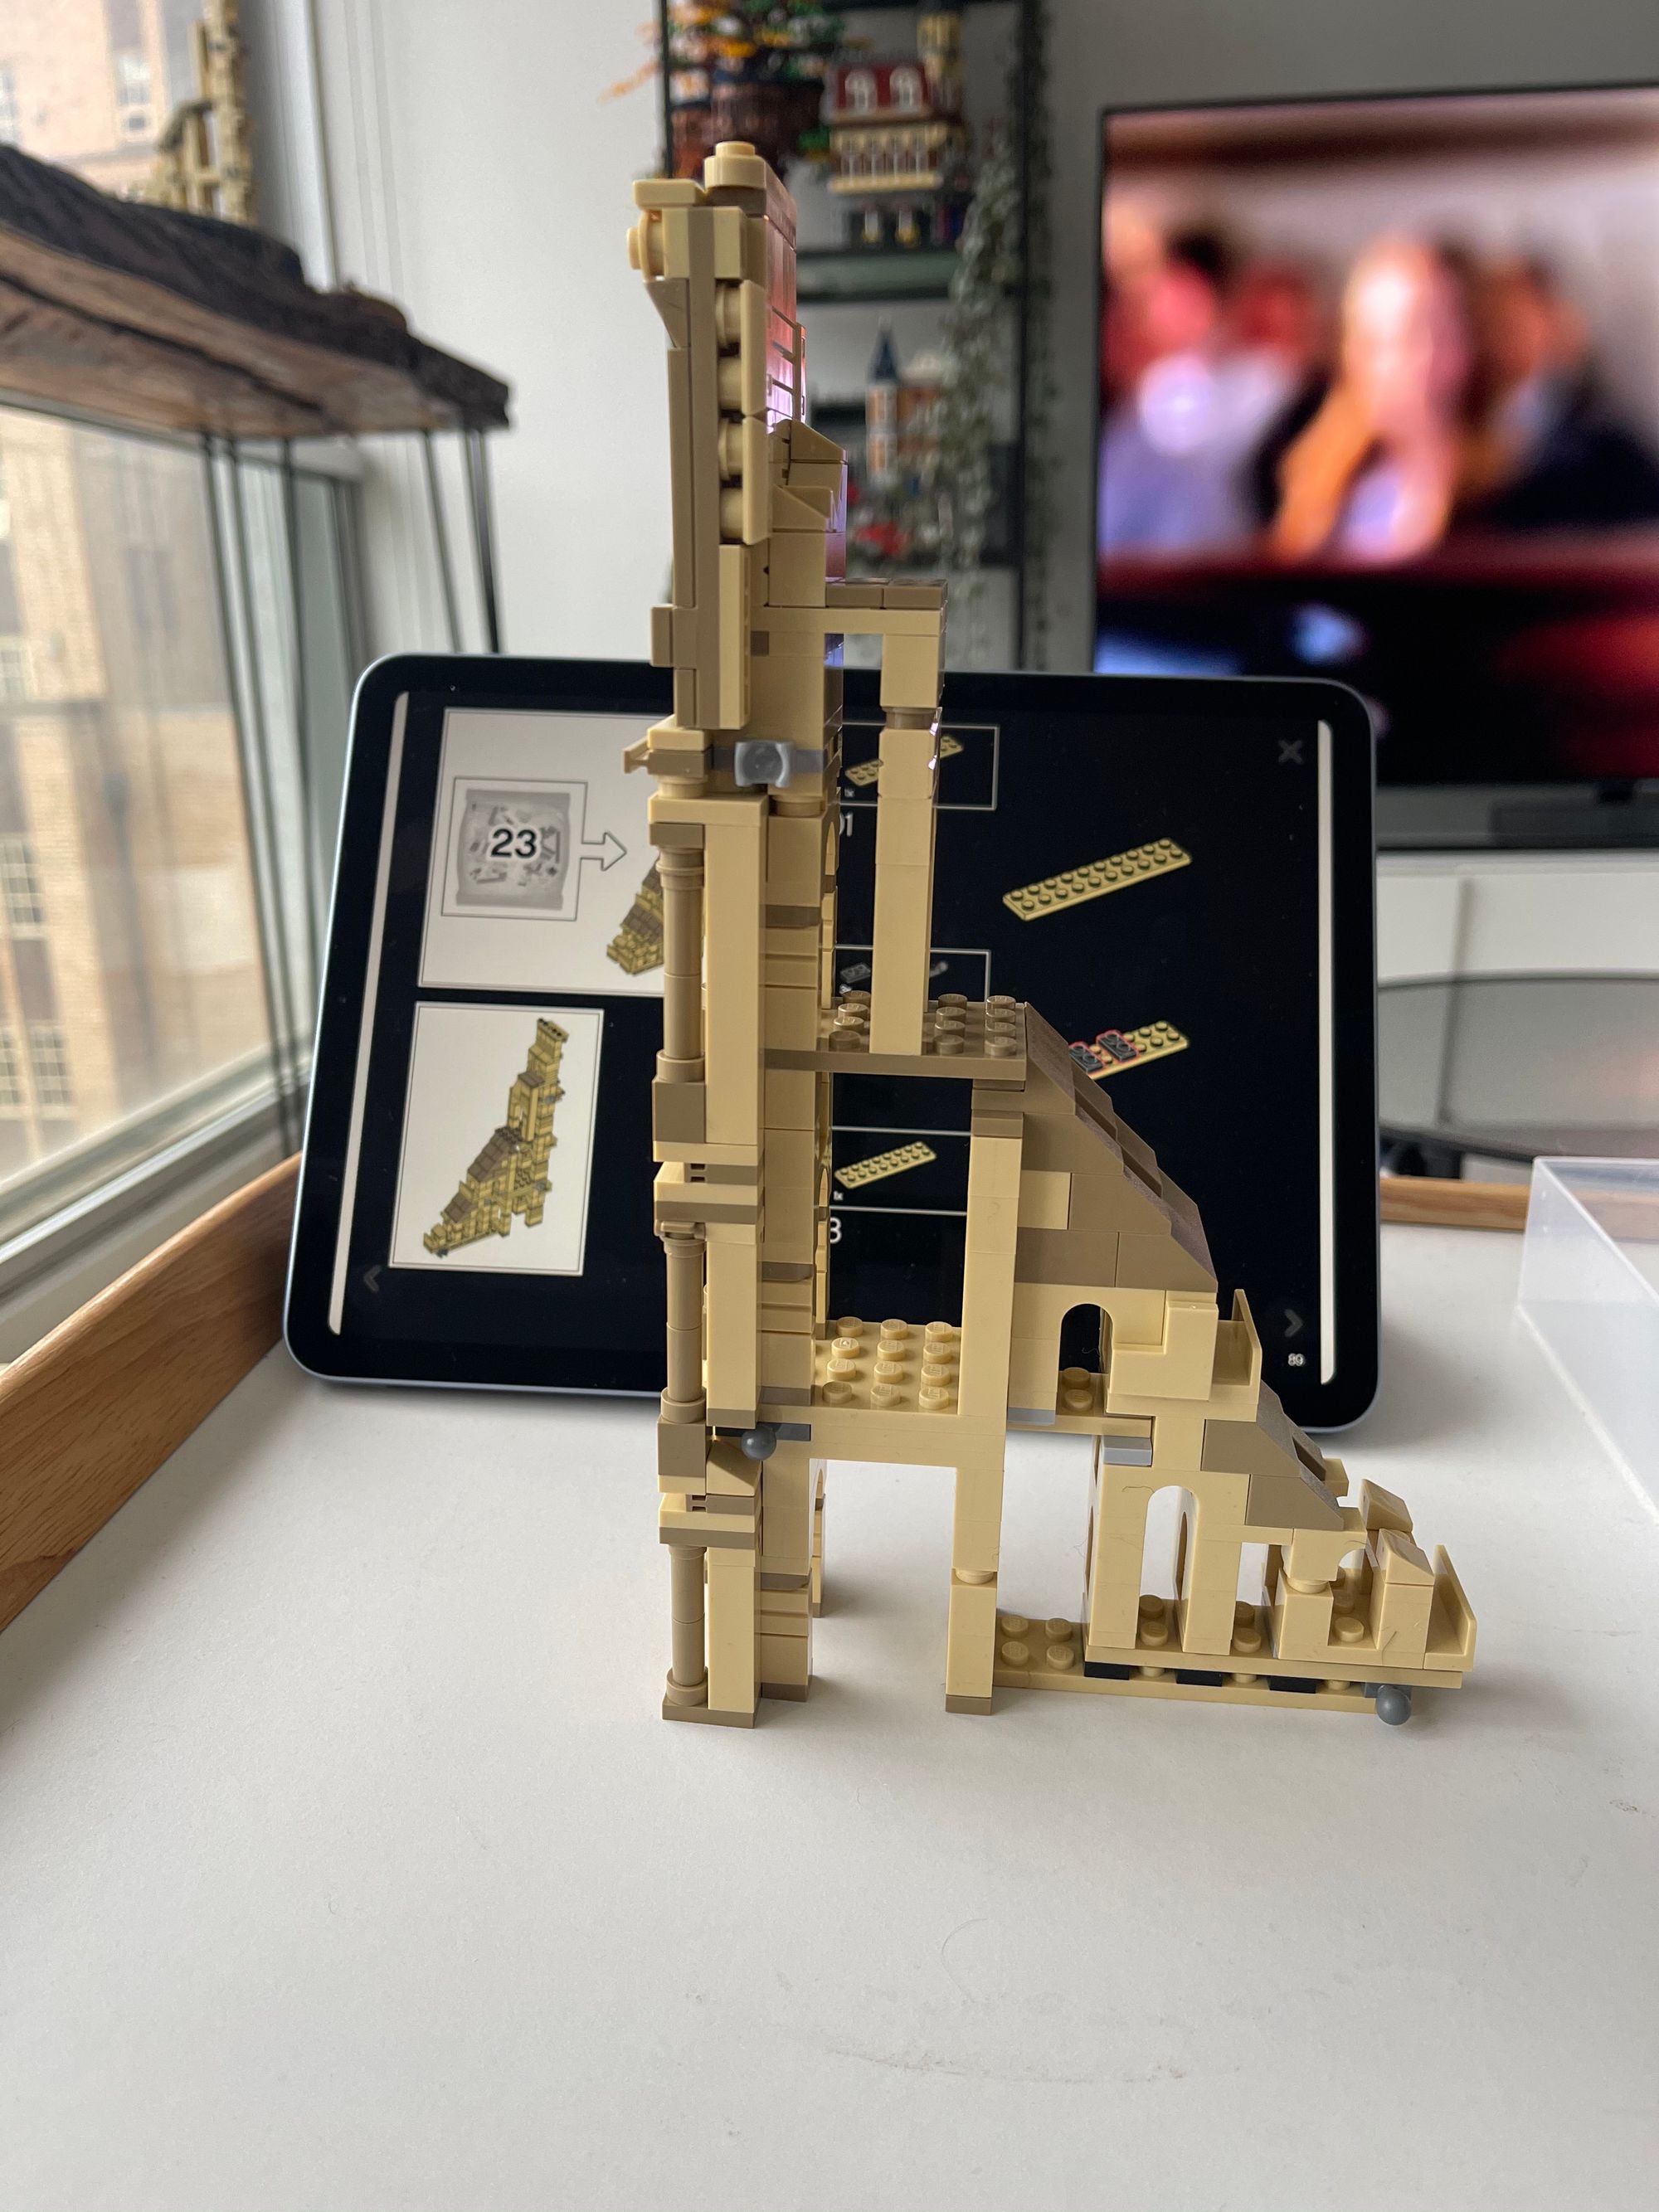
Bag 23

Almost the same as bag 22, but a bit skinnier with some slightly different details.
Bags 24-28
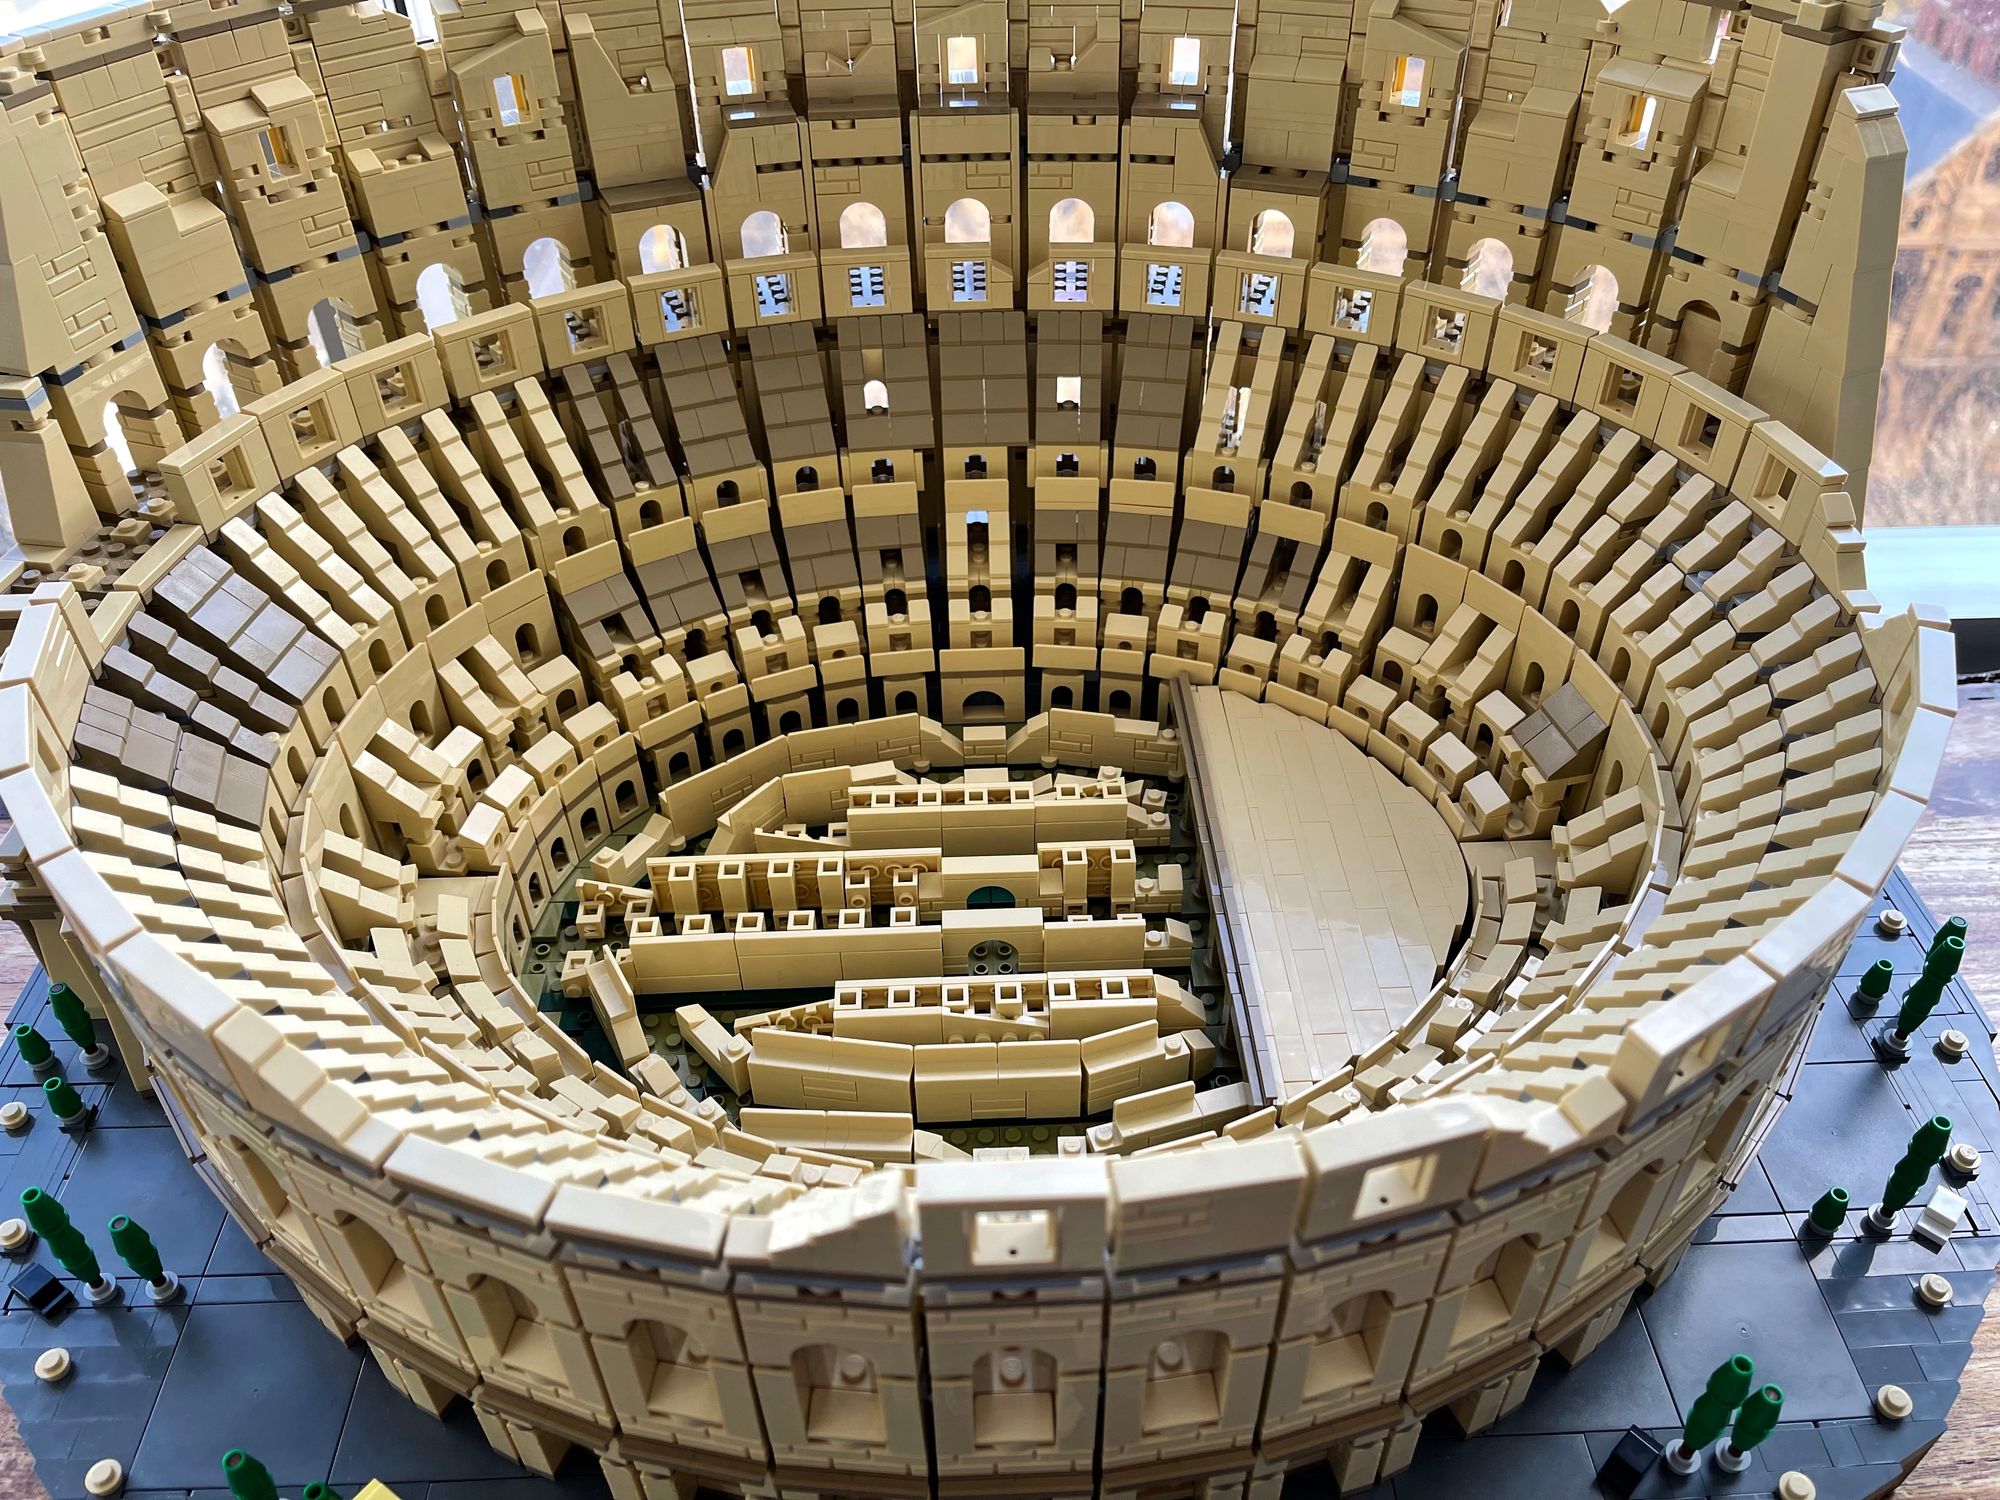
There’s more variation on these uprights, which is cool. Not quite as repetitive. They all have minor differences in details, perhaps because this is the side that the viewer will mostly see the inside of by design. You can see that some are more ruined that others, which is such a beautiful touch.
It also means you can’t just memorise the steps and sleepwalk through the build. It’s quite lovely, actually, imaging all the things the real structure has seen to make these minor differences, all the people who have been there who left their mark on this stone that has stood for so long. All the weather, the animals. It boggles the mind if you think about it too long.
Box IIII
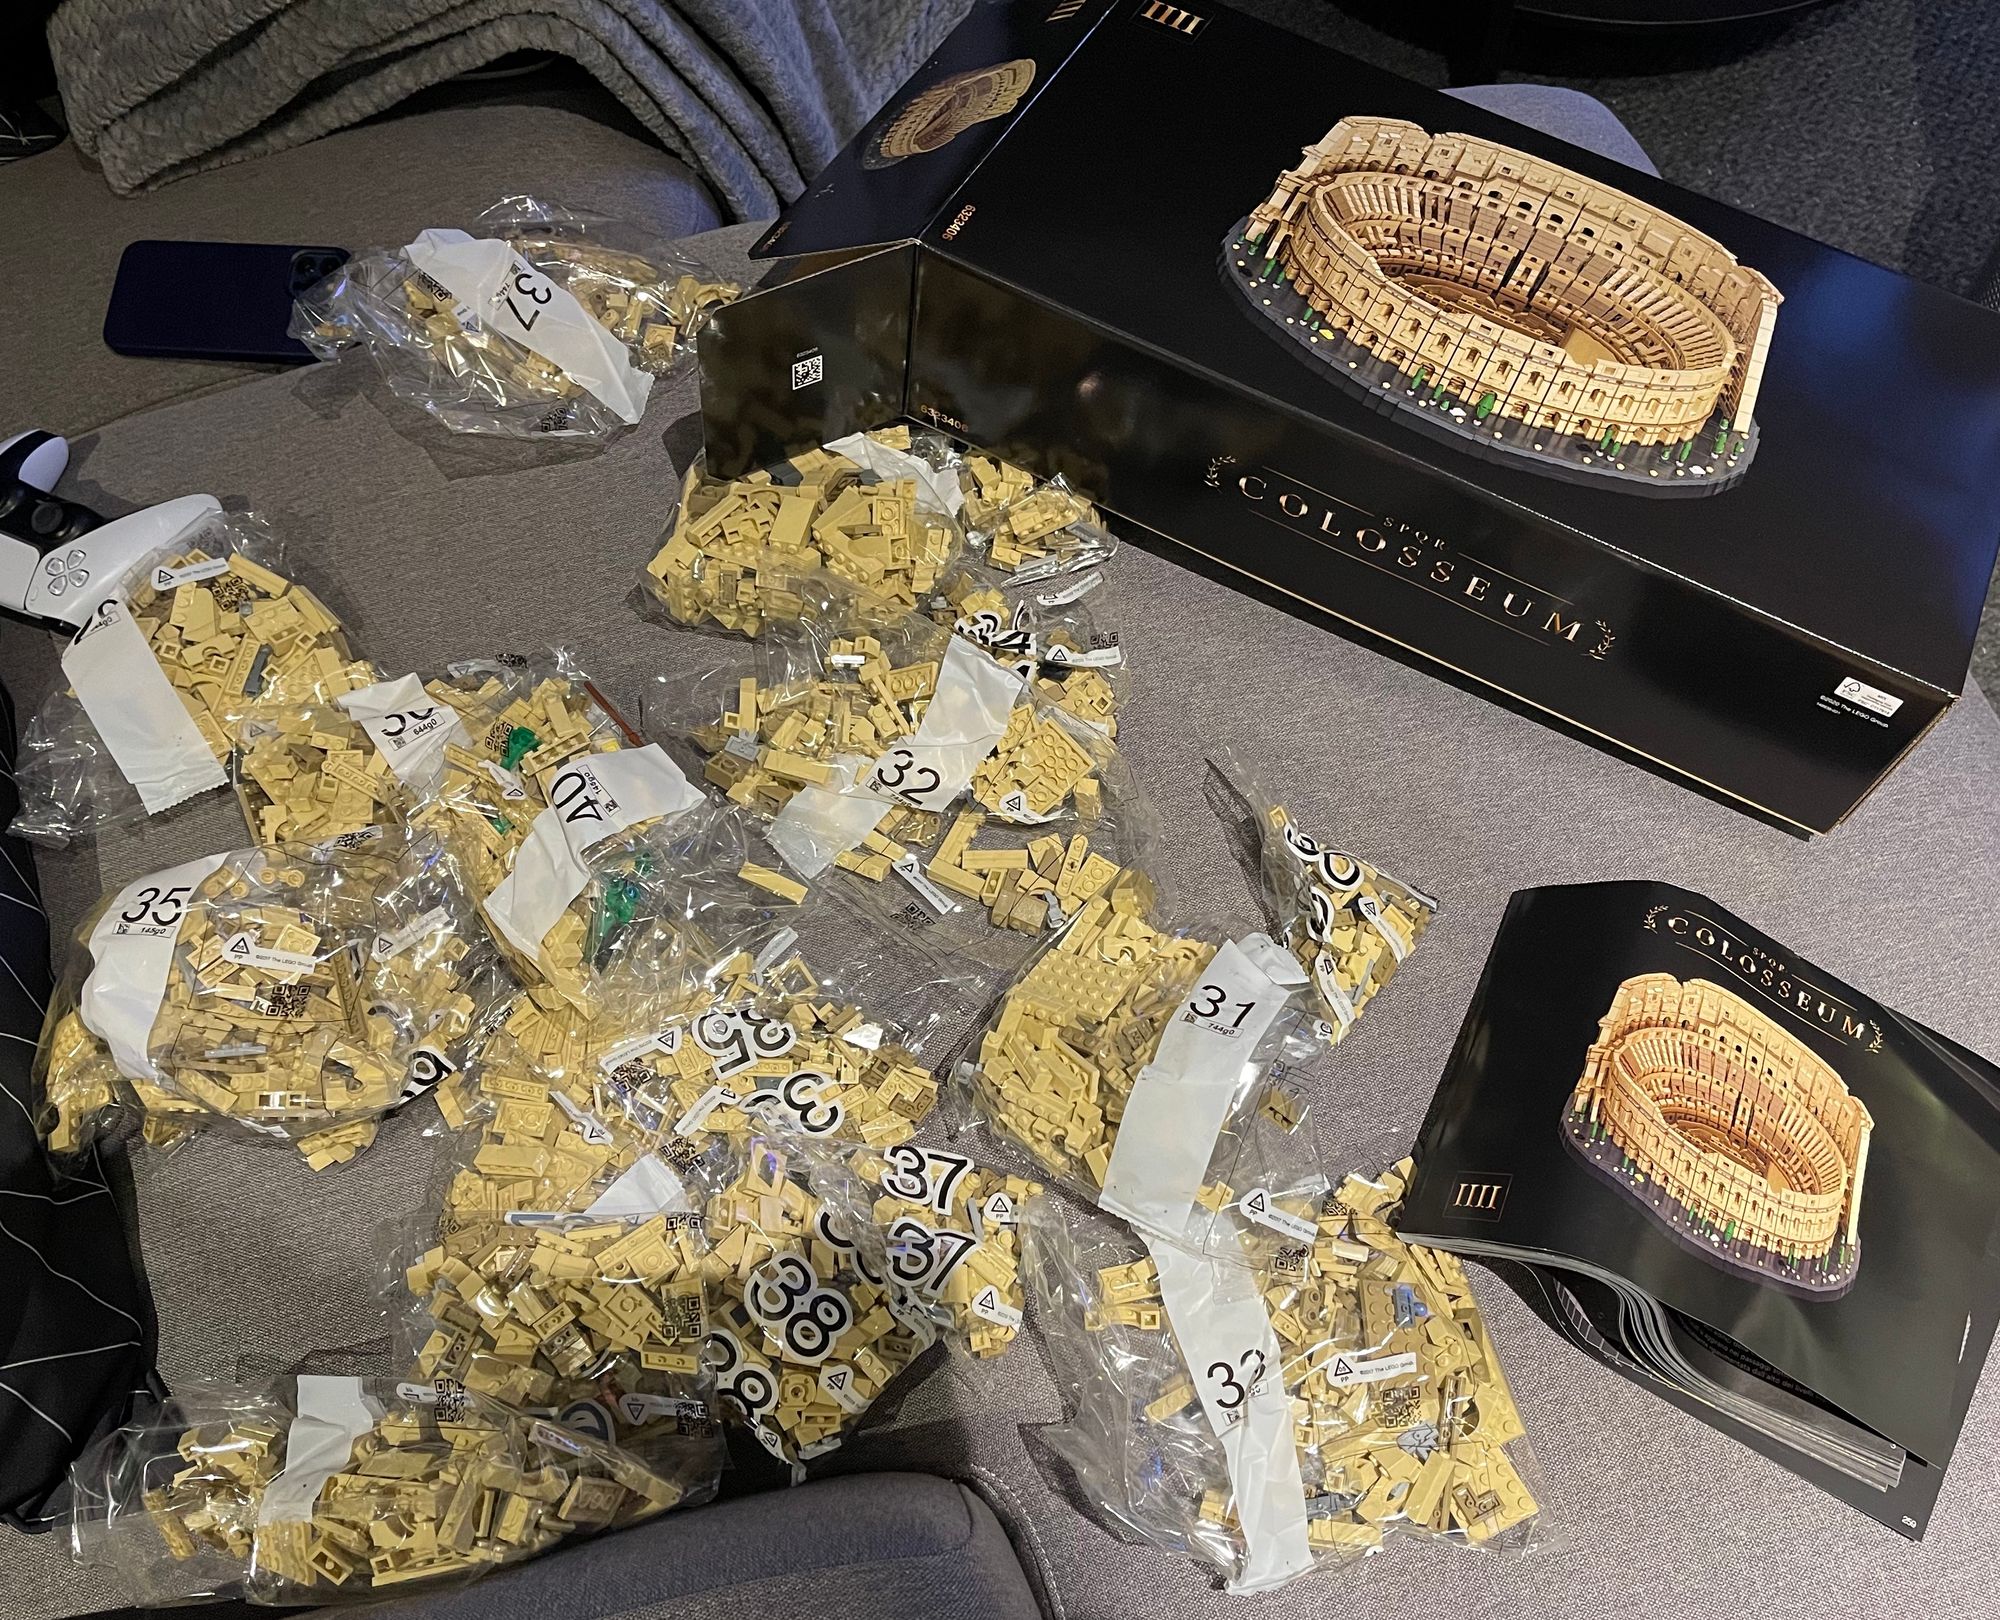
Once again the book is really smashed up. Extremely unimpressive for a premium set. So, keep that in mind. The first wasn’t a fluke. Here we’ve got 29-40, the home stretch.
Bag 29
There is yet another upright.
Bag 30
Another upright and we attach this crop of uprights to the base! It’s all starting to look really impressive. Before it looked a bit lame and I was worried about how I would display this kinda weird thing, but now I’m starting to really like the way the whole build looks.
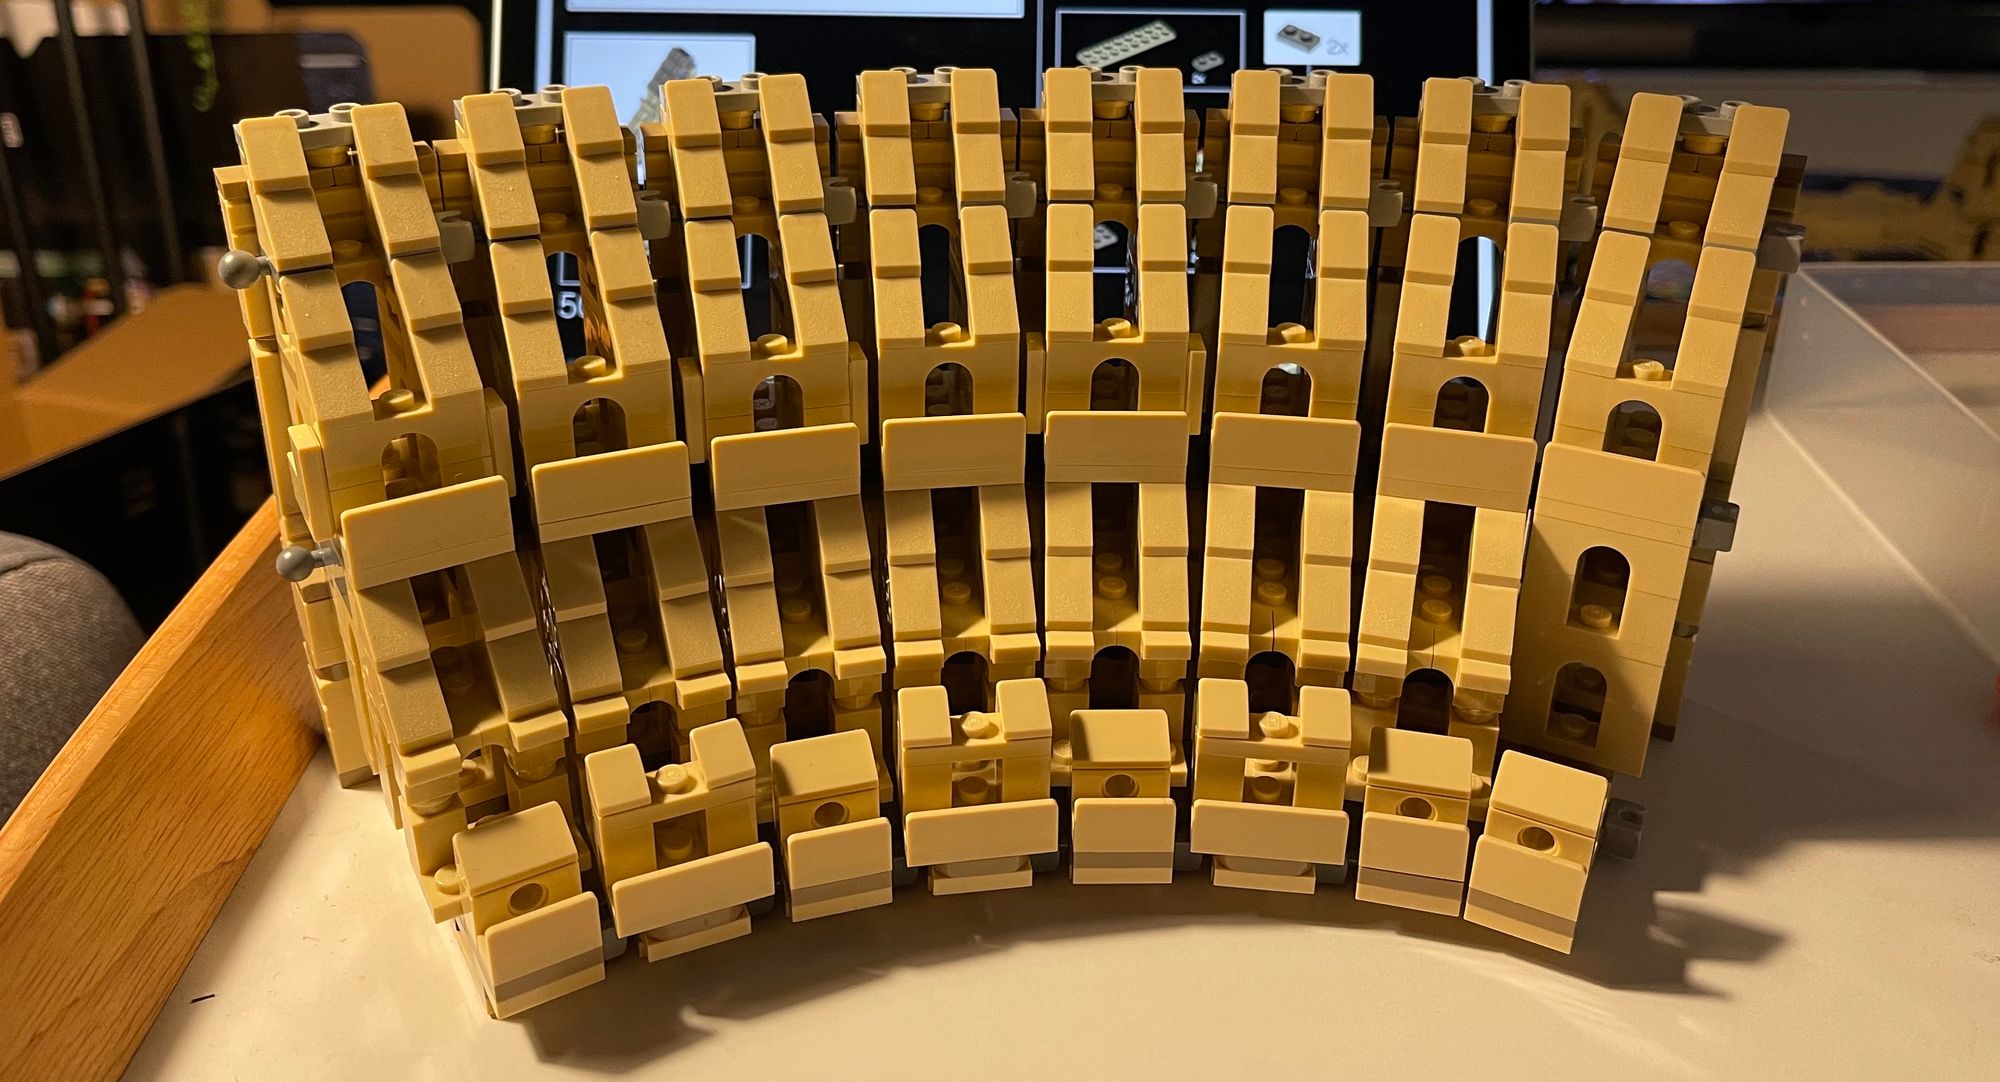
Bags 31-36
More uprights, but each one is just different enough that I’m continuing to enjoy it. I’m still loving seeing how each one has collapsed slightly differently. There are lots of little details to notice when you look at them all in a row.
Bag 37
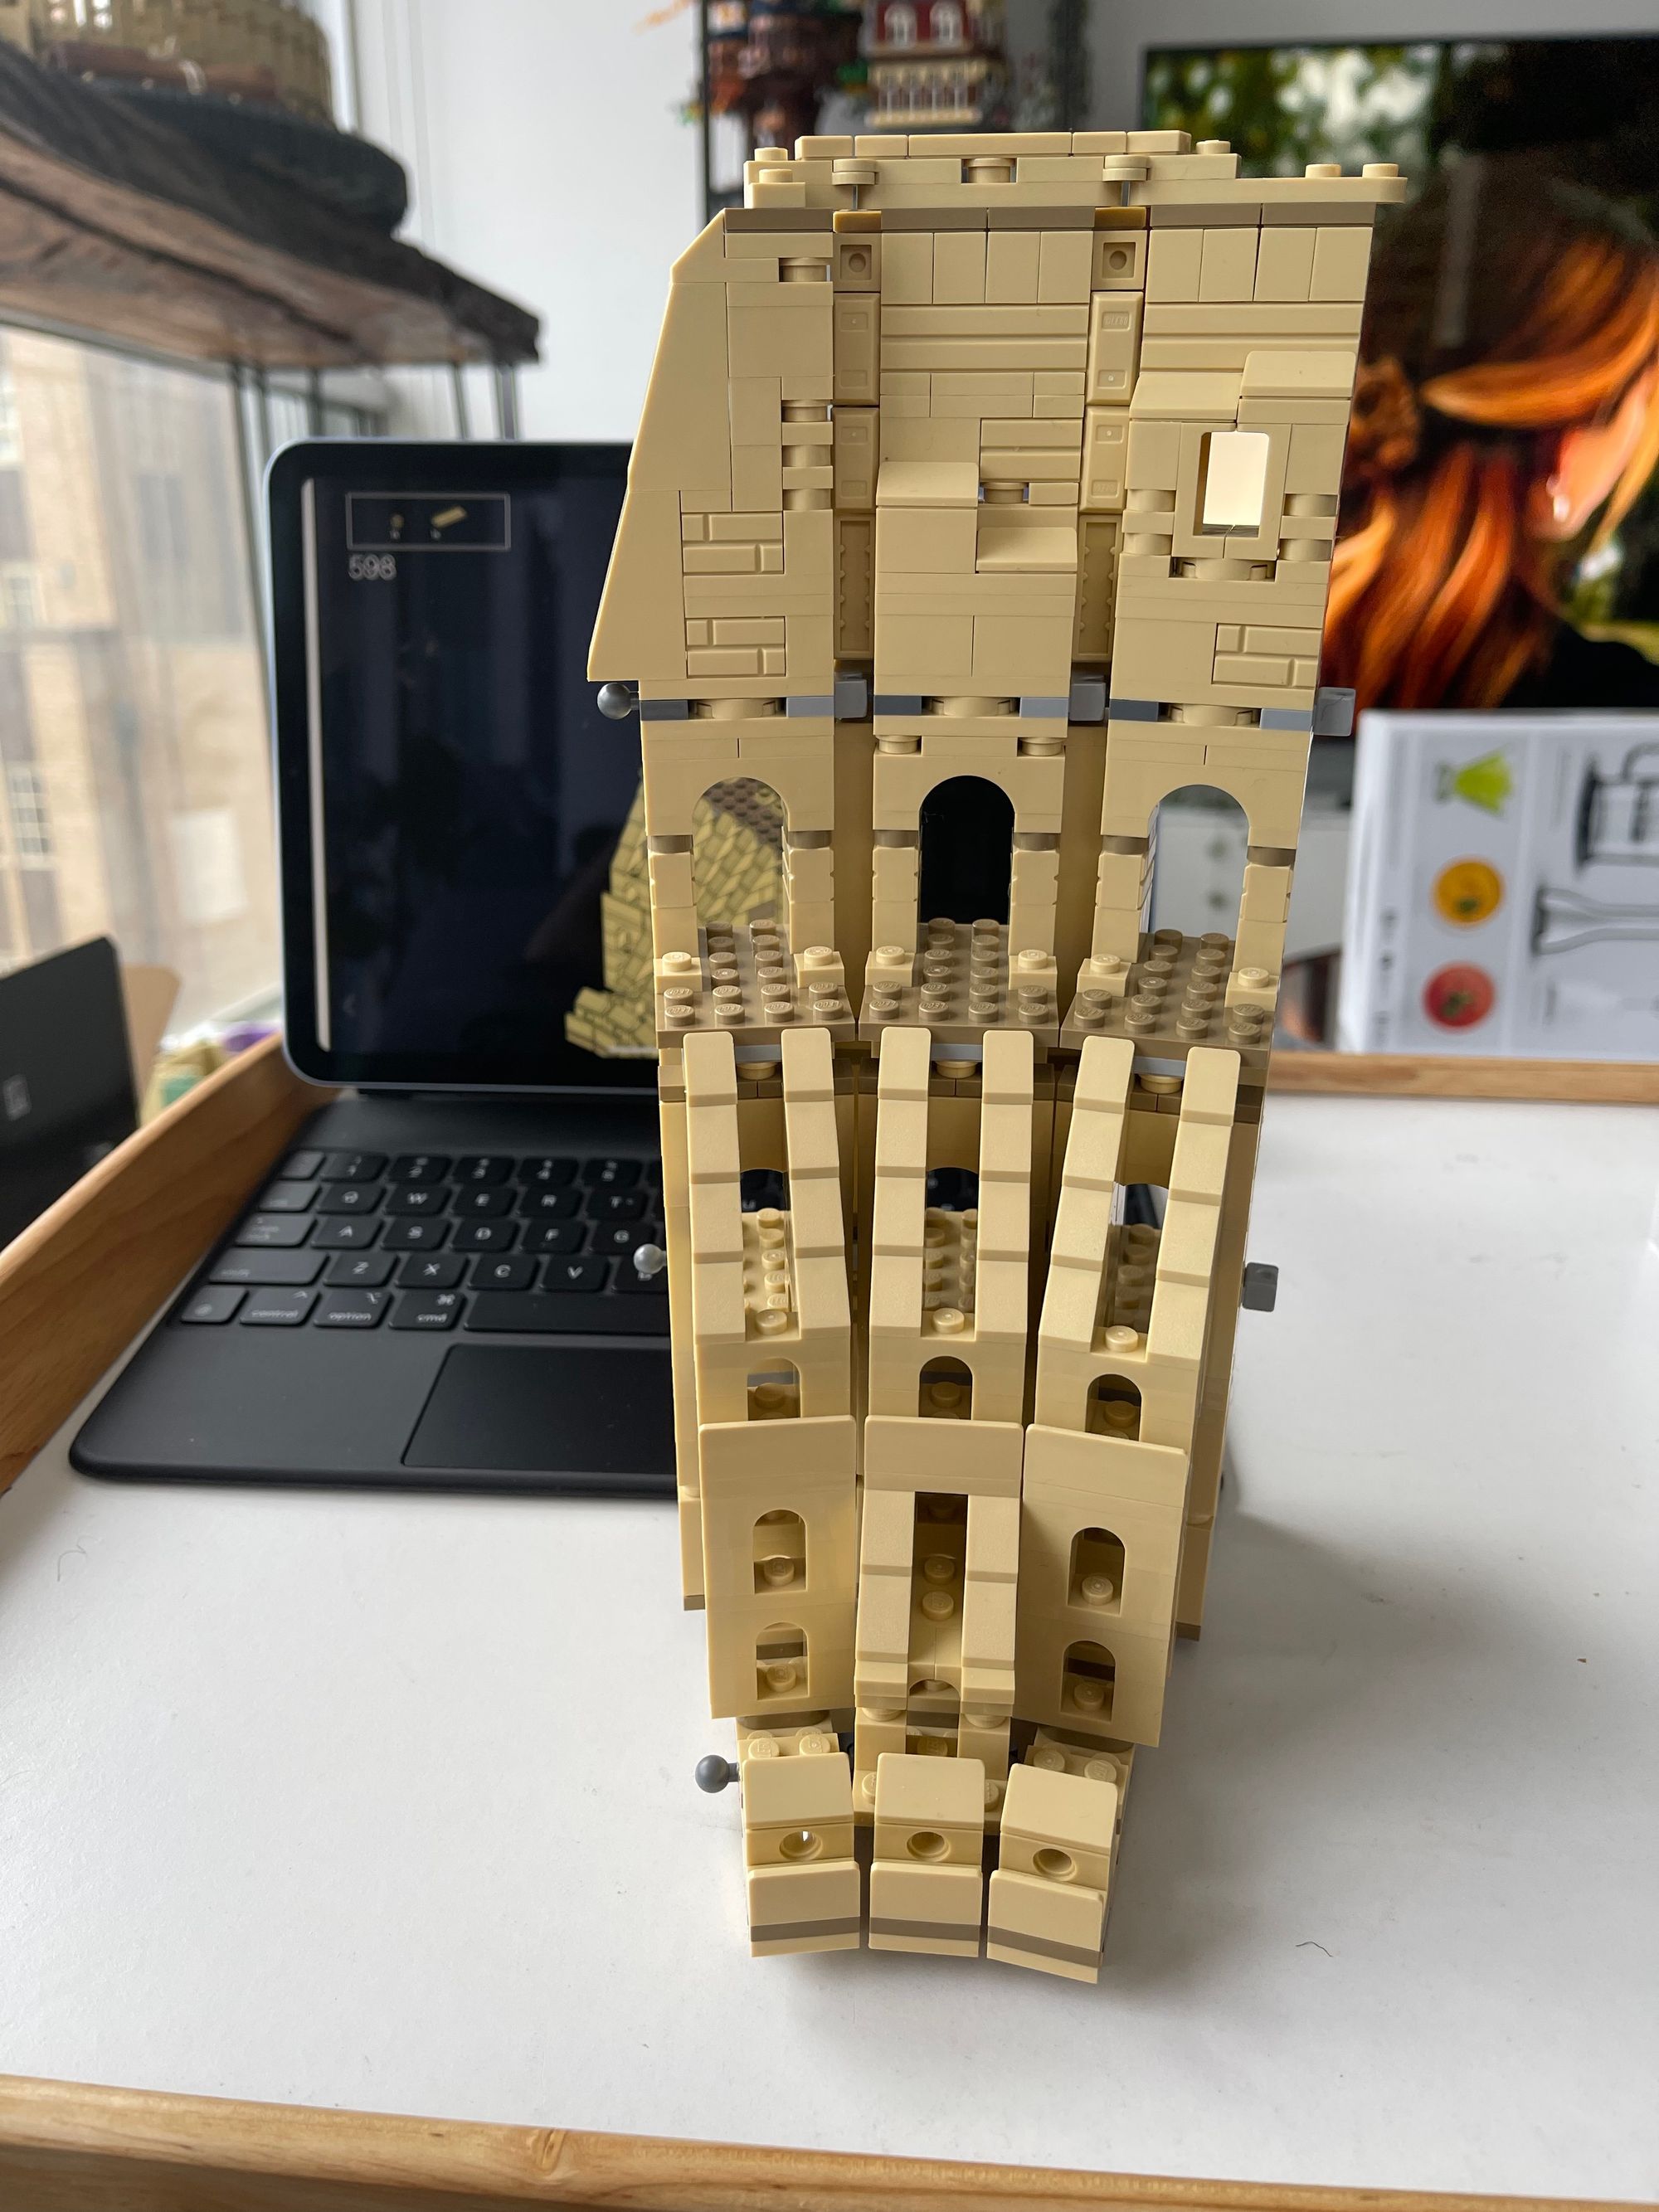
The most pieces in an upright so far. Make sure you pay close attention, because while the sections are largely similar, some of them have subtle differences that are frustrating to fix afterwards… Yes I did have to take a large chunk of it apart and reconstruct it.
Bag 38
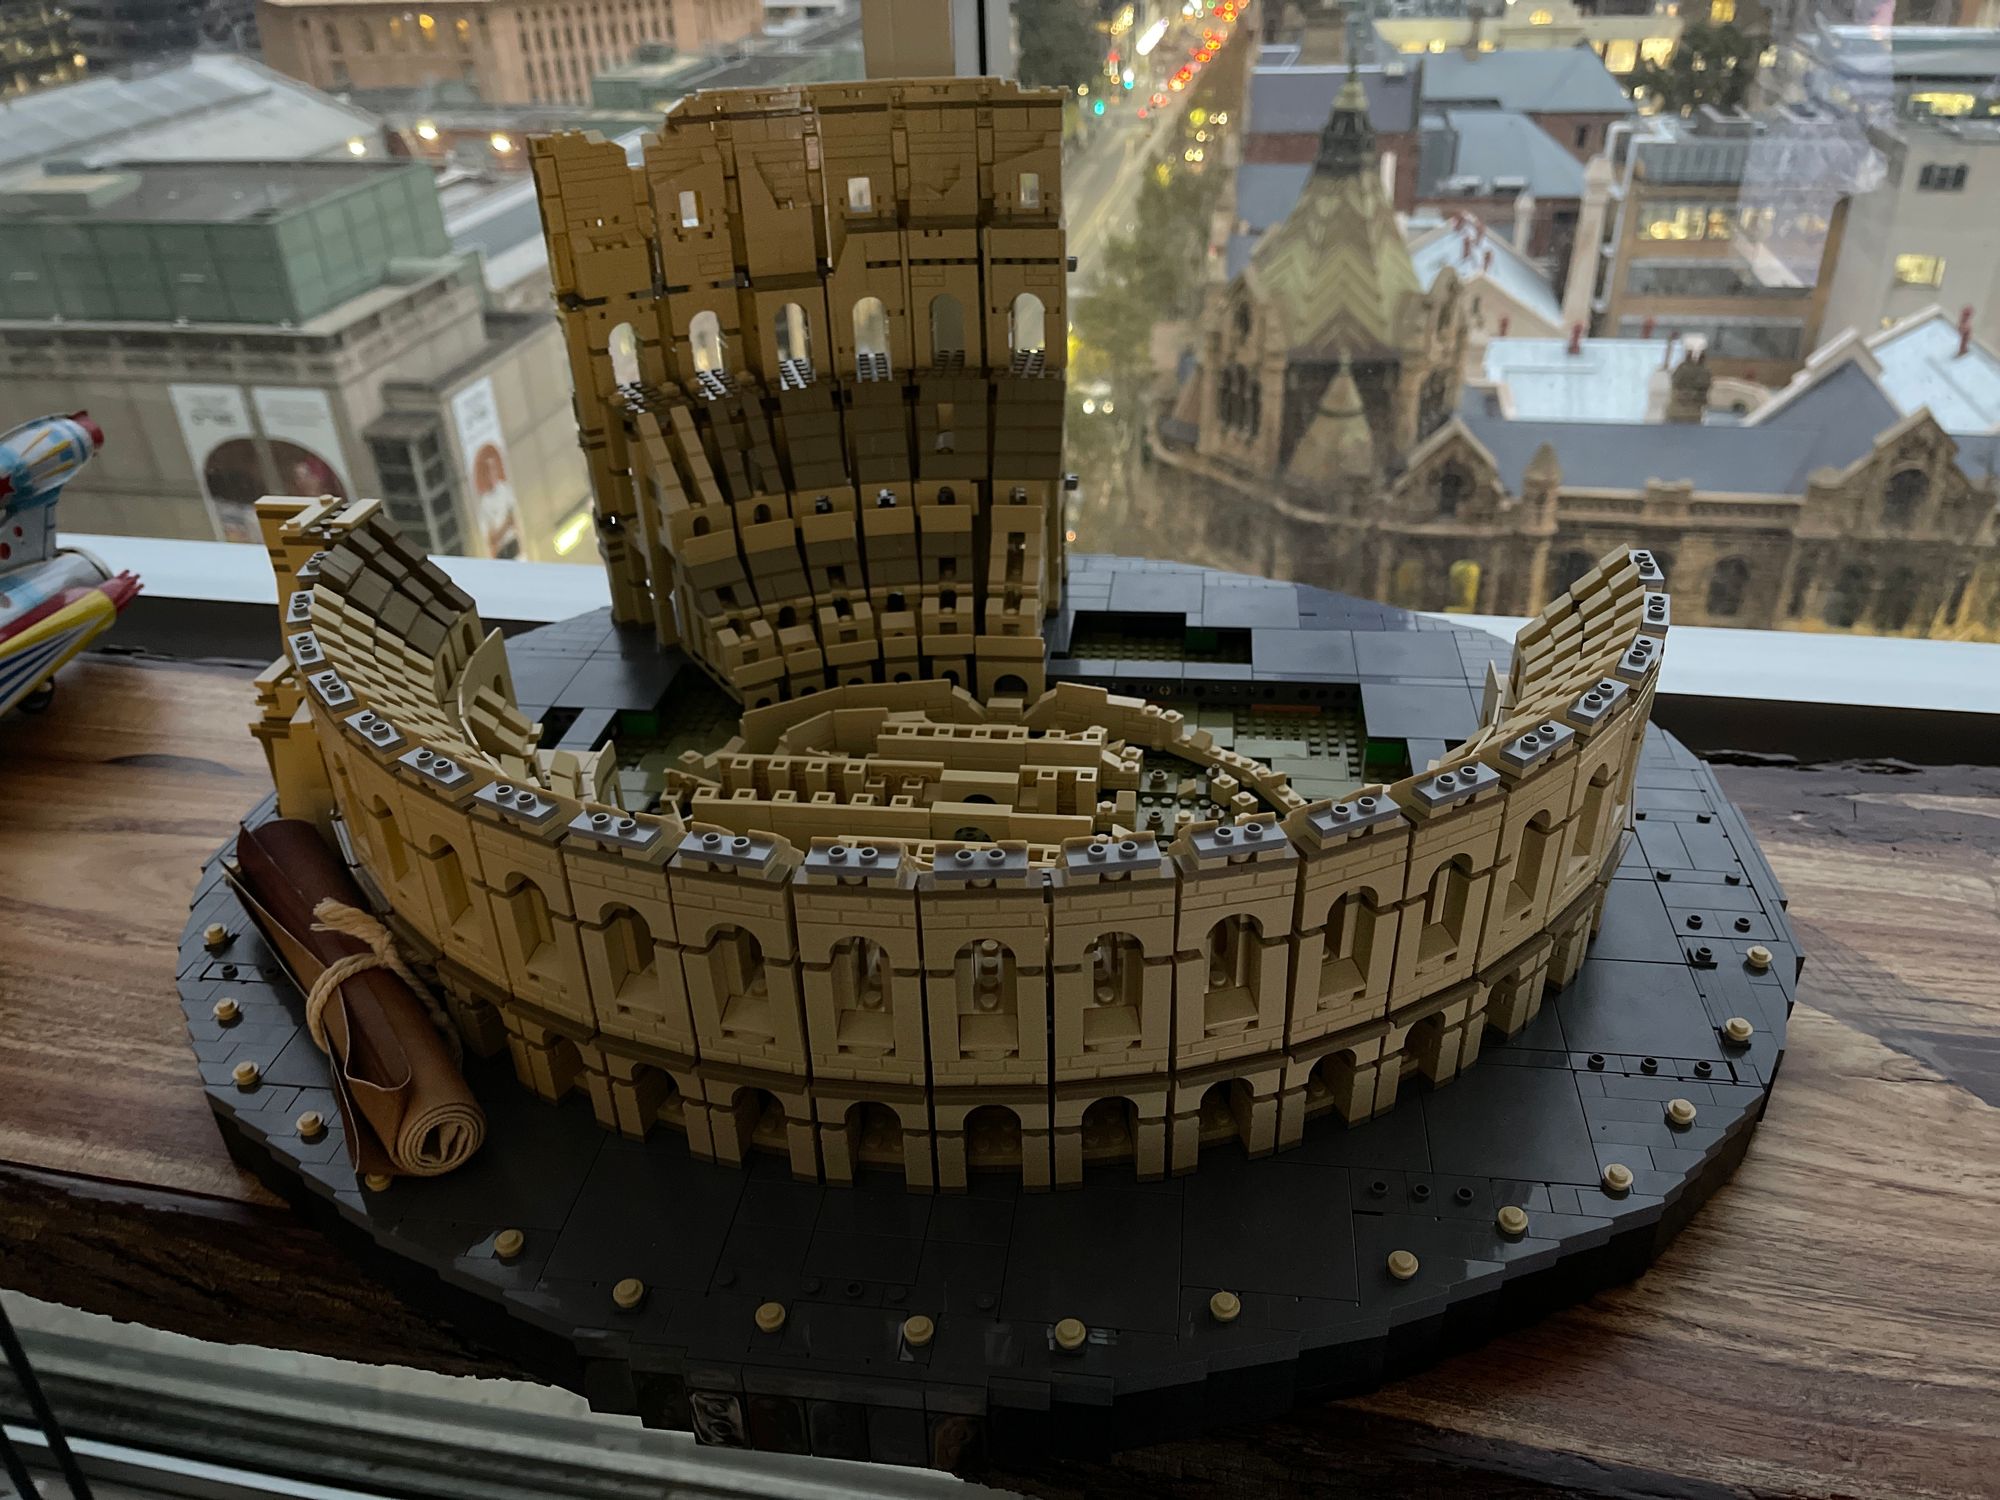
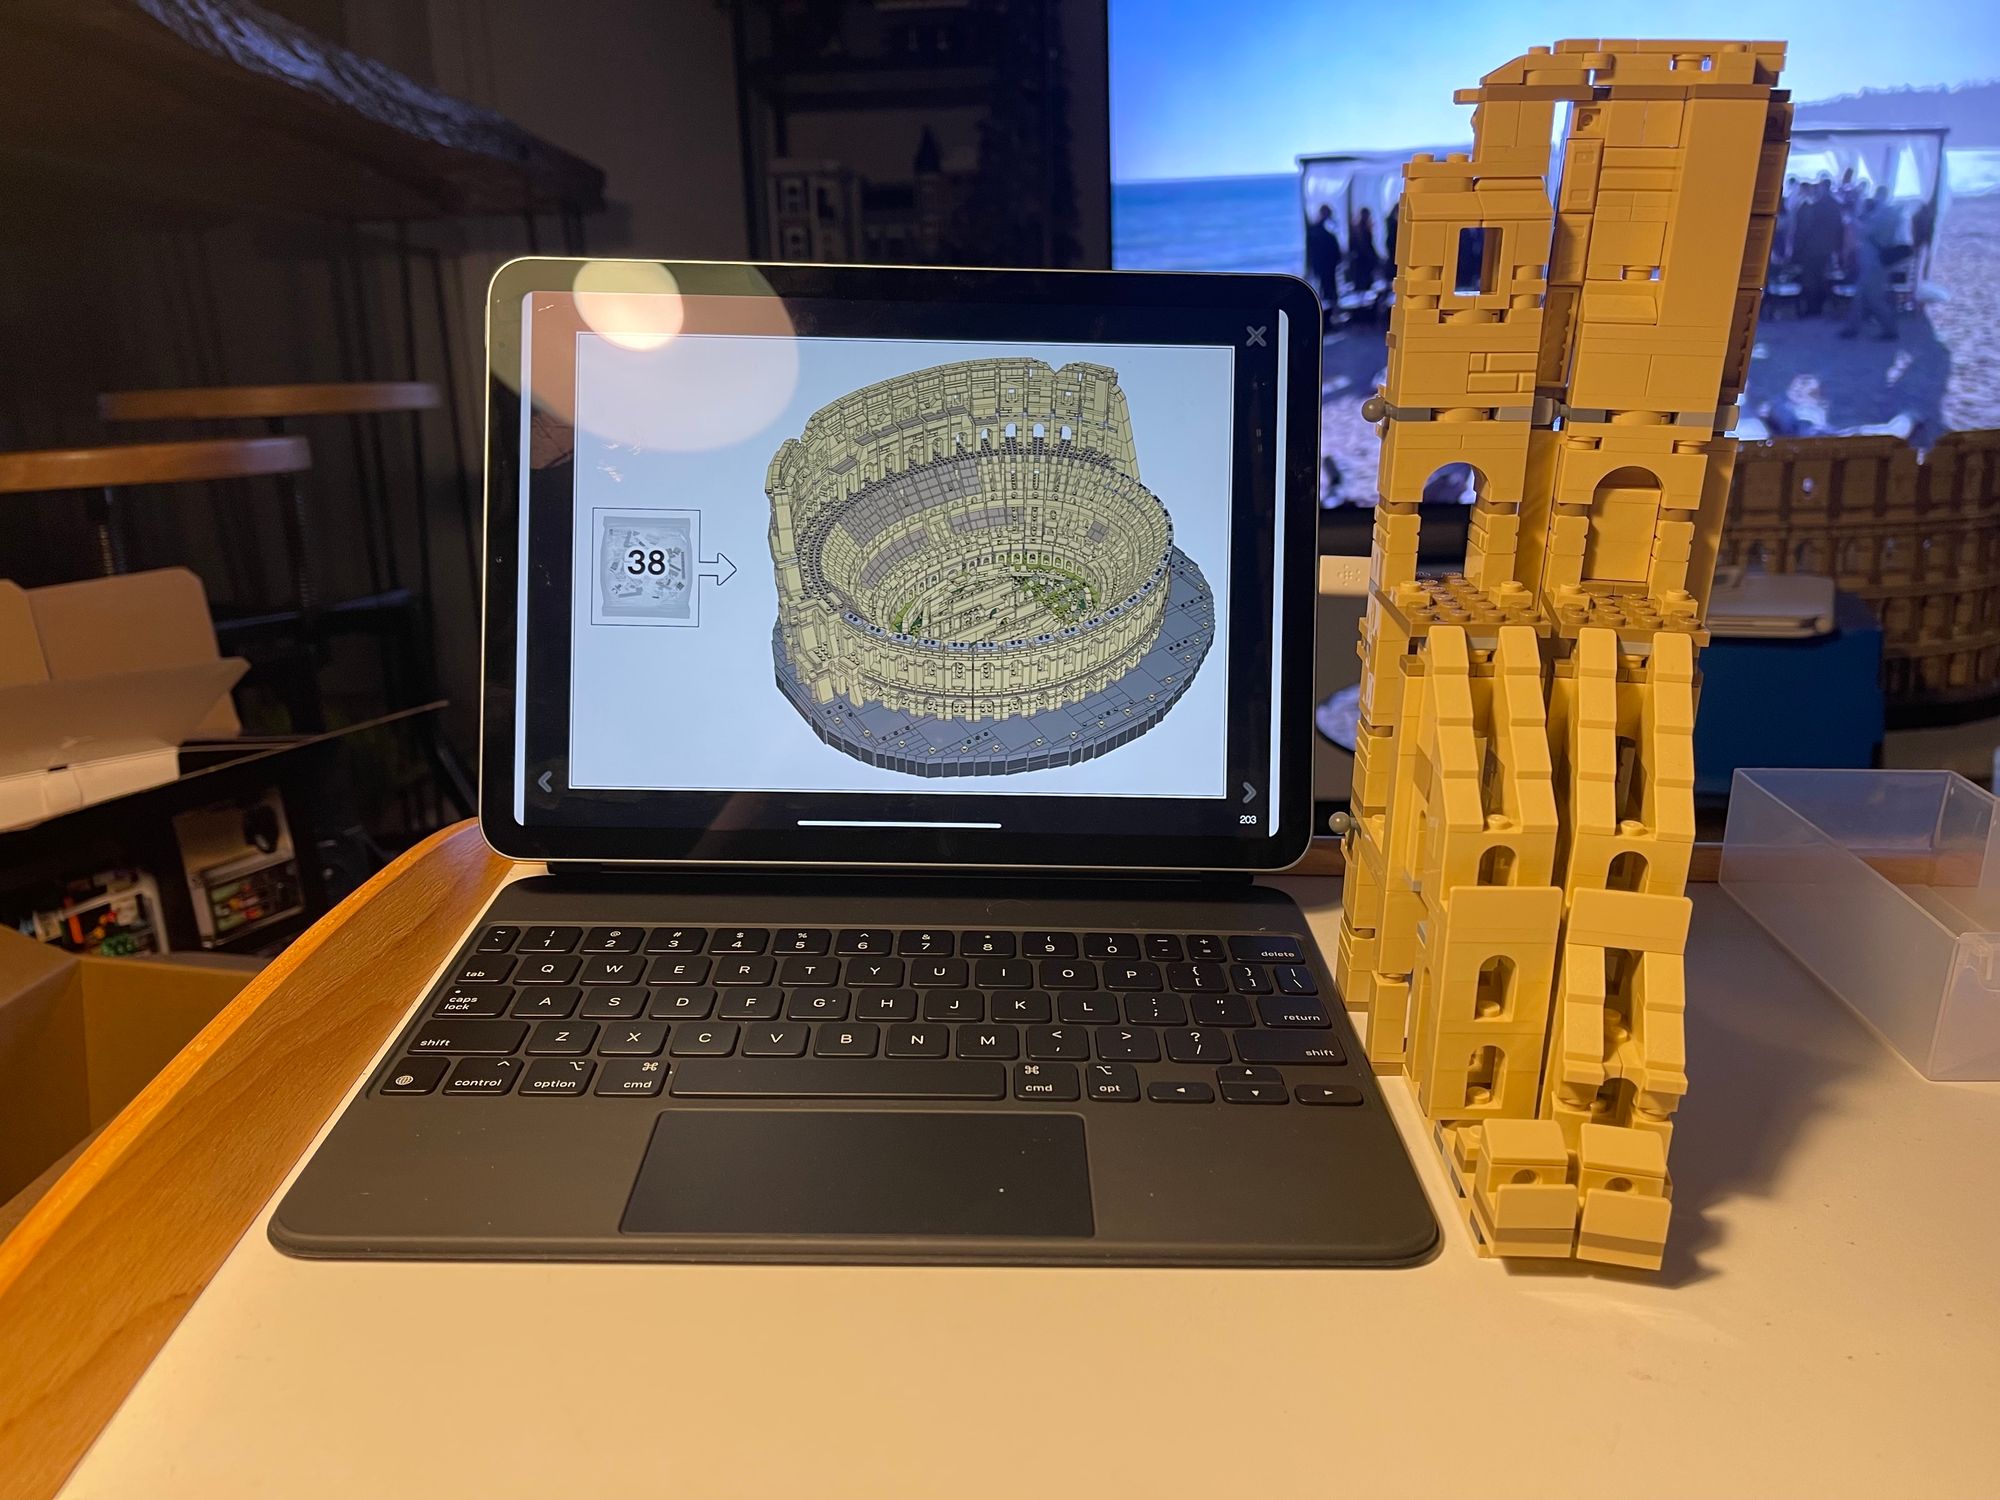
Sweet Jesus this is a lot of pieces. That is the first thought when you open these two bags in 38. Many, many pieces. This one is the ruined edges. It’s two solid uprights that taper down, signalling the end of the upright journey. It looks *so* cool once the final uprights are put on the colosseum. This is what I’ve been working towards for two months, and I think it was worth it.
Bag 39
Now it’s time to fill in the extra little details and tops of the low uprights using window frames and a bajillion tan 1x1 bricks. These are the parts that you put on the naked grey tops from 10-20 with a few extra features sprinkled in. It’s a lot of tan 1x1 bricks, but after months of just building the stands, these fiddly bits were a welcome change.
Bag 40
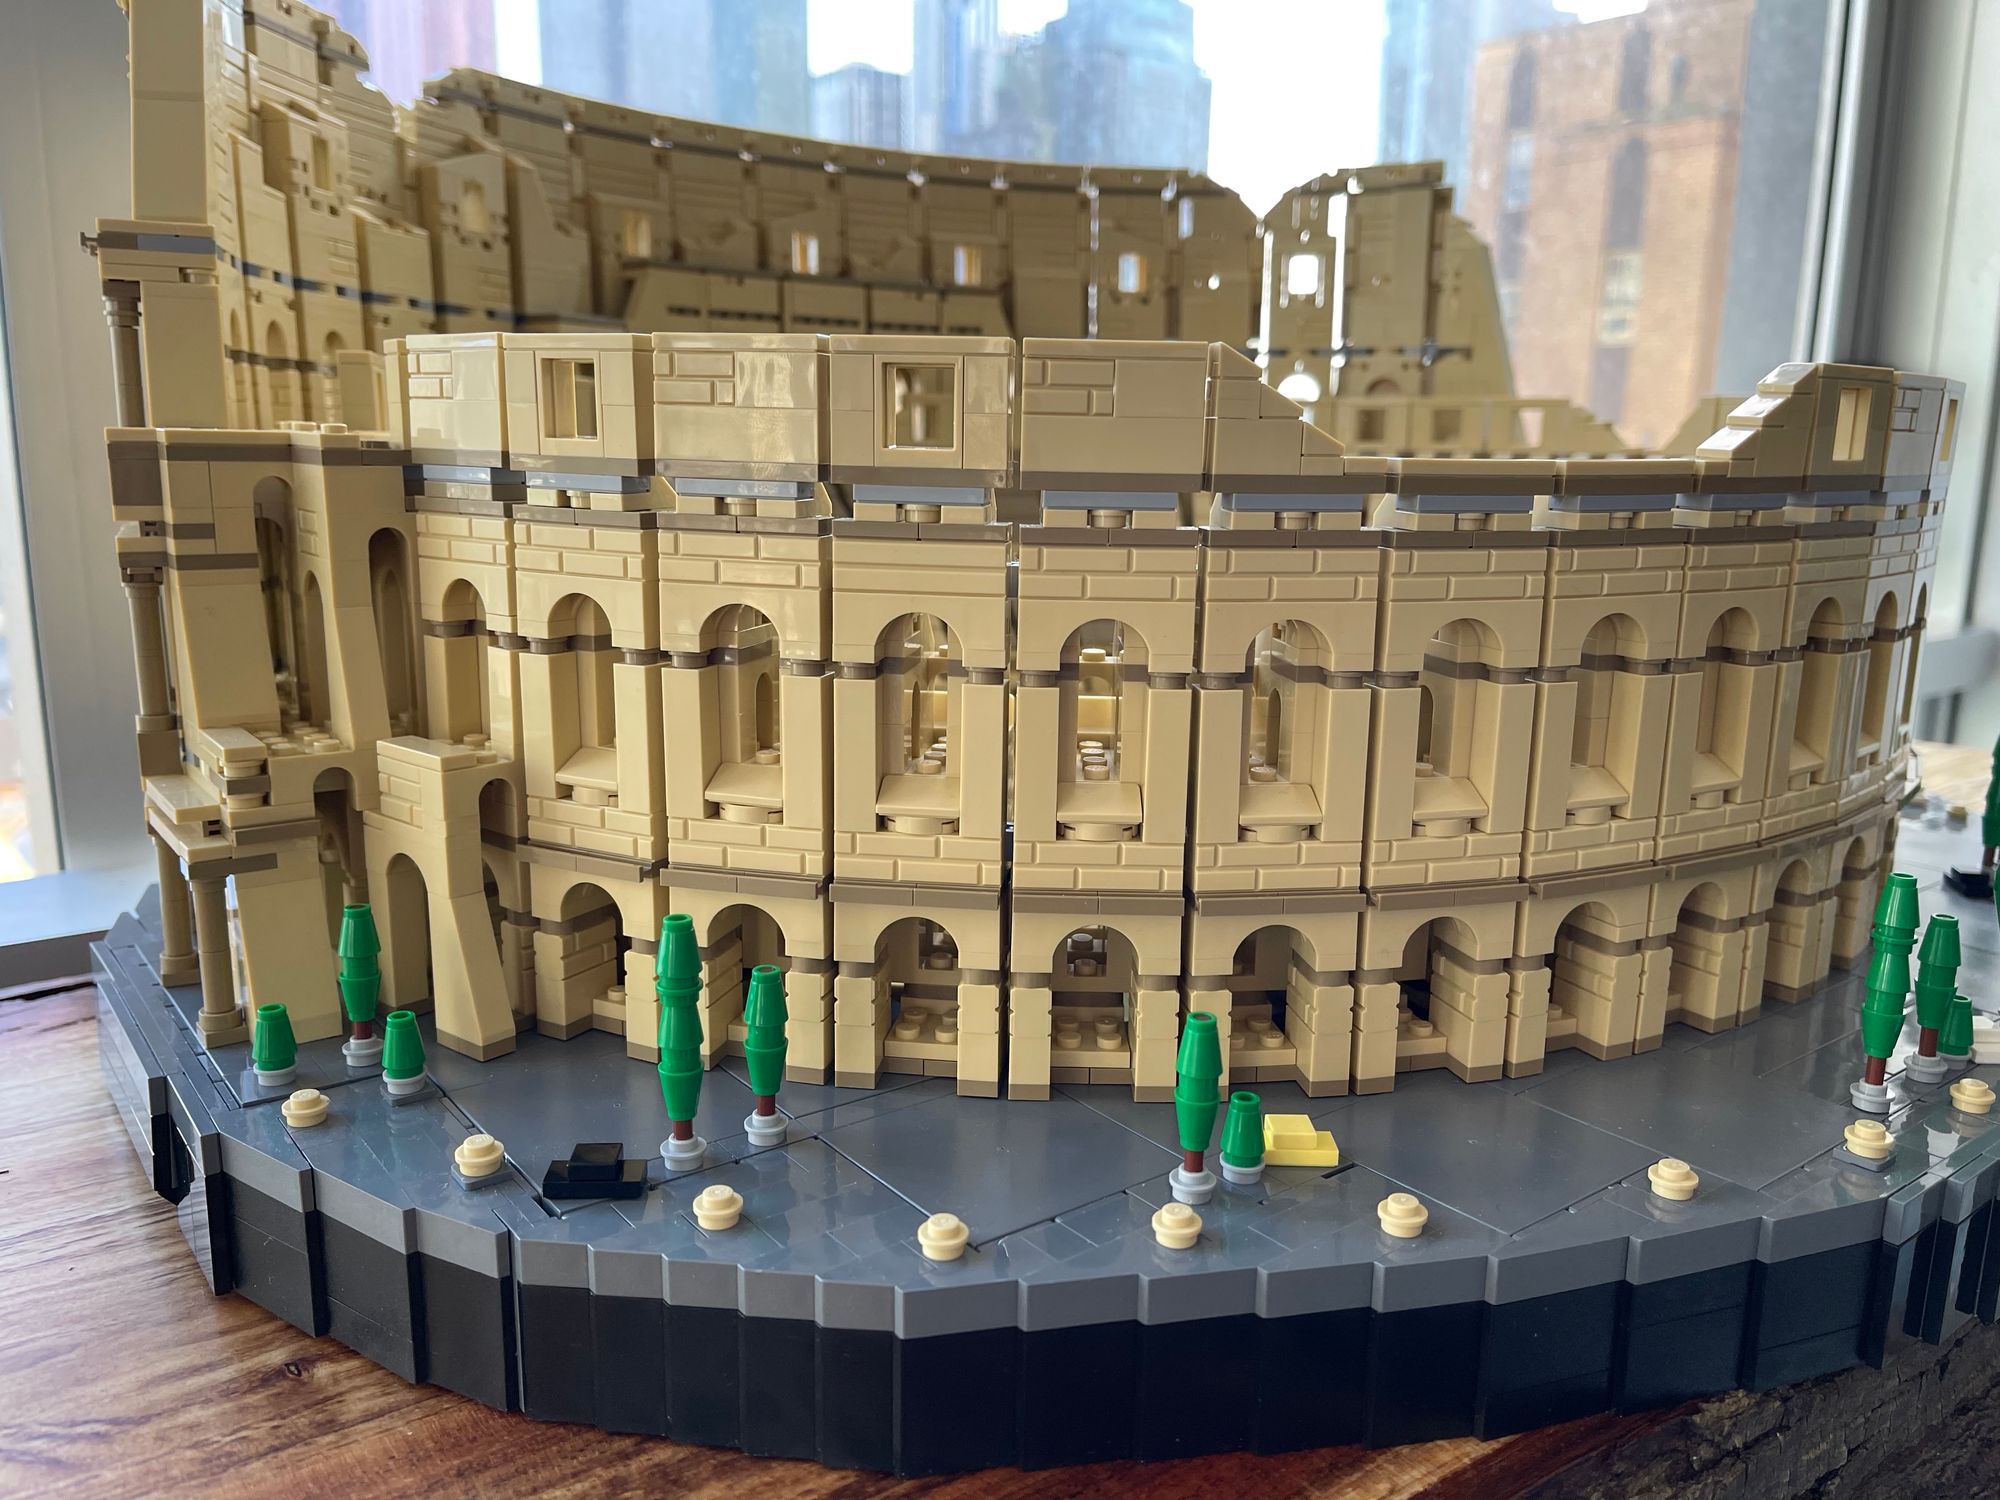
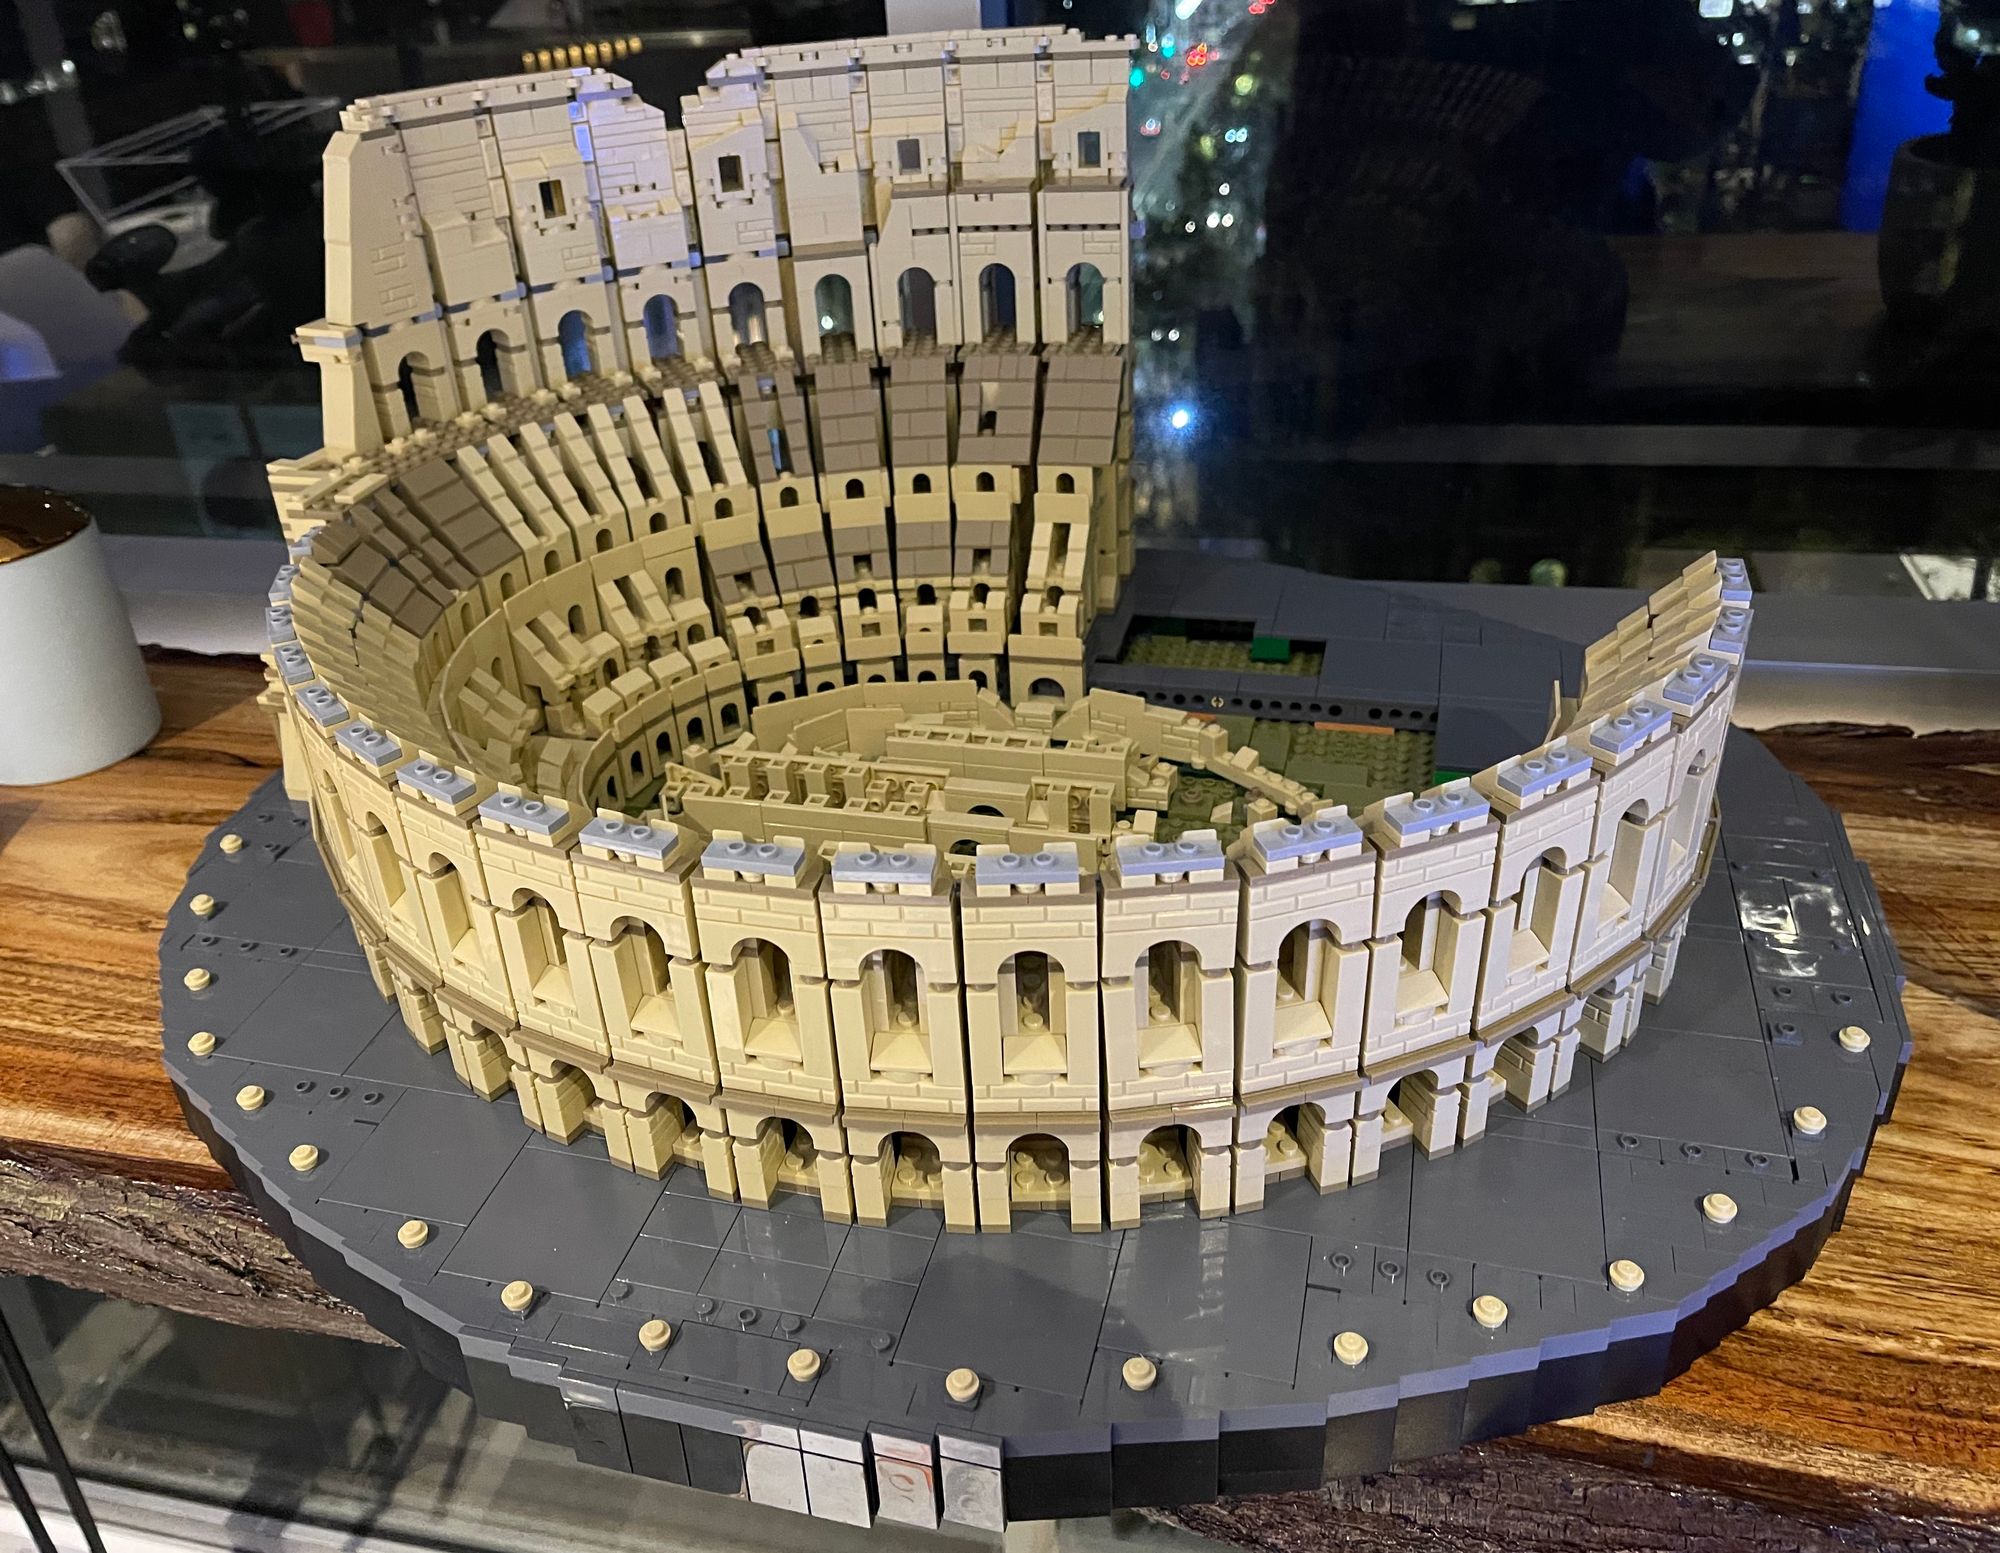
Now that the actual Colosseum is finished, it’s time to add the little trees and cars that contextualise the set. This is all about the features of modern, daily life out the front, which really show the scale of the building. There’s also the cover for the right inner portion and then it is DONE!!
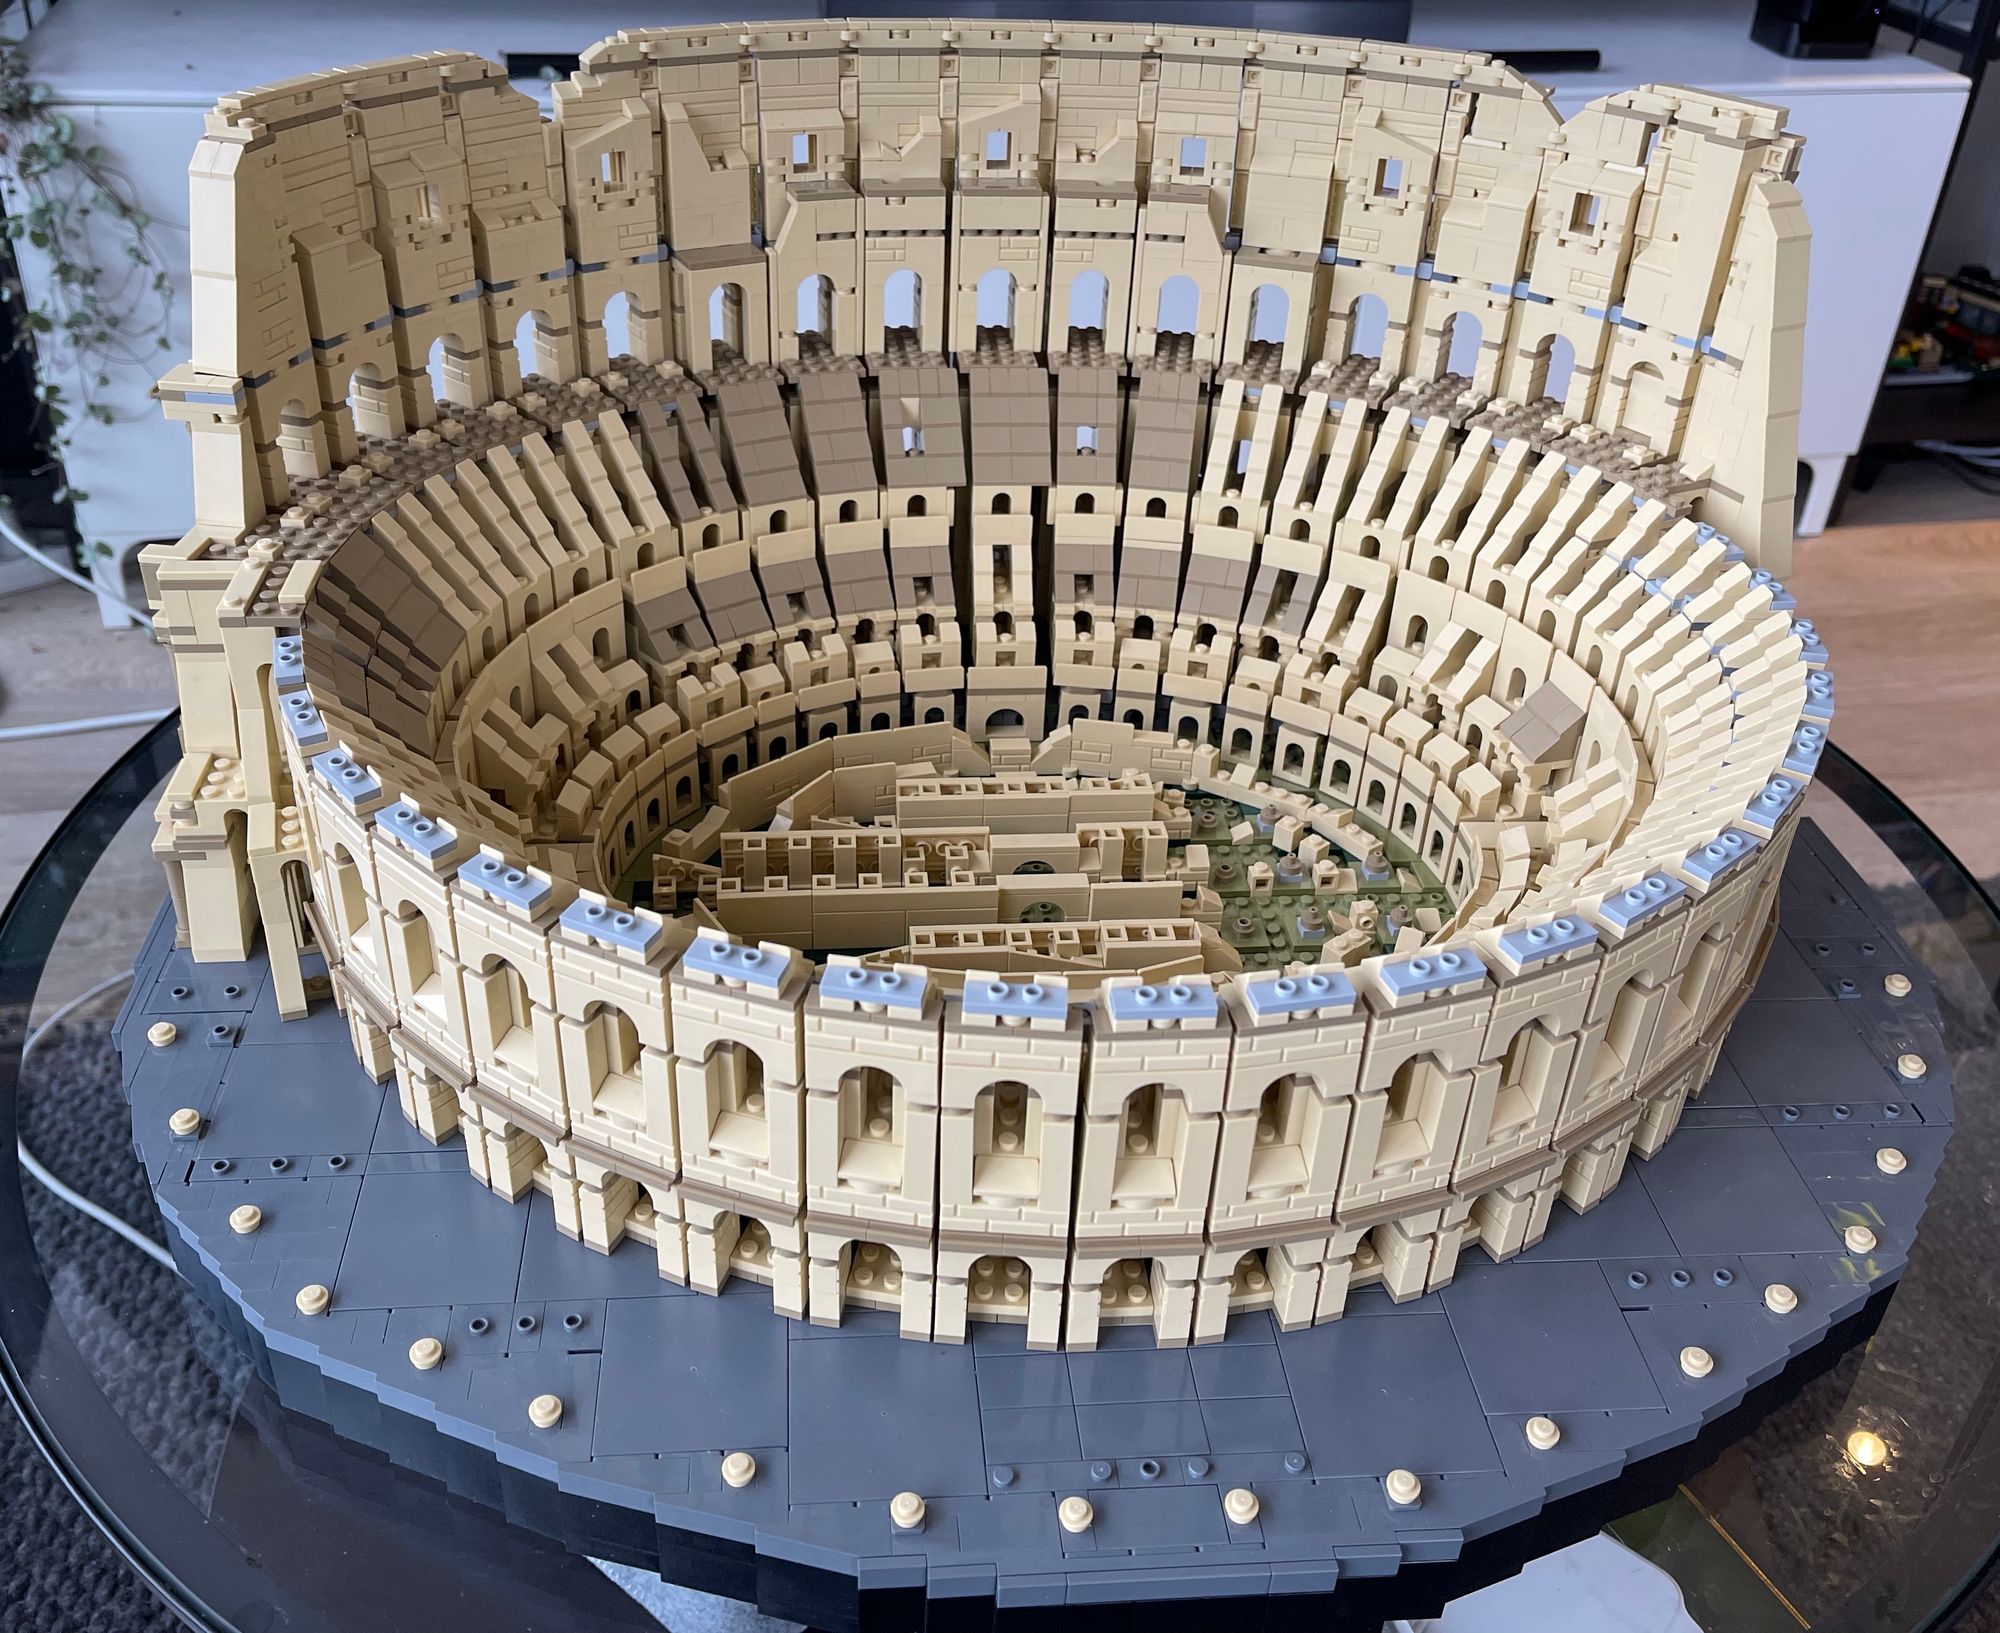
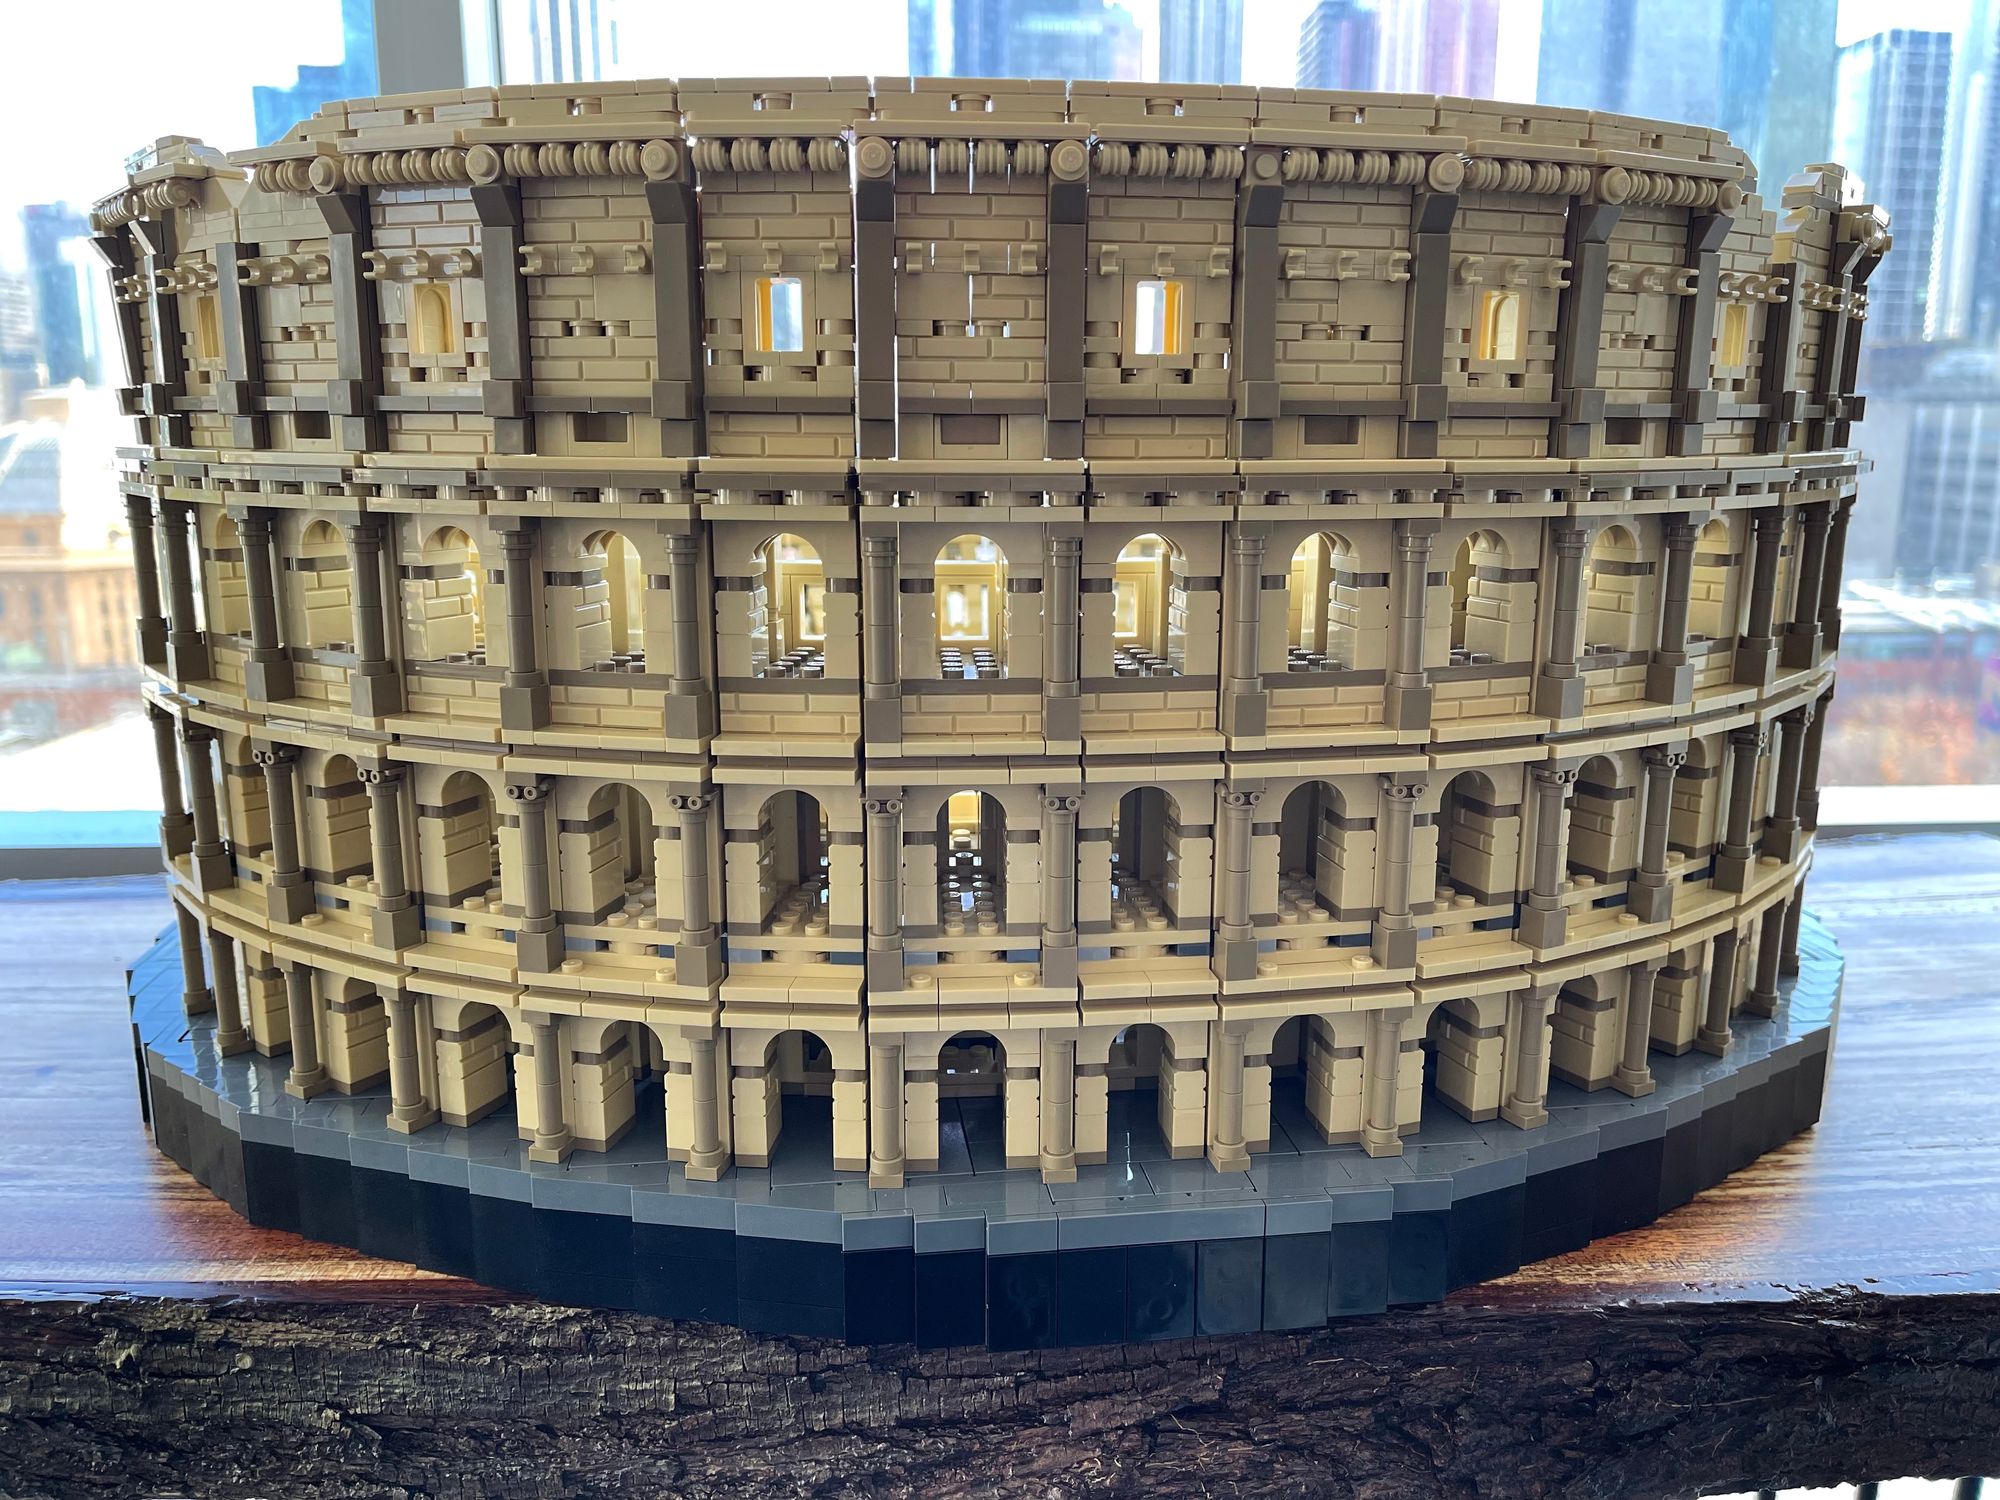
FINAL PRODUCT
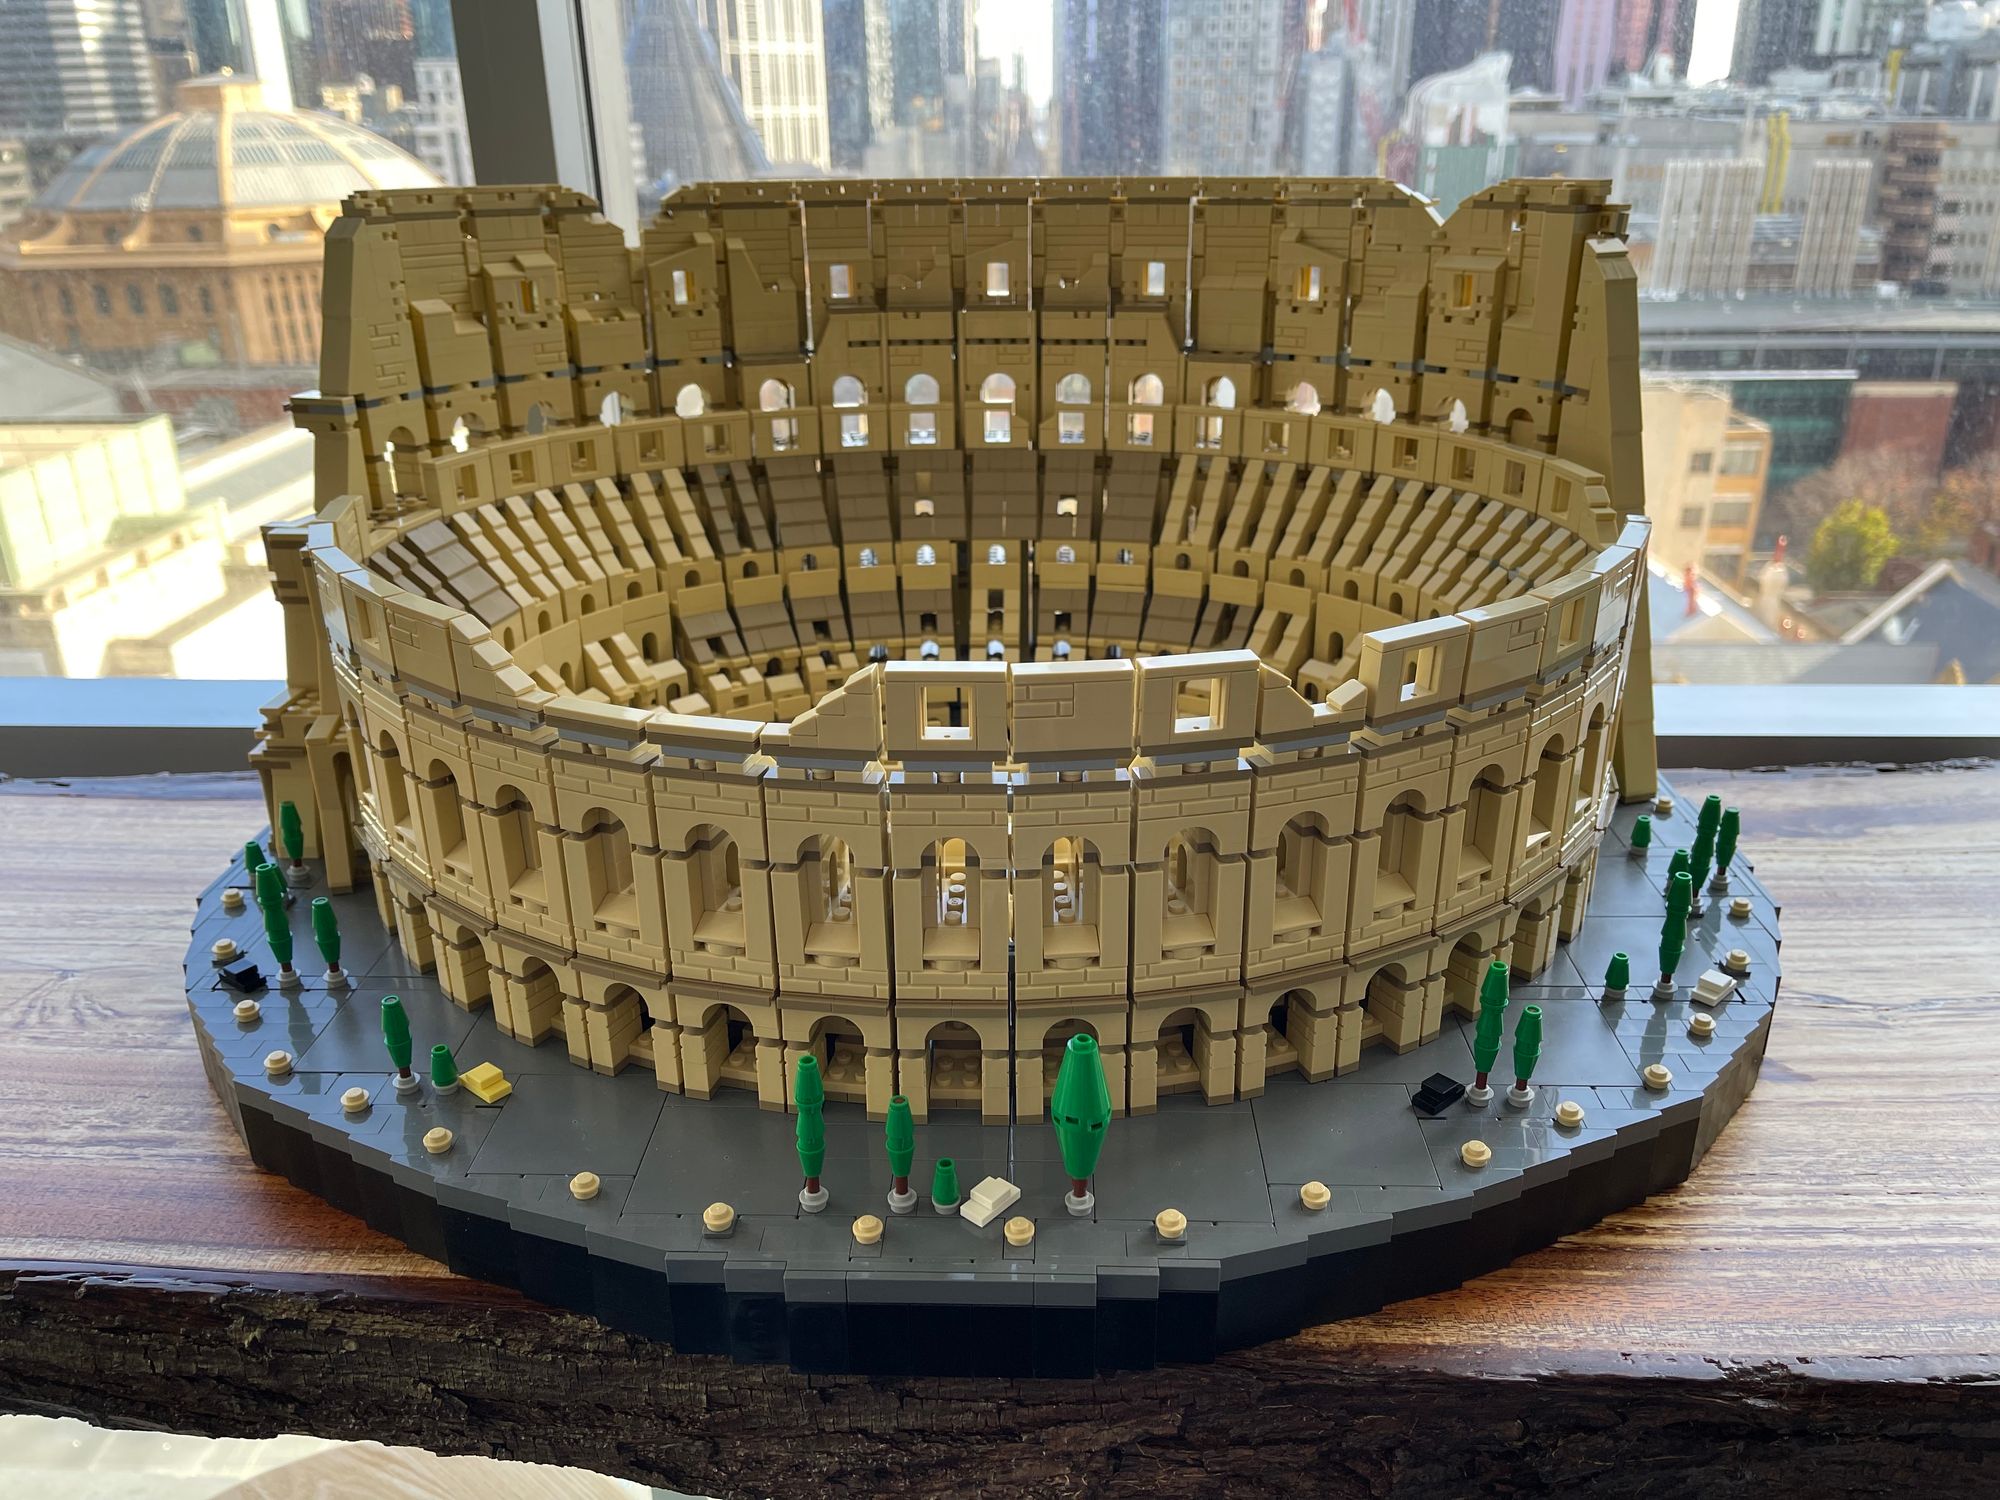
This thing is massive and heavy and carrying it is terrifying, but it makes such a cool display piece. There is so much detail, and clearly so much care put into the design.
Building it was less repetitive than I expected by the end. Not to say that it’s not repetitive – there are clearly large parts where it was – but I was expecting something like the fiddly and repetitive London Tower Bridge.
Most of the build is pretty similar, but that's a feature, not a bug. It's nicely mindless to build, but there’s also enough variation to keep things interesting.
Its $750 price tag is steep, but given that my metric for value in Lego sets is 10c a piece, and it’s 9,036 pieces, it’s not too bad. It’ll likely to be on sale for 20% off at stores like Myer and David Jones fairly soon, too.
Plus, this thing took me around two months to build in the evenings after work, so it’s certainly a good value experience!
I’ve also built the Taj Mahal (a previous 'largest set ever'), which was $499 for 5,923 pieces, and while I think the Taj Mahal is easier to display, I found the build experience of the Colosseum more satisfying (and it took a bloody lot longer).
If you like Lego, and have a large enough empty surface in your house to house a 27cm x 52cm x 59cm model of a famous architectural building, I would highly recommend this one.